Sound Dept and Equipment Rental

This is a bit of an observation on how sound kit rental seems to be viewed from both outside and inside the department. Hopefully this will be useful for both sound recordists and production staff in budgeting and booking sound crew and kit.

Sound Recordist “with kit”

This is a phrase I see very frequently in requests for jobs and it seems to mean that productions want one of two things:

  • An ‘all in’ quote, covering all eventualities
  • Free kit hire

It’s not as simple as that, though. Different jobs have different requirements. Sometimes it’s looking at hundreds of thousands of pounds worth of kit and multiple recordists and assistants, sometimes it’s a mic on a stand. Talk to us! We can give you a quote (or at least a ballpark figure)- the earlier you do this, the more chance you have of getting the budget and expectations to fit. I can do an ‘all in’ price, but it won’t be cheap…

Why can’t you give us free kit?

It needs to be paid for, otherwise we’ll just be losing money. We’re putting really expensive things on actors or members of the public who could drop them or run off with them. Things break, we have to get them fixed or replaced. I don’t go out with the same kit every time and some things which get used more frequently end up paying for other things which I want to have handy, or things that make my life easier. Also, I’d like to be able to give newcomers the chance to rent proper kit and not be essentially ‘paying to play’ on personal projects.

But the DP has got a deal with the rental house…

That’s great! But it’s not something we can do. Because we generally own our own kit, we’ll only occasionally use rental houses for more specific things. We’re not likely to be able to influence a production company to hire a lorry full of lights for our next commercial.

How much?

For context I’m going to put some rough new purchase prices down for professional kit:

  • Boom Microphone kit, £1500-£2500 (£800-£1500 for the mic, £400-600 for full wind protection and £300-£500 for the pole)
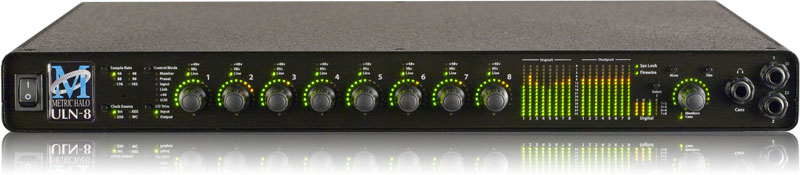
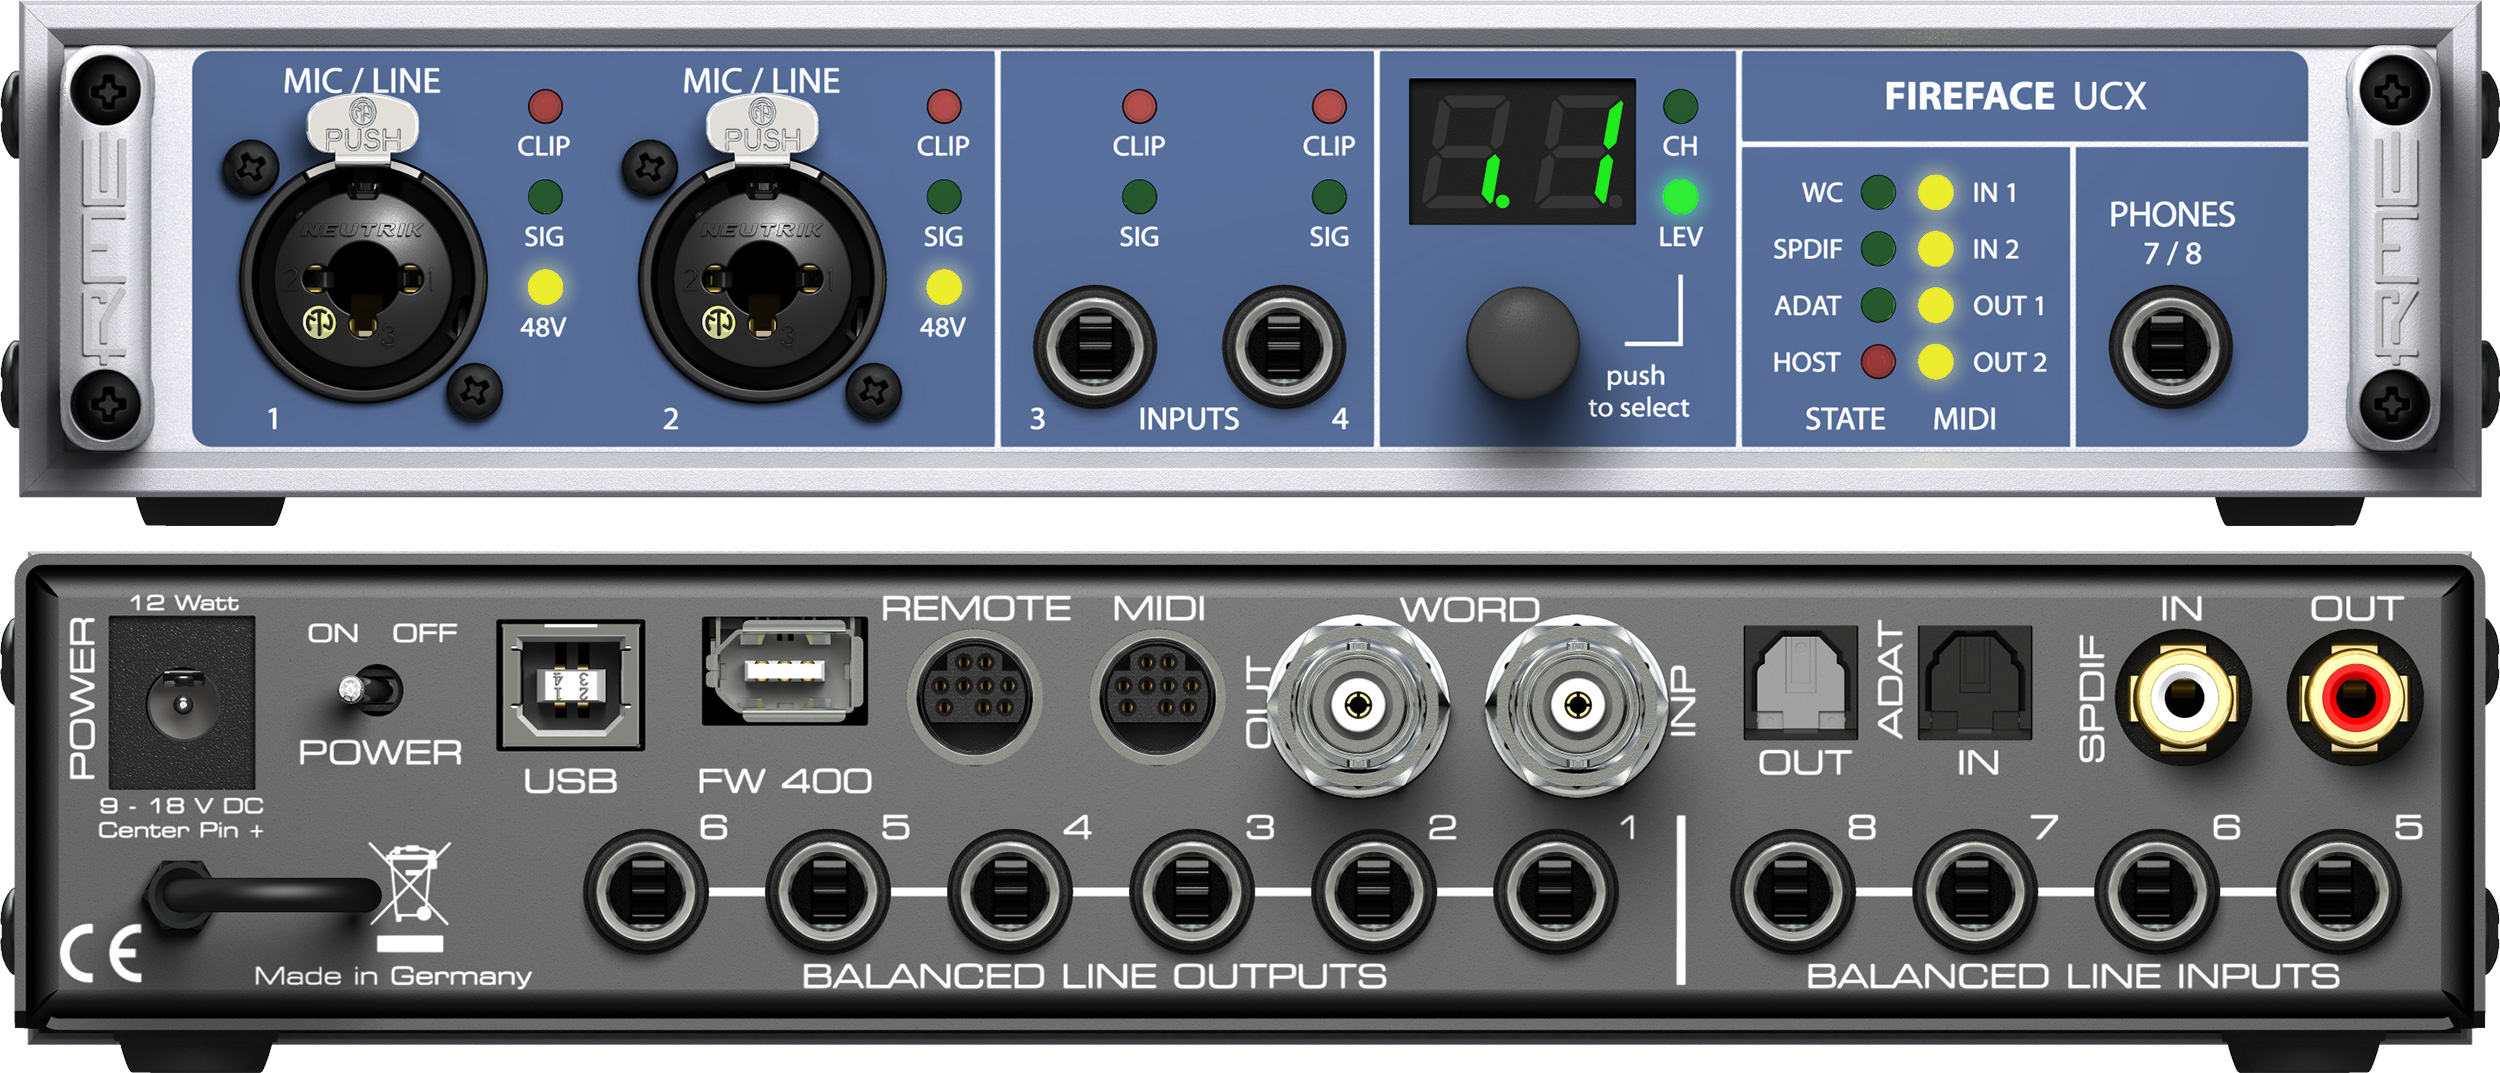
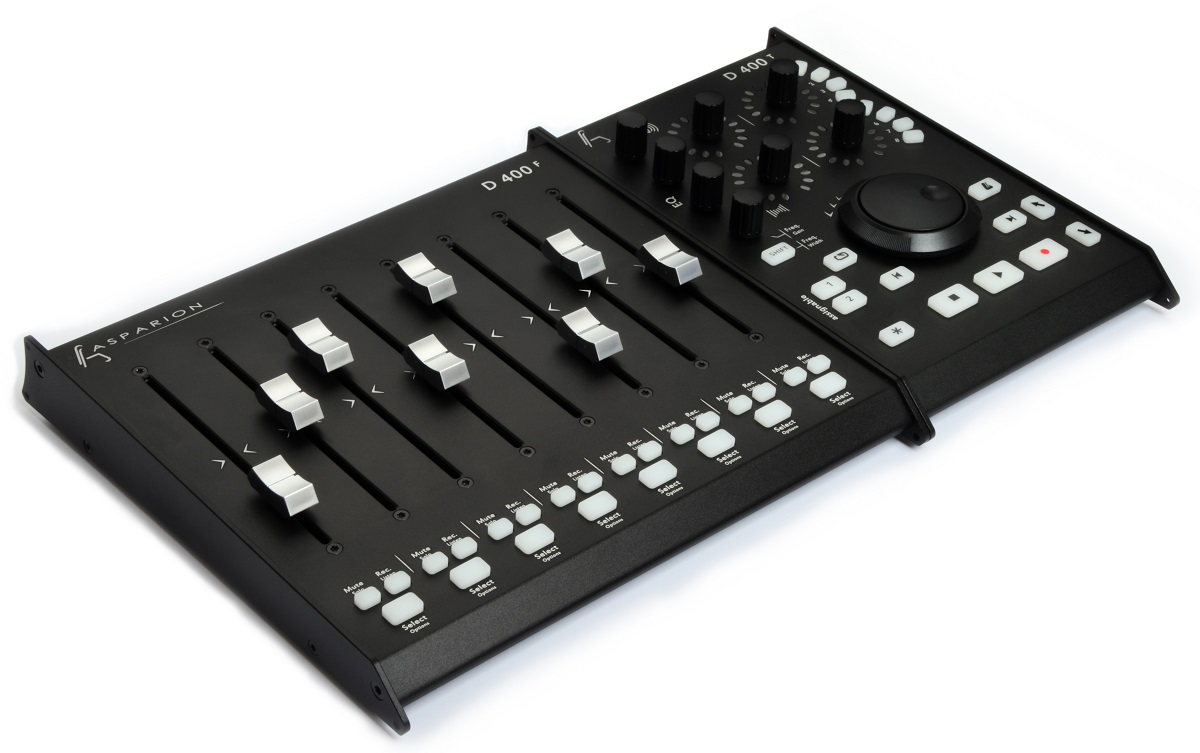
  • ‘Bag’ Mixer/Recorder £3500-£6000. £10000+ for ‘cart’ machines
  • Radio mics are where things get expensive. It’s around £3000 for a transmitter and receiver pair. Personal mics for them would be about £3-400 each.
  • A “camera hop” = 2 channels of radio mics, as above and the camera mount will be about £400 too

So, for a boom, mixer/recorder, 2x radio mics and a camera link (so, 4 radio mics in effect), you’re looking at £17,500 worth of kit, not even including the batteries, cables, bags and cases to get it all working and to the job which could all put it over £20,000.

8 channels of radio mics, that’s over £25,000 on its own. And having more starts to bring about the need for RF distribution, remote antenna systems and even more boxes which can be thousands on their own

Can’t you use cheaper equipment?

It’s usually the case that we’ll choose the best tools for the job. Rental rates seem to be based more around what something does than the purchase price and the difference between prosumer and professional kit isn’t that much. Part of this is that the prosumer kit isn’t going to be designed for such intensive use, so will require more frequent repair and replacement (in fact, some manufacturers won’t repair it at all), so may have a higher running cost than the professional stuff.

Some recordists may have some prosumer items in their kit, but again- it’s stuff that won’t last as long and they may have made that call and deemed it the right tool for a particular job.

Can you use our equipment?

Usually no, although there can be some exceptions. Prep time would be required to test and put it together. I also have a co-ordinated set of radio mics. Extra ones from another manufacturer may not be compatible with the same plan, adding more isn’t straightforward- it makes things quite a bit more complex.

Why are UK rental rates as they are?

For a long time, throughout the 80s and 90s we were more limited with the equipment available to us and its capabilities. The kit was by no means cheap, but there was a more limited supply and it had more limited capabilities. An SQN field mixer, a boom and couple of channels of radio mics was all that was required for nearly all jobs (with the addition of a Nagra tape recorder for drama). That kit could last most of a sound recordist’s career- so they could save up, buy it and then rent it out as a ‘kit’ to production on every job. Rental value got to around the 1% of original value mark and stuck around that point.

Now we’ve had an acceleration in technology, it’s giving us the ability to point a lot more cameras at a lot of different things at once. This has meant we’ve become a lot more dependent on (and able to record) multiple radio mics. Now we’ve got small, ruggedised computers effectively. Sound Devices has released 5 different professional multitrack ‘bag’ machines in the last 10 years.

We’ve had 2 major re-allocations of radio frequencies, mandating new radio mic kit and there’s a big investment in digital RF kit to fit all the channels in. Although our microphone technology is staying mostly the same, there may be some increases in rental price coming up to compensate for the rate of turnover of equipment

Budgeting (and where you can save money)

Ok, so how much should you be looking at? I’m not going to put any prices down here (you can probably figure them out from recent quotes), but general guidelines for would be:
1x radio mic system per person simultaneously on camera at a time
1x boom + mixer/recorder per recordist
2x radio mic per 2 channel camera send
0.5x radio mic per set of wireless headphones
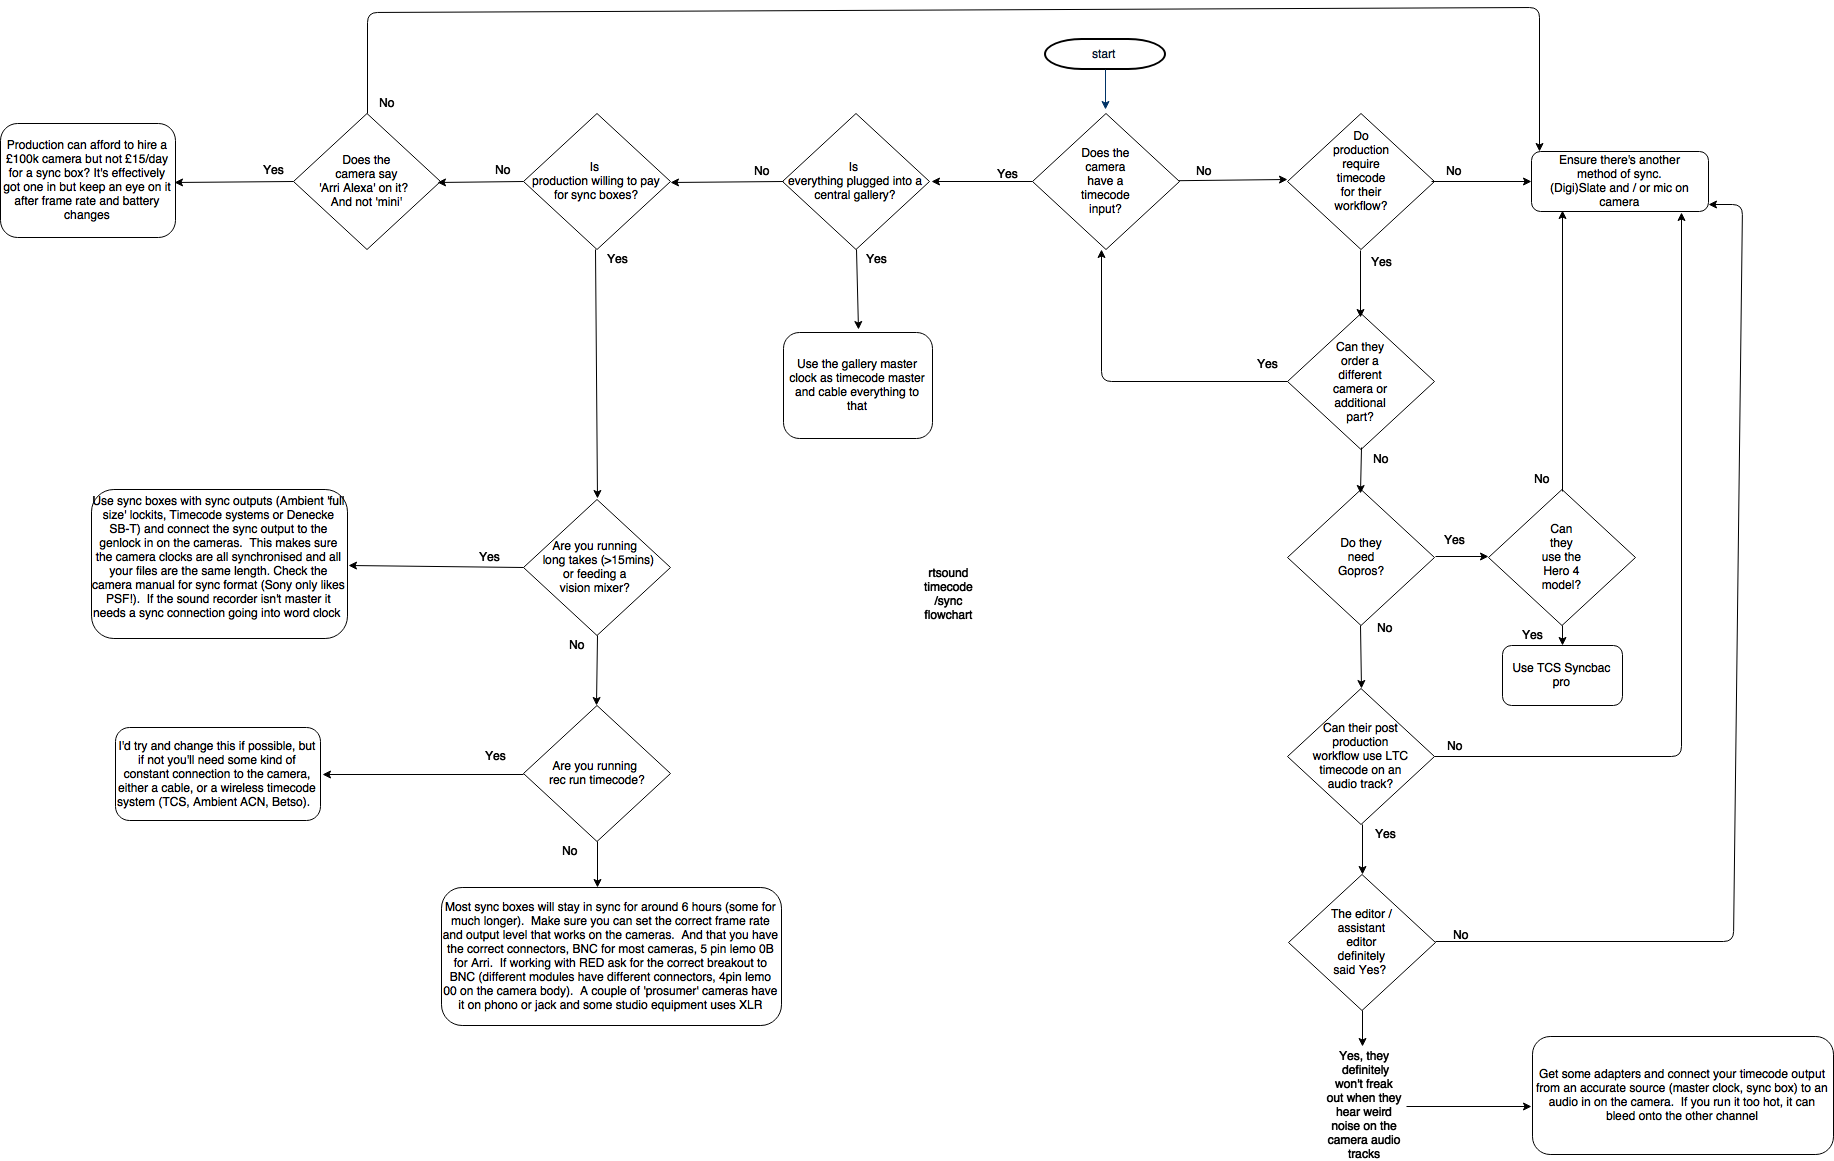
1x sync box per camera

Anything that can be hardwired is much cheaper, however moving it is more difficult.

Equipment for drama and commercials tends to charged for more as a ‘kit’. Higher end feature and commercials kits are often specced to cover ‘almost any sound recording situation’ in order to give production and director maximum flexibility. However, it won’t necessarily cover any courtesy feeds for clients or additional sync and playback equipment.

No Gain, No Pain: Sonosax R4+ and AD8+ Gain Structure

Traditionally, when setting up input gain the engineer sets it so that a ‘healthy’ voltage is coming into the system. A certain level of headroom is maintained in order to allow for unexpected peaks.  24bit analogue to digital converters have allowed us more flexibility in leaving headroom before system noise could become a problem.

Here’s a more traditional input diagram from the previous generation SX-R4 recorder:

I’ve been using the latest generation of Sonosax preamplifiers for a while now. I’ve known that they can handle a huge dynamic range since using them but I’ve only just found this in the AD8+ manual:

The thing which is initially quite alarming is that the only gain before the analogue to digital converters (ADC) is a switchable +20dB.  Most professional equipment will have low cut filters, gain and analogue limiters before the ADC stage. If something overloads the ADC, it becomes digital garbage.

In this case, the paired ADCs can take a considerable amount of level- +21dBu (which is 24.6V) and +1dBu (2.46V) with the +20dB option enabled.  To put this into context, most amplifiers are designed to take +18dBu max at input.   So the only “real” gain setting is the +20dB option.  In the unlikely event that an even higher voltage is coming in, there are analogue pots on the line inputs of the SX-R4+ (the small 5 and 6 knobs on the front).

This means more information is coming into the ‘digital world’ earlier in the chain and there’s no limiter- everything is captured as it comes in. The gain on any of the knobs, rather than controlling an amplifier is effectively a multiply function.  Sometimes you’ll need to add gain just to hear a signal, however it now doesn’t really matter where it is added as long as the signal isn’t turned back into an analogue one,  it will have the same result in post production as it will from the machine directly.  Even if it’s sent over AES3, it’s the same 1s and 0s. Whether your post production facility want to work this way is another matter.

So, it should be possible to use an AD8+ as an analogue front end and get the same results without putting any gain on the inputs and adding ‘digital gain’ in another mixer or computer

Audio Interfaces as Location Mixers 2: Motu AVB Midi to OSC

Earlier this year I made a post about the theoretical use of audio interfaces as digital mixers.  Since then I’ve got some toys and the experiments have begun:

Motu 8D

I ended up getting a good deal on 2 of these interfaces.  They each have 8 channels of AES3 audio in and out with sample rate conversion, although some of the connections are 75ohm RCA for consumer SP/DIF.   They are also happy with a variable voltage range and are happy with reversed polarity on the DC input (even though the plug says 15V centre positive).  The AVB connection allows them to link together and address multiple channels from one interface, essentially making a modular interface with all sorts of connections.  Together they have 16 inputs and outputs.

Control Surface

I started off here running a Keith McMillen K-Mix, however it just runs standard midi control change and note outputs.  These are easy to deal with and re-route, however I came across some issues with resolution which were solved by using a control surface that runs the Mackie Control Universal protocol (MCU).  The cheapest one I could find was an iCon Platform M.

Lost in Translation

The problem with the MOTU interfaces in this instance was that they used a nice control protocol for computers to talk to each other, but not control surface hardware- they’re designed the interface with the view that it’s used on an ipad or similar.  They use Open Sound Control to communicate (documentation here), so there needs to be a way of converting midi commands to this.  It’s also one way- the interface doesn’t send any data back.  So, I needed a way of translating midi commands to OSC.

Pure Data

After looking at a few solutions, and realising I can’t program properly- it dawned on me that I could use Pure Data.  It’s an open source graphical programming language (similar to the proprietary Max/MSP) and I’d used it before on various music performance projects.  It would also run on a raspberry pi– so could have a low power dedicated computer to do the translation work.  I found it was actually pretty straightforward to get the midi in and the OSC out, however came across a few snags…

Linear faders

This is one of those terms where everything gets confusing.  Yes, linear faders can mean they’re in a straight line- rather than rotary faders, which you turn.  The potentiometers, however need to be logarithmic- every 3dB of attenuation is a halving of voltage.  In most midi applications this would normally be done at the software end, but here it’s just a number being fed in.  In order to do this a bit of mathematical transformation of the data was required and the higher resolution of the faders really helped in MCU (they’re used as pitch bend controls on each channel).

Mechanisation

In order to run 16 channels from an 8 channel controller I decided (possibly foolishly) to create a second layer on the PD patch and send back data to the control surface.  It works, however the mute and solo buttons unexpectedly turned out to be a headache!

IMG_2648

Wot, no Dante?

I had a look and I couldn’t find and DC powered interfaces with a Dante connection and a mix engine.  Best option I can think of is to use a MADI interface (such as a MOTU M64 or RME Madiface Pro) and a Directout Exbox.md or Ferrofish Verto series converter

Talkback

I haven’t put a dedicated talkback control in yet, but should be a case of pressing a button to open a fader.  There is a dedicated talkback button on the newer Motu 828es, however- although it only has mains power

I Want This

If you want to have a go with it, please feel free to get in touch.  I can’t offer any kind of warranty or technical support at the moment- it’s just a thing I made.  It should hopefully work with any of the Motu AVB interfaces and midi controllers with MCU emulation.  It requires pd-extended 0.43-4 to run

Radial Catapult CAT5 Extender

I don’t normally do reviews per-se, but I thought this was a particularly useful bit of equipment and it may not be obvious at first glance why the Radial Catapult is so useful. So much so, I didn’t realise its usefulness until buying the wrong boxes…

Radial Catapult TX4

Standard Analogue over CAT5

I initially bought just the standard TX and RX boxes which don’t have any transformers.  After doing some work making my own analogue to CAT5 adapters before,  I found they weren’t rugged enough.  Also I’d found that the Neutrik CAT6 connectors weren’t compatible with their standard ethercon connectors.  These were obviously well made in pretty chunky steel cases.  As CAT5 is 100ohm, it’s also ‘close enough for jazz’ to 110ohm and is able to run long distance AES3 digital signals. 48V phantom power can be provided as long as shielded CAT5 cable is used.

Splitters!

They also have the advantage of working like a  4 way ‘Y cable’ providing a passive split of the signal.  As most of my kit is battery powered a lot of the time, I didn’t see a need to get the transformer versions.  Everything in them is wired in parallel, so the same signals are split across both XLR connectors opposite from one another and the same signal comes out of both CAT5 sockets.  There’s also all passive boxes, so no power supplies are needed, however any splits will incur a 3dB loss in signal.

The ‘TX’ boxes have 4x female XLR connectors and 4x male XLR connectors, while the ‘RX’ have 2 sets of 4 male XLR.  In the case of the ‘TX’ boxes you can use them as sex changers and don’t necessarily run signals the way they’re intended.

Transformers: More than meets the eye

There are multiple different versions of the Catapult, with transformers optimised for mic (ending with an ‘M’) and line level (ending with an ‘L’) signals.  They way they’re arranged is to isolate the 2 sides of the catapult box, but could also be used to interface unbalanced signals from things like laptops.

Something I can think of a very good use for them is for running out comms feeds to set.  Typically we use small battery powered ‘beltpack’ TX for this, which only have an unbalanced input.  Here you could put in a long run along one CAT5 cable without worrying about interference on the audio getting to the comms transmitter.

Another approach is to use a ‘plug on’ transmitter designed for balanced microphone inputs.  However, it uses the cable shield as an antenna, and a 50m antenna is less than optimal for UHF. The transformer will break this up and a patch cord will have a better antenna length.

In this case, the TX4L would be the best box for this, plugging any microphones into the ‘input’ end and transmitters on the ‘splits’ of the other 2 channels on the other side of the transformers.  These could run to either a TX or RX box (although sex changers would have to be used with the RX to run the transmitters the ‘wrong way’ up the CAT5 cable)

CAT5 is for networking

Who said network audio had to be digital?  With multiple boxes it is possible to route signals to multiple locations using splits and the fact that dual CAT5 connections are on each box allows this.  The transformers can also help isolate different systems running form different power sources and they have ground lift switches to avoid ground loops (however this will mean you lose phantom power).  Do bear in mind the 3dB signal loss for each split, though- if you wanted to do something particularly complex it’d be worth getting amplifiers in to compensate.

Analogue vs Digital wireless

Throughout most of my career I’ve used analogue wireless systems.  However, for a few individual jobs I’ve run digital wireless.  I’ve recently been running a digital system for a specific job over 3 weeks, with both positive and negative experiences.  I’m not going to get into the details of particular brands, but have had similar experiences running digital systems made by different manufacturers.

Range and Reception Quality

It’s quite difficult to actually compare the range of different radio mic systems in real life.  Different situations and environments can produce wildly different results.  In some situations I’d get fantastic range with the digital system including through buildings.  In others, sometimes where someone just turns away or bends down, obscuring line of sight from the transmitter when they are reasonably close, I’d lose RF and therefore audio completely.

With an analogue system, I wouldn’t expect this to happen- worst case scenario would be a rise in noise floor.  Which, in a documentary setting makes the difference of something being potentially still being useable or not getting it.

On the other hand, a colleague was using an RF antenna distribution system with a bandpass filter and seemed to experience these issues far less.  I’ve also heard other colleagues having much better experiences with digital systems using directional LPDA and YAGI antennas.

Backup Recording

Which leads us to this potential saviour, built into some digital systems.  In some cases it’s brilliant and can save scenes from dropouts or allow shooting in situations without crew nearby.  However it is not 100% reliable.  I had a couple of instances I caught where battery telemetry caused the transmitters to drop out of record.  Other colleagues have had corrupted cards.  Just the fact that you cannot monitor them when they’re away from you means you can never be totally certain they’re recording.

There’s also additional work in backing up the cards.  Backing up 4-5 8GB cards, the daily card from my recorder and running the conversion program took 45mins to an hour of precious downtime.

Intermodulation

There is a real advantage of digital systems in that they are not very susceptible to intermoduation from other RF sources.  This is where harmonics from other RF sources can be received on a mathematically related frequency.  Effectively you are receiving multiple RF sources at once.  The fact that digital systems either receive their signal or not really works to their advantage here.  They’ll just get the strongest source or not get it at all.

This results in the ability to pack RF channels much closer together without having frequency coordination issues.  This allows much more flexibility in setting up larger systems, without incurring higher licensing costs or being able to work in already congested areas.

Audio Quality

All the digital systems I’ve used sound very good, with transmission quality surpassing that of top end analogue systems.  I do believe there is a difference in the microphone amplifiers in various different transmitters and output stages of receivers, though- which can make some analogue systems competitive on this front.

The issue, however is in the fact that ‘it works or it doesn’t’.  Digital systems are full quality or nothing, whereas if in suboptimal conditions analogue systems will lose transmission quality. While not ideal, it’s better than a complete dropout and can be a sign that you need to move your antennas closer.

Interoperability and Security

Analogue systems don’t use proprietary modulation schemes and different codecs to send audio.  This allows them to be picked up using other analogue equipment as long as the frequencies match.  Some companies even make receivers which can emulate expander settings to work with different manufacturers’ analogue transmitters.  This can allow much more flexible multi-recordist setups and the ability to often ‘tune in’ to individual microphones at live events where a separate PA is being run.

In the case of digital systems, compatible transmitters and receivers made by the same manufacturer are necessary for the system to work.

The flipside to this is that others can eavesdrop on interviews with important people or talking about sensitive subjects.  Most digital systems have options to encrypt signals.  Even those with equipment from the same manufacturer would not be able to listen in without the matching encryption key.

Power

Digital wireless seems to be much more power hungry.  Both transmitters and receivers need much more power, even compared to analogue systems running DSP.  Some transmitters require rechargeable li-ion packs in order to last a reasonable length of time.  Digital transmitters requiring dual AA batteries lasted about the same as a single AA analogue transmitter.

My analogue receivers pull around 1.5W each, while the digital ones I was using pulled a figure closer to 4W.  This really mounts up and required larger batteries- and meant a heavier bag.

Conclusion

There are currently some areas where digital wireless is superior and can do things that analogue wireless cannot.  However, I still think that analogue definitely still has strong advantages in what I use on a day to day basis.  The fact that you get gradation in quality rather than an “on/off” effect, the flexibility of being able to use them with other systems and much lower power consumption still make them very competitive.

I can, however see certain jobs where digital wireless is more useful.  Those where high channel counts need to fit in a limited bandwidth or if recording transmitters are a requirement.  Analogue cannot compete here, but neither of those circumstances are something I come across on a day to day basis.

The disadvantages of digital also start to become less relevant on a drama set.  In some cases, they may start to outweigh the advantages of analogue.  Size, power consumption and larger antennas are less of an issue.  Frequency co-ordination in studio complexes where multiple productions are happening would also be much more straightforward.

I also had no issues at all with the digital camera link system- works on a single frequency, AES digital in and out so the only quality loss is through the codec (negligible) and would even send timecode without additional boxes.  The disadvantage is that it doesn’t also work as two personal transmitters

Wisycom IR interface installation on windows 10

I’ve had a few people ask me about installing wisycom infra red interfaces, such as the UPKmini in order to do firmware updates.

Most are mac users- easiest way is to set up bootcamp and download an image of windows 10 from microsoft.  It’s up to you to get it licensed, but it’ll only shout at you a bit.  Loads of things on the internet will tell you how to do  this.

Next you need to install Wisycom Manager from the (fantastically named) wisycom.com (look under support/downloads/wireless microphones).

Run that- and there’s a picture of the UPK interfaces

If you press ‘help’ there are installation insrtuctions for earlier versions of windows.  Run the 32 or 64 bit driver depending on your OS, may as well install all the parts.

Now it gets a bit tricky: you need to ‘Disable Driver Signature Enforcement’.
Open the start menu and search for ‘Change Advanced Startup Options’

Hit the ‘Restart now’ button and put the kettle on.  It takes A Long Time

When it’s restarted, go to Troubleshoot/Advanced Options/Startup Settings.
and Restart again (this time it’s faster).

Now (and only now) you can ‘Disable Driver Signature Enforcement’.  It’s option 7.  Press it and windows will boot up again.

Now you’re back into windows, you can plug in your UPK thingy.  It’ll install it for a while, but you need to point the right drivers at it.

This can be a bit confusing compared to the windows 8 instructions- look for Device Manager and open it.

Now look under Ports (COM & LPT)

It’ll be the USB Serial Device (may be on a different COM port)
Now, right click and ‘Update Driver Software…’
Then ‘Browse my computer for driver software’

It’ll be wherever you installed it, but is likely to be in Program Files\Wisycom\Wisycom USB Drivers.  Include the subfolders.


And…. finally it should install the driver:

Fire up the update utility in Wisycom manager, and remember to hit the ‘Connect’ button to talk to the UPK.  Lights should come on!


Macbook Pro USB-C powering from battery

After getting one of the new macbooks, which only had USB-C ports, I initially thought there was a real advantage running the power through this.  The cable’s replaceable and can plug into any USB-C source, potentially making the computer a lot more mobile.

I’m often in situations where I’m away from power sources all day, so being able to use the computer here is very useful.  When working off a cart I use a 12V LiFePO4 battery, so it would be really useful to be able to charge the laptop battery from this.

USB-C Power Delivery

The USB-C power delivery format is actually rather clever.  If the device on the other end is happy, it can up the voltage from 5V in steps up to 20V.  This allows more power to flow along the (usually pretty thin) cable without it getting hot and even melting, as it would by just increasing the current.

However, it seems to be that a number of manufacturers are getting this a bit wrong, and potentially putting out unsafe devices which could blow up your computer or other things attached.   One of the engineers from google has been testing USB-C cables and peripherals to see if they’re up to spec, and a lot of them aren’t.

USB-C Car adapters

It’s pretty easy to do standard USB power from a 12V battery- car USB adaptors are a cheap and easy answer, you just need to attach an XLR4 connector (or whatever you’re using for power distribution), so thought it’d be the case for USB-C.

After doing a bit of research, I only really came up with one adapter which seemed to be able to deliver a reasonable amount of power (45W).  However, that’s still not as much as the laptop can use going full tilt.  This is the Targus APD39EU.  DC input spec is 11-16V so some NP1 type setups may deliver a bit more than 16V.  I expect it’s fine but they may not pay for a replacement if you blow it up.  It’s also quite a lot more expensive than most of the other USB adapters at around £60 (although I managed to snag a reduced one with damaged packaging).

Due to the fact it’s quite an expensive adapter, and a fair bit longer than some other USB adapters, instead of directly attaching an XLR4 I made up a lead from XLR4 to automotive 12V socket.

12 Adapter and cable12V automotive socket on cable

So far the laptop charges off it and nothing has exploded yet…

Timecode and Sync Workflow Flowchart


Here’s a flowchart of what I do when asked about timecode workflows and keeping things in sync.  It should be useful to other departments too, when specifying kit.

Note that it is not always possible to run a timecode based workflow.  This is especially the case with consumer equipment.  In this case, the best solution is to use a synched digislate.  Here there is a visual record of the timecode in the image which can be entered manually in the edit.

Other solutions are a good old clap in front of the camera(s).  Editing software also has built in algorithms for matching audio waveforms.  They’re not always reliable and won’t work if the audio on camera has no relation to the master audio recorded

Click on the image below and hopefully you’ll be able to read it (it may require some zooming/scrolling on lower resolution screens or mobile devices):


Audio interfaces as location mixers

This is a bit of a ‘thought experiment’ as I haven’t actually got any of the kit to try out and found whether it actually works in a production environment or not.  I’m also not sure if this is currently a workable solution for me and will state the drawbacks, but this could all be useful to some people- at least as a bit of an experiment

Currently there aren’t really any digital mixers suitable for location work and I’ve been looking at potential solutions to this.   I’m aware that the Yamaha 01V96 is used quite a bit (in the US especially), but it’s big, power hungry and AC powered only.

A possible solution now is that a number of computer audio interfaces will work as standalone mixers (with a suitable control surface).  They have a considerable amount of DSP power available with the ability to run EQ and multiple submixes.  Another advantage is that audio can be sent to a computer, for playback of previously recorded tracks or even processing (auditioning noise reduction, for example).

Having done some research, here are some possible combinations of equipment:

Metric Halo ULN-8 / LIO-8

Metric Halo ULN-8

Effectively these are the same box, except the LIO-8 is a cut down version of the ULN-8, with no microphone preamplifiers or additional DSP plugin licenses.  They’ve been around for a while and use top quality components.  Metric Halo do continually support their products and are the only company I’m aware of who offer hardware upgrades to their audio interfaces.  At the moment there’s been mounting rumours of an upgrade to the DSP and interface with a 3D card (which would not involve buying a whole new unit), which would add a class compliant USB-C computer interface, improved DSP power and an additional card slot.

This is the only computer audio interface I’m aware of with a locking DC connector (4 pin XLR)!  There’s also a second barrel plug, which could be used for redundant power.  It has another unique property in that it’s the only DC powered interface with sample rate converters on the AES3 inputs.  This means I could run my radio mic receivers directly into it using their digital outs.  It’s got 8 analogue audio I/O and 8 digital AES3 I/O

Now for the drawbacks: it’s a big box- a deep 19″ rack unit 432 x 330 x 44 mm but it weights 2.6kg which isn’t too bad.  It currently only has a firewire interface and OSX drivers so requires a good bit of fiddling to get current computers to work with it.  They really need to update this and talk of the 3D card being ‘coming soon’ has been going on for about 2 years now.

Also, with the current architecture, the midi input will accept controllers using the mackie control protocol but needs to have a computer running in order to be able to control the mixer

MOTU AVB Series

MOTU 8A

These are effectively a load of different interfaces with different I/O which can be combined using the AVB protocol.  For a while there was just the Ultralite AVB which could be DC powered, but at the end of last year a couple more, the 624 and 8A were released. Furthermore a whole bunch of digital boxes were announced last month with AES3, ADAT and MADI interfaces.  All of these are in a compact ‘half rack’ format

I’m particularly interested in the 8D, however only half the inputs are AES3, the other 2 are SP/DIF and may require adaptors and/or sample rate conversion

The DC inputs aren’t locking, but will take 12-18V, only draw 10W on the current half rack interfaces and they don’t care about polarity either

The main drawback is controller integration- they won’t accept midi control, only OSC over a network.  Their suggested method is using a tablet computer using a web interface. It should be possible to hook up a tablet to a midi controller and use an application such as TouchOSC or Lemur to control the interface as a mixer.  Another future possibility is programming a BomeBox, although that doesn’t have OSC compatibility yet

RME UCX / Babyface Pro


RME Fireface UCX

These RME interfaces will all work with their totalmix FX mixer out of the box, and accept Mackie control midi commands.  A few features such as some of the talkback functionality won’t work without a computer, however.

The drawback, however is with some of the digital interfaces used.  They all us ADAT optical format, which isn’t common in broadcast equipment, so a converter box is required.  RME do one, the ADI-4DD, however it doesn’t have any sample rate converters, so 2 AJA ADA4 boxes would be required to provide use with mutiple digital sources which cannot be connected to word clock.  Again, power is with a barrel plug (and it’s not too fussy about voltage or polarity), although the babyface can also be powered over the USB bus, so could be a redundant power connection.

Waves / Digigrid LV1


Waves LV1

This is a system designed to work as a powerful digital mixer with a dedicated computer running all the mix software and also plugins at low latency.  It’s not cheap, but is built for purpose.  Working it on DC power may be a challenge (and I expect it may be greedy), however and would require a bit of hardware hacking- looking at the motherboards on some of the host computers (the smallest Impact model, for example will run from 12V but would involve fitting a 12V PSU and invalidating the warranty).  Interface wise, only the MADI ones will run from 12V, so a MADI converter with the I/O you require would be required.  DirectOut make the Exbox.AES which converts 16 channels of AES3 to and from MADI but without sample rate converters (but is has redundant locking DC inputs!)

Keith McMillan K-Mix

Keith McMillen K-Mix

This is actually a real hardware digital mixer- 8 analogue in and 10 out (including the headphone out, which can be freely assigned).  I’ve bought one of these and it’s a really compact and useful machine.  However, it doesn’t quite cut it for me I/O wise- I could do with some digital ins and outs.  It’s powered over USB, but can accept 2 USB connections, so redundant power can be supplied.  The touch control surface is surprisingly useable, there are ‘tracks’ along the faders and indents at 0dB.  The only disadvantage with the touch control is you can have ‘jumps’ if you take your finger off and it’s not in exactly the same place as where the fader is.  The K-Mix works with the Keith McMillan MIDI expander so can use 5 pin DIN cables

Icon Platform M

Icon Platform M

This is just a control surface- but a small DC powered one.  I owned its predecessor, the iControls Pro which wasn’t bad, although from picture it looks like they may have improved the build quality since.  The motorised faders are 100mm but did require a press downwards before moving them, so weren’t super smooth.  In fact I quite like the idea of having smoother, non-motorised faders on a control surface).  Icon have also recently showed off an expander, the Platform Z which adds blocks of 8 faders to the ‘M’.  This is designed to work with a computer so only sends class compliant MIDI over USB.  Various boxes are available which will work as MIDI hosts, however

Asparion D400

Asparion D400F and D400T

This is another control surface, again with motorised faders, a modular system except the build here looks more rugged than the Icon at first glance and has more buttons (but less knobs).  Also USB out only so may need a host device if not being used with a computer

Professional Field Recorder comparison

There’s been radio mic comparison table up on this site for years now, and I had the bright idea of doing one for recorders, partly as a lot of people don’t really know what’s out there (and some assume it’s just Sound Devices).  I’ve only included those with features suitable for professional use in the field – timecode, metadata input, DC power, reasonably sturdy build and those that are current products. I have missed off the Sound Devices 702T and 744T as they have relatively low track counts compared to most of the other machines.

Also, there isn’t any info on ergonomics or sound quality as they’re both subjective.  The only machine it’s not possible to mix on (but you can route) is the Sound Devices 970- which is really designed to have a mixer in front of it, in some ways that is a bit of a different beast and is the only one which can accept a MADI feed.  Please let me know if I’ve made any mistakes or omissions, this is mostly from published specs:

Edit:  Added Aaton Cantar Mini specs.  I’ve also missed off the Sound devices 664 as it’s similar in specification to the 688

2019 Update- added Sound Devices 666 (or ‘Scorpio’, as they insist on calling it) and Zaxcom Nova

  Mic/line inputs Line inputs AES3 inputs AES42 inputs (pairs) Max Inputs to tracks Rec Tracks available (192kHz) Rec Media
Aaton Cantar X3 8 4 8 2 24     24 (24) SSD, 2xSD, USB
Aaton Cantar Mini 4 2 4 2 10     16 (16) SSD, 2xSD, USB
AETA 4minx 4 6***** 2 2 8     8 (8 at 96kHz) SD
Nagra VI 4 2 4 0 8      8 (8) HDD, CF, USB
Roland R-88 8 0 2 0 10      10 (4) SD, USB
Sound Devices 633 3 3 2 1 6      10 (6) SD, CF
Sound Devices 688 6 6 4 2 12      16 (6) SD, CF
Sound Devices 788T 8 0 8 4 8      12 (4) SSD, CF, Firewire
Sound Devices 970 0 8 8 0 64      64 (32 at 96kHz) 2xSSD/CF, 2x eSATA
Sound Devices 666
(or Scorpio)
 16  4  32 36 (18)   SSD, 2xSD
Sonosax SX-R4+ 4 2       10* 4 16      16 (16) 2xSD
Tascam HS-P82 8 0 8 0 8      10 (4) 2xCF
Zaxcom Deva 24 12 4 24 8 24      24 (24 at 96kHz) SSD, 2xCF
Zaxcom Maxx 4 2      0/4***       0/1*** 8      8 (4) CF
Zaxcom Nomad 6 4       0/8***       0/1*** 10      10/12*** (10/12 at 96kHz) 2xCF, USB
Zaxcom Nova  4  2  4  10  12 2xCF 
Zoom F4 4/6**** 2 (unbalanced) 0 0 6      8 (8) 2xSD
Zoom F8 8 0 0 0 8      10 (8) 2xSD


  Balanced Outputs Unbalanced Outputs AES3 Outputs Output buses Multichannel Options Control surface Extras
Aaton Cantar X3 8 0 12 40      Dante 32×32 Cantarem 2
Cantaress
Monitor output, waveform display, play/rec, wifi, bluetooth
Aaton Cantar Mini 8 0 4 12       Cantarem 2 Monitor output, waveform display, play/rec, wifi, bluetooth
AETA 4minx 4 6***** 6 4   MIDI Soundfield monitoring
Nagra VI 2 0 2 4   MIDI  
Roland R-88 8 2 2        8 (direct)      USB interface 10×8 MIDI  
Sound Devices 633 4 2 4 6   CL-12 Wingman Remote
Sound Devices 688 8 2 8 8   CL-6, CL-12 Mix Assist, Dugan, Wingman remote, SL6
Sound Devices 788T 6 2 6 6   CL-8, CL-9 Mix Assist, CL-Wifi, GPIO
Sound Devices 970 8 0 8 64       Dante/MADI 64×64   RS422/GPIO/Network remote
Sound Devices 666
(or Scorpio) 
10  10  Dante 32×32  MIDI (MCU)  Android app 
Sonosax SX-R4+          0/2**                  2/6**     2/6**         4/8**      TBC network audio RC8+ wifi web interface
Tascam HS-P82 2                        0 8      10 (direct)   RC-F82  
Zaxcom Deva 24 10 0 12      10 (12 direct)   Mix-16, Oasis Nomad Touch, MixAhead
Zaxcom Maxx 4 2 0/4*** 4     Zaxcom digital tx option, Automix
Zaxcom Nomad 10 2 0/6*** 6   FC8, Oasis, Mix8 Zaxnet, Nomad Touch, Automix
Zaxcom Nova 8  0  6   Oasis  2x receiver slots for QRX212 
Zoom F4 2 2 0 4      USB interface 6×4 FRC-8  
Zoom F8 2 2 0 4      USB interface 8×4 FRC-8 Bluetooth remote app 


  Battery / power connection Dimensions (mm) Weight (kg) Notes      
Aaton Cantar X3 2x eSmart 2054, XLR4 90x320x240 3.55        
Aaton Cantar Mini 2x eSmart 2054, XLR4 90x259x234 2.3        
AETA 4minx Sony DV, HR10 75x260x195 1.9 ***** EXT I/O connector shared       
Nagra VI Nagra, XLR4 74x310x285 3.8 (weight with battery)      
Roland R-88 AA, XLR4 93x260x235 2.67        
Sound Devices 633 AA, DV, HR10 60x240x160 1.1        
Sound Devices 688 AA, HR10, NP1 (in SL6) 53x320x198 2.21        
Sound Devices 788T DV, HR10 45x257x153 1.7        
Sound Devices 970 2x XLR4 84x218x262 3.4        
Sound Devices 666
(or Scorpio) 
DV, 2x TA4 51x320x205 2.63      
Sonosax SX-R4+ eSmart 2054, HR10 50x200x144.5 0.91 *2 shared with aes out, **2nd figure with xlr5 output board      
Tascam HS-P82 NP1, AA, XLR4 100x270x260 3.65        
Zaxcom Deva 24 2x HR10 76.2x267x177.8 2.45       
Zaxcom Maxx AA, HR10 51x191x133 1.13 ***option variants      
Zaxcom Nomad AA, HR10 51x251x178 1.72 (weight with batteries)      
Zaxcom Nova 2x HR10 51x210x152 1.16 / 1.56***** ***** weight with 2x QRX212 modules     
Zoom F4 AA, HR10 54x178x141 1.03 ****line level only on jack, additional input option APH6XLR      
Zoom F8 AA, HR10 54x178x141 0.96