Anatomy of a Charger box

I’ve seen a few people lately make boxes for all their battery chargers so they can just plug one them in and then have all their chargers set up.  However, most of them relied on using a number of the different power supplies and sometimes running a power strip, which take up a load of weight and space.  I’ve decided to make one but cut it down to be lighter weight and to also have the option of plugging in to a battery or car DC connection in case of being away from mains.

So, first of all I needed to figure out what to was going in and what was required to power it.  I thought about 20 AA batteries is about the maximum I’d go through in a day (I try not to use any other kinds) .  I also use 2054 style SMbus batteries- both the chargers for these are small but require external power supplies, and they take a 24V input.  I also use USB to recharge my Timecode Systems boxes (and some USB batteries, and *everyone* wants a phone charger).

So (according to the manuals/existing power supplies)
2x AA chargers on 12V (1.5A each)
2x SMbus on 24V (2.5A each 5A total)
USB on 5V 2A

and I need something to power all that…

So, basic electricity time:
Power = Voltage x Current
Components will only work within a specific voltage range (otherwise they don’t work or break) and will draw up to a certain current.  So the voltage is the ‘level’ of electricity and the current is the amount it uses.

So 1A of current at 12V = 12W of power
12W divided by 24V = 0.5A of current
so, to provide the same amount of current at twice the voltage requires twice as much power.

So, the SMbus chargers need 100W, AA chargers need 36W and  USB needs 10W.  In all that would need a 150W PSU to run everything at once at max power.

I actually ended up getting 2 under-specced 90W PSU as they were smaller and lighter, had variable voltage, USB built in and a display.   However it may mean it’ll top out (7.5A) if everything’s on at once, which may mean some things won’t charge as quickly.  It’ll also turn off if it gets too hot.  The second can be used too if I need additinal power or even to power my cart

The 5V line is taken care of but what about either the 24V or 12V? Although it’s usually more straightforward to reduce voltage, I decided to run the PSU at 12V and get a 12V to 24V step up converter which will handle 120W.  This way, it gives the option of swapping the PSU out for a 12V battery.  I made all the linking cables up with 4pin XLR connectors, which is fairly standard for DC power distribution, and means the various components can still be used separately.

Here’s all the individual components connected together:
IMG_1144

Ends were cut off most of the cables to replace with 4 Pin XLR connectors and the 24V output was soldered directly on.  I also used right angled DC jacks to save space and avoid pressure on the cables when in the box.

For the box I used one of the newer Orca accessory bags made of moulded EVA plastic.  It’s considerably lighter than a Peli case, yet still seems rather durable:

IMG_1145

The AA chargers are velcroed to the pockets which contain the PSU, step up converter and USB hub.  It’s a bit top heavy, so I may remove the support straps in the case to let the lid fall back as it falls over if not leaning against something. There’s a channel under the material on the hinge which makes a neat place to run cables too.

The USB cables run to the section to the bottom right, so whatever’s being charged can go there, and the plug can fit there when being transported

Sonosax SX-R4+ v2 firmware

I’ve owned a Sonosax SX-R4+ for around 6 months now and I generally stand with what I said in my initial review:  the machine has been a pleasure to use, sounds fantastic and has a lot of recording power in a small box.  I’ve managed to get by with it on its own in a number of situations but with the v2 firmware it really opens up the machine and removes these limitations.

This is based on a v2.0 release candidate version of the firmware (which won’t be publicly released), there’s been a few bugs ironed out of this and v2.1 should be up on the website very soon.

Faders

This is the big one, so I’d better get this out of the way first.  In v1 of the firmware the 4 main knobs on the front are ‘hard set’ to gain control of whatever the 4 XLR inputs are.  Although it was possible to mute at zero and control gain ranges (so it was possible to mix on them), the ISO track levels would also change- so post would have to undo these gain changes.

Now this is no longer the case: the v2 firmware has  “fader modes”.  2 different fader curves are available -60dB to +12dB (with a steeper rolloff at the bottom) and -60dB to +24dB (linear).  Both mute at -60dB.

Faders are assignable to tracks on the mix configuration screen, and single faders can be assigned to multiple tracks for stereo or surround work or even as groups.  This also now allows me to run my radios (Wisycom MCR42) in AES3 as before the gain was fixedto being ganged across both AES3 channels on each XLR.  It’ll also allow me control levels using the AES3 inputs on the accessory port (when I’ve sorted out the cabling)

IMG_0597

If a fader is not assigned to a channel which is assigned to mix, then it comes through as if the fader is at 0dB.  It’s possible to mute by changing the mix assignment (which is possible while recording)

Gain structure

So, how do you set gain and fader level with only one knob?  As default the push buttons on each knob are the input settings and PFL for each XLR input (long press can also be assigned), so whatever’s going into each of these channels can be soloed and gain adjusted with the menu knob (gain is the initial setting on the input screen).  Here’s a video:

Also, due to the high dynamic range of the converters it’s possible to set gain very conservatively and set up the mix tracks to be up to +20dB higher than the ISOs.  With another 24dB available at the fader it’s possible to work with 44dB of headroom with unnoticeable loss on the ISO tracks if desired.  With the AES3 inputs you’re limited to what happens on the analogue end of whatever you have plugged in, but can have them come in a 0dB and again boost in the mix.  An issue however with setting ISOs this conservatively is it become difficult to PFL as there’s such a big difference.  Personally I might only use these more extreme settings for scenarios where there may be more extreme dynamic range.

Routing Setings

Routing works so that inputs (and mix tracks) are assignable to any 1 of 16 tracks.  These can then be assigned to 2 mix tracks, or any of the outputs on the machine.  Again, anything can be assigned to anything.  There’s also due to be a new output board released soon with an XLR5 connector, switchable between 2 channels of balanced analogue, 4ch of AES3 or unbalanced analogue out. This gives a total of up to 8 outputs over a combination of unbalanced and AES3.  Something I have noticed is that it’s not possible to send individual channels post-fade to outputs, though- which could be useful for mix-minus.

Although it’s now possible to separately assign the inputs, faders and outputs, it’s reasonably easy to keep a handle on what goes where.  The new colour coding to channels also helps.  The record tracks matrix shows input, track name, arm and colour.  Mix menu and output menus also show track assignments and have recallable presets

IMG_0598

User Interface

I found I could navigate this recorder very quickly using the v1 firmware, however more programmable buttons and features have come online in the v2 firmware.  All buttons (7) and 5 touchscreen areas can be programmed to perform different functions with both short and long presses.  Shortcuts for channel muting is also something which isn’t there and I can see that being useful  The Mix setup screen has also been brought up a level in the menu to the main screen.

Sound Reports

The R4+ now generates sound reports straight to the SD card.  Currently all the metadata is there, but the headers aren’t customisable. It’s generated automatically as an HTML file so readable in any web browser (javascript does need to be turned on to read it).  I also looked for a ‘generate sound report’ button and couldn’t find one.  However I just found the report to be generated on the SD card and is updated on the machine continuously.

Here’s an example report:
soundreport

Comparison

At first glance this machine looks like it’s something similar in size and capability of the Sound Devices 633 or Zaxcom Maxx, however there’s quite a lot more crammed into the box.  The interface feels more like a larger recorder such as the Zaxcom Deva and as long as you have access to digital outputs or with an ADC it has the power to be used behind a bigger mixer and be able to deal with complex drama jobs.  I don’t believe there’s anything else that can cram so much mixing and recording power into such a small space.

A feature it doesn’t have compared to the Sound Devices 688 and Zaxcom Nomad however is some kind of automixer, and although the control surface was announced a while ago now, both Sound Devices and Zaxcom have their own control surfaces released.  When I had my hands on the pre-release physical mockup I found it had super smooth faders but was a bit cramped.

The R4+ does, however have a considerable amount of DSP power inside, though- so can potentially see additional features being added

Backup rig

Having both the mixer and recorder in one box has really become a standard these days for doco recording.  It’s quite easy to see why, it’s 2 boxes with the size and weight of one.  However, if something goes wrong with it you can be stuffed.  With my old rig, say if there was a problem with either the recorder or mixer it would be possible to either cable to camera and just use the mixer.  Or plug directly into the recorder and just record iso tracks.  Either way, if something bad happened to either box it’d be possible to get something.  If you’ve got one box handling all your mixing and recording and it goes wrong (and it’s a computer!) you need some kind of failsafe.

Since I bought the SX-R4+ I’ve been carrying this rig in the bottom of my bag.  This is partly because I’m only set up to send to camera over wireless or AES3 digital with the R4+ (currently waiting for the XLR5 option board) so it’s had a bit of use, still:

DSC02048


It’s a Sonosax SX-M32 3 channel mixer, Wisycom MCR42 dual channel radio receiver (with standalone back and AA battery compartment) and a Sony PCM-M10 recorder (with remote on the right).

All of it will work for a good 5-6 hours from AA batteries (the recorder runs for about 24!).  So say, I run out of Li-Ion rechargeables, or they’re held up in customs I can at least get a runner to buy a load of AAs from a shop.  I can run a boom and 2 radio mics and be cabled to camera or record independently (with no timecode).  Also a feature the PCM-M10 has which the SX-R4+ doesn’t is recording as MP3 (!).

The whole bag weight about 2kg and I’d probably find I can do a great deal of more basic jobs with this rig

Even when I do get the additional output options for the SX-R4+, I still think I’m going to carry this around, just in case…

Kaoss Pad KP3 DC powering

Just as a note as it doesn’t seem to be anywhere else on the internet (and was quite tricky to find out): the power connector for the Korg Kaoss Pad 3 is JEITA RC-5320A JSBP4 standard:

Outer diameter is 5.5mm
Inner diameter is 3.3mm
Centre diameter pin is 1mm

Plug I used was a Lumberg 1636 04

It’s also nowhere as greedy as the PSU is specified, it’ll boot up with as little as 9V 100mA

This may also be applicable to other Kaoss Pads and other Korg products.

And using alien power supplies may invalidate your warranty etc etc

New DPA concealers

Earlier this week I bought some of the newer style DPA concealers- I’ve found the older style to be really useful for hiding body mounted mics, however they’ve made some changes (very possibly improvements).

Quite a few people seem to be a bit confused about them, so I thought I’d show you how they work:

DSC01991

As you can see, instead of one piece, the new concealer’s made of 4,with one piece being slightly smaller than the original concealer.  The back part can be sewn into clothing or used with the clip, as shown here:

DSC01990

There’s also an extra “space bracket” wire which is removable over the top- both of these should keep fabric away from the mic, reducing the chance of rustle against it.  I also think these may be a good way of mounting wind protection without tape, but may require some further experimentation

DSC01989

Here’s a comparison against the old concealer- the new one’s slightly smaller and the plastic’s more pliable. The new ones are a tighter fit and need to be bent a little to get the mics in. As you can see, there’s a 4071 in the old concealer and a 4061 in the new one.  The old ones need specific concealers for both mics and the new ones will work with either:

DSC01988

Here’s the 4071 in the new concealer:DSC01987

DPA’s part number is DMM0021 for a single concealer or DMM0521 for a pack of 5.

Other versions are available for the heavy duty versions of the 406x and 4071 mics and the new d:screet slim.

Sound Network are the UK distributors


Tascam DR701D and HDMI DSLR Sync

Last month Tascam announced a new recorder, aimed more at DSLR self shooters- the DR701D

Although I’m yet to see one in real life, they have built in a unique feature: an HDMI input and output.  This is by no means a review, but a few thoughts on what impact this could have on workflow.

Why would you put an HDMI input on an audio recorder?
Well, it’s not just video signals which are sent over HDMI.  They need to be synchronised with the source and, in addition to that there are 8 channels of audio and time code.

There are also a number of DSLRs and cheaper cameras which lack professional inputs and outputs for time code and genlock, but do have HDMI outputs.  With a case of a lot of these cameras, it’s simply not possible to synchronise them, so more work is required in the edit (although programs such as Plural Eyes can really help).  In addition to this the inputs for DSLRs are often consumer 3.5mm minijack connections with poor analogue performance.  If they’re sent audio it usually ends up being noisy and adding another cable just adds an additional point of failure to the system.

Single Camera interview
In this situation, a sit down interview- neither the camera or sound recordist are likely to move, so attaching an HDMI cable to the recorder is fine.  This allows the recorder’s clock to synchronise with the camera’s and to receive time code (including remote roll commands).  Here both time code and the clocks are synchronised; these are 2 separate things- time code is only meta data, the clocks which determine the frame rate and sample rate of the camera and recorder require a higher frequency sync signal- genlock or word clock, here the sync signal is in the HDMI stream.  This should mean both files should be perfectly in sync throughout and the files are the same length (never before possible on DSLR shoots).

Vérité shooting (single camera)

Here it’s not really practical to be cabled to camera (especially with something as flimsy as an HDMI cable) , as both camera and sound will be moving.  What’s possible though, is to plug the HDMI into the recorder near the start of the take, then roll separately.  Time code will probably be well within a frame, however the clocks will not be synced so files will be different lengths.  This may be fine for shorter takes, but over longer periods (say, shooting events) the files lengths will differ and may need to be cut and re-synced.

There are some consumer  (and professional) wireless HDMI transmitters, which may work for this, however I think they will have a different clock on the receiver so will not have synchronised clocks.  They will also have a fixed delay time, which will have to be accounted for in the edit.

Multiple cameras

Unfortunately, this is where this workflow totally falls over.  All these cameras only have HDMI outputs, so it’s impossible to get an external time code or clock signal into them.  The only time code and clock output on the DR701D is an HDMI passthrough and I’m not aware of another box which can extract this.  For this another solution may be required, such as sending time code to an audio track on the cameras (which has no clock sync and specialist software is required to decode it), or hiring suitable cameras for the job!  A lot of times DSLRs are used as B-Cams and it’d be good to get a more professional sync solution with them, unfortunately this isn’t it.

However, the DR701D does seem to have a professional level TXCO clock generator, so could be jammed and stay in sync with more professional equipment

Molle radio mic pouch

I’ve been looking for a decent solution for this for a while now.   I’ve been using a few of the hard zip up containers Countryman mics come in for lavelier microphone and wireless transmitter storage, along with mounting accessories.  However I’ve been after something a bit bigger to put belts in so I’ve got an ‘all I need’ radio mic kit for when I need to leave set to get people mic’ed up.

After getting one of the new K-Tek stingray bags it has fabric rings for attaching military standard ‘MOLLE’ accessories.   There’s quite a lot of different kit available which is compatible with this, from army surplus and other places.

I bought a ‘medical pouch’

Inside I can get batteries, 2x countryman pouches with mics, transmitters and belts

Under the countryman pouches:

Inside the pouches:

And here’s how it can be attached to the bag:

I also often carry just one ‘main transmitter pouch’ in the front of the bag- this will just be when I’ve got this bag on its own.  It should also mount onto the waist belt.

I’ll have a look into more MOLLE accessories and see if some are useful…


Sonosax SX-R4+ first impressions

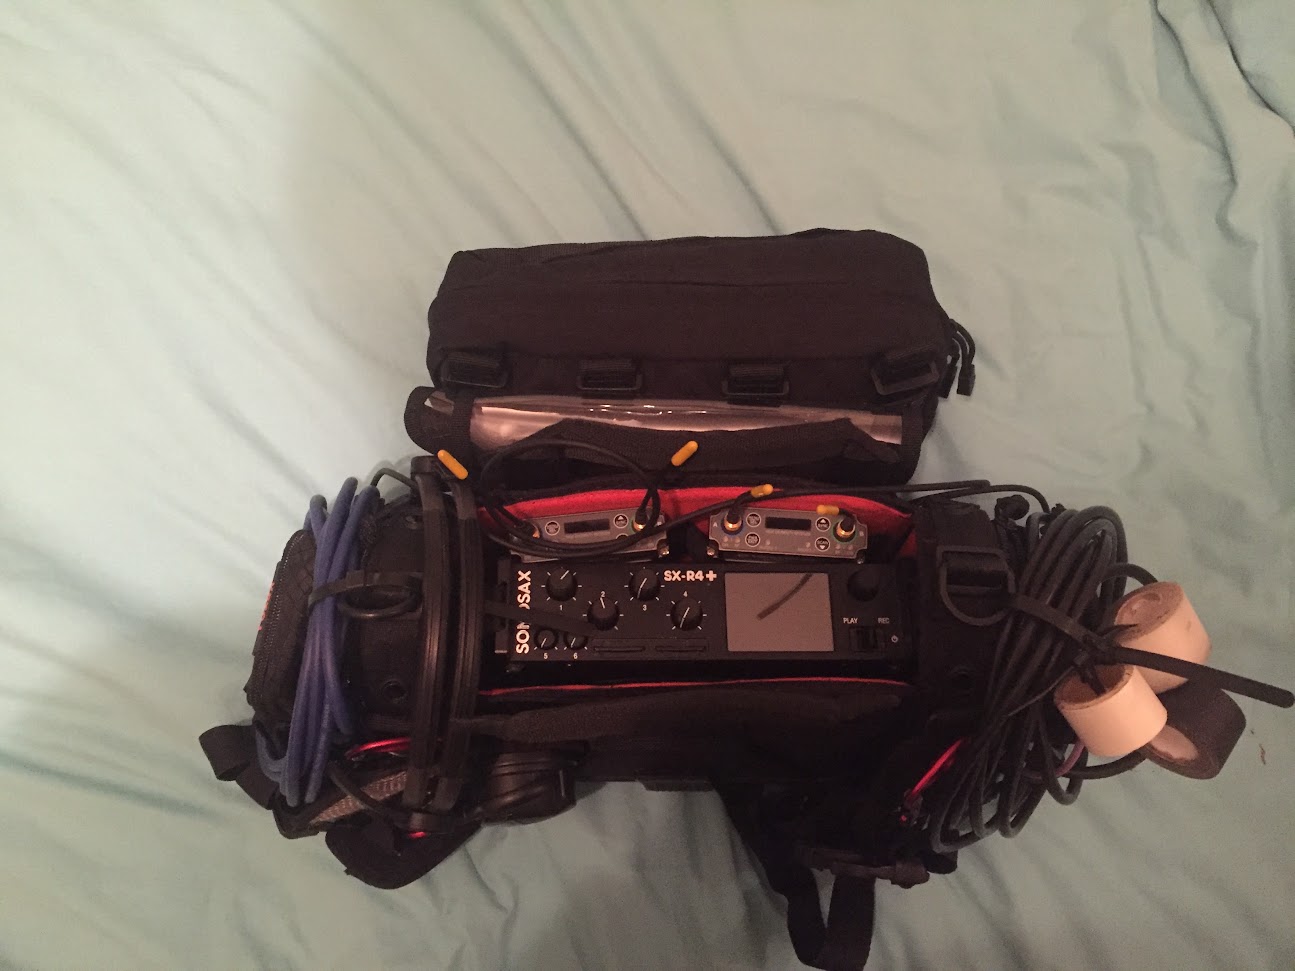
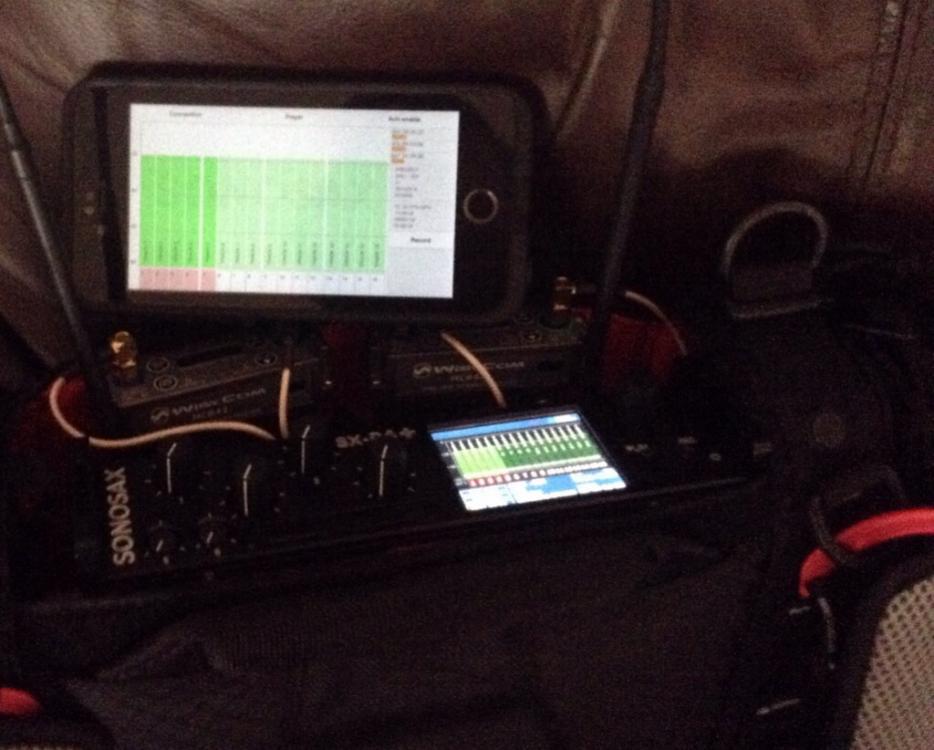
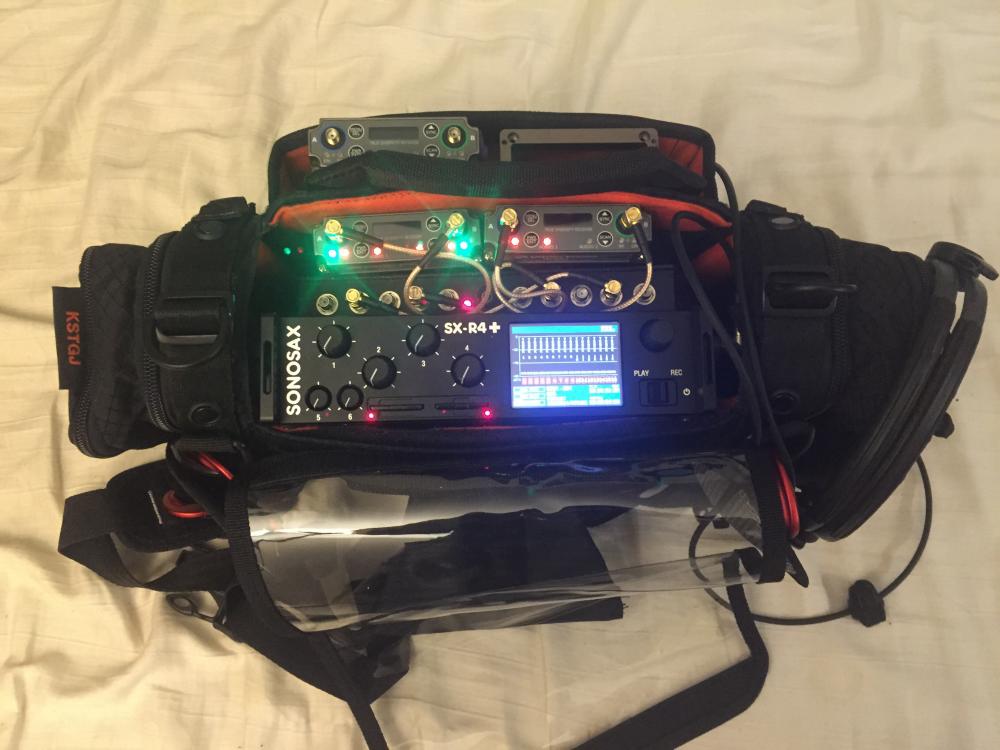
Being an ‘Early Adopter’ is usually a thing I don’t do and warn others away from, especially with products which are heavily software based, however I’ve been a user of the SX-R4 /SX-M32 for some time and have struggled to find another solution which has been able to do quite as much with a similar footprint and weight (despite the numerous workarounds and bodges in my current rig) and have the sound quality I’ve grown accustomed to.  When they offered a discount for pre-orders of the machine I put a deposit down.  Think of this as an ‘initial’ review.  I expect there’s a lot more to come from this machine and the modular system based around it.

The SX-R4+ has been out on 3 separate jobs now, all fairly straightforward corporate /online type things.  It was spared from a trip to Kosovo as it arrived the morning I flew out.

At a first glance the front of the machine and user interface looks pretty bare.  However,  it has a touchscreen interface, I was a bit sceptical about this until I’d used it (especially for a machine this size, it’s only marginally bigger than the SX-R4).  For most menu functions, the screen’s effectively separated into a grid of 9 buttons- all big enough for fingers and there’s a knob to change parameter values.  The menus seem well layered, nothing’s more than 3 layers down.  This allows much faster navigation through menus than on recorders without a touchscreen.   On the main screen there are 3 shortcut sections at the bottom, one to the power menu, one to quickly change scene/slate/take and one to the main menu.  Ideally I’d like a faster way to to the metadata notes screen too, but that’s one click on the web server screen.  Faster hard pan control would also be beneficial.

To add to that, it has a wifi interface which other devices can join or, alternatively it can join a network.  It doesn’t require an app, just a browser window as the machine runs the interface through a web server.  Currently it’s possible to view meters, arm and disarm tracks and add metadata, while almost all parameters on the machine are viewable.  This adds further ease of use to the machine and there’s no reason why a keyboard couldn’t be plugged into your tablet/phone/computer (although there’s no native keyboard port).  Although it’s a small device, it can ‘get big’- there’s no reason why it couldn’t be used effectively for trolley based work with either a mixer in front or with the upcoming control surface.

Webserver screen

Next, what does it sound like?  Lovely. Through the headphone amp, there’s definitely an extra level of cleanness compared to the original R4 and Sound Devices 6 series, this may be just an improvement to the headphone amp, though.  However, it does have an extended dynamic range, due to some kind of dual ADC witchery to give something like 135dB(A) dynamic range- effectively your recordings should be clean without adding any gain to your mics whatsoever (although productions may not understand/like this).  I’m not sure my ears can manage that- it’s from nothing to practically being behind a jet engine and possibly more than any microphone can manage.   There’s some sort of patent wrangling in the US going on with zaxcom’s neverclip which seems to be similar technology meaning the R4+ won’t be sold in the US at this time.

Input-wise it can also take 10 channels of AES3 digital inputs (4 of which can be dual AES42 digial microphone inputs if going though the XLR connectors), 4 microphone inputs and 2 balanced line level.  Using the AES3 inputs make a real difference to the noise floor on the outputs on my Wisycom MCR42 receivers.  All the digital inputs use asynchronous sample rate converters, so clocking is not required.  When switching between analogue and digital on the XLRs, you can hear the mechanical click of a switch inside the machine (in your ears, rather than headphones).  It’s quite satisfying, and I can’t imagine you doing that whilst rolling.  The mechanical record/playback switch is also satisfying, but I think the original R4’s is slightly larger and better.

Outputs are a bit of a sticking point with this machine, as it comes your only outputs (except headphones) are a 2 channel unbalanced output and a 2 channel AES3 output.  This actually worked out fine for a job feeding 2 amiras, with one on wireless but it will require an extra box to run balanced analogue, either an unbalanced-balanced converter or DAC.  There is an empty slot on the left ‘analogue’ side for either a 5pin 2 channel balanced output or RJ45 digital audio connector to run 16 channels I/O over dante, ravenna or AVB- this would really open up the machine to expansion and allow it to be used as a computer audio interface but would still require another box for camera feeds.  Both of these options are currently in development and expected by the end of the year.  Any inputs can be routed to any track or output.  There’s a matrix with each of the 16 tracks and inputs are assignable, while outputs have a 2 track matrix with each pair of channels assignable to either output channel.

The R4+ is a 16 channel recorder, which records to 2x SD cards located on the front at up to 192kHz.  I didn’t receive a cover for these as they’re currently being re-designed.  Sonosax weren’t happy with the initial batch so a new one should be on the way.  Personally I like the front access to the cards- it avoids ferreting around the sides/back with some pliers trying to pull out a CF card . Also the SD cards are considerably cheaper than CF.  A new development is that the R4+ formats the SD cards as UDF- which is the ‘dvd writing format’.  This means file headers are written at the start and the data is added sequentially- if there’s any interruption to recording, say a loss of power then the files stay intact and won’t be lost as a header hasn’t been written.

The power management on the R4+ takes another step up from many other recorders available.  It uses ‘2054’ shape Inspired Energy/RRC/audioroot batteries internally with a runtime of over 8 hours with the machine as-is, and running a RF distributor and 2 wisycom receivers just under 5 hours on one 48W/hr battery.  You can tell this from the smbus interface with the battery- detailed current draw, how many charge cycles the battery has done and accurate runtime are all viewable.  Battery warning alarms can be set at whatever time you like.  It also has a 12V regulated output, and 7W can be drawn from this- this is switchable so peripherals can be turned off through the menu.  There’s also an hot-swappable external DC input which will also receive smbus data over pins 3 and 4 (check your wiring in case DC is going through those pins!).

Finally, the 4 main controller knobs.  First, the good news- these are connected to the DSP and control the ADC input levels of the inputs to each of the 4 corresponding XLRs. Also, the fact they’re offset from each other makes it easier to identify channels without looking. They’re very smooth and totally free of ‘zipper’ noise; sensitivity, gain ranges and whether the knobs mute at zero can all be selected through menu options.  They also have a button which is activated when they are pushed in (this can also be programmed to do number of functions- including something else on a ‘long’ press, although PFL seems to be the most useful).  The issue that they’re currently ‘locked’ to input gain on each XLR, is however an issue at the moment- this means it’s only possible to record post-fader iso tracks, and that each AES3 pair is automatically ganged to one fader, so in AES3 output mode my receivers are effecitively single channel.  This is one of a number of issues which are due to be fixed in the next firmware update, however.  The faders for inputs 5 and 6 correspond only to the analogue line inputs and are pre-adc potentiometers, so if used as faders the iso tracks will be ‘post fade’ (and this can’t be changed in software).

The final missing feature is dedicated comms sends.  I think it’s something Sonosax want to keep for their bigger mixers, however this machine does have plenty of tracks and it certainly has the DSP power to route a mic input to a number of destinations (possibly through programming some of the buttons).  It could also be possible using an external analogue mic switch or through a third party dante/ravenna/AVB compatible box.

In conclusion,  it’s small, this is a very powerful machine, which sounds fantastic and has an excellent user interface.  It should also get very expandable later in the year when the additional mic preamp box, control surface and option cards become available.  There’s also buckets of DSP horsepower in there yet to be used, so it’s still early days on software capability.  However there are a few missing pieces at the moment, which should hopefully be sorted very soon.

For further information, see sonosax.ch and the IPS have a detailed interview with Pierre Blanc from Sonosax about the machine here

New battery standard?

For the last few years I’ve been using NP1 batteries (mainly the shorter NP35 format), which seem to have become a standard for most location sound recordists.

However, there are other 14.4V Li-Ion batteries available.  Another type, which I feel may become a new standard are the “2054” format batteries.  They come in 2 sizes, one around the same as an NP1 but packing in up to 98Whr of energy (pretty much the maximum allowable on flights without limitations being imposed) and a half length one at 48-49Whr.  This is compared to a maximum of 84Whr in an NP1 (DSM’s Ultimate NPLU84) and 35Whr in the half length (Hawk-Woods NP35).

Here’s a picture of the various sizes compared to a full size NP1

Both Sonosax and Aaton have recently announced recorders (SX-R4+ and Cantar X3) which use this battery format and Audioroot have been producing both these batteries and the distribution systems for them for a while now.

Also there aren’t really that many sound recordists, we’re not a huge market.  These batteries are used in industrial and medical equipment.  There are two companies who make them (that I know of): Inspired Energy (USA) and RRC (Germany).  I’ve been informed that Audioroot batteries are supplied by Inspired Energy, but programmed with custom firmware in order to communicate with their distribution systems and chargers. RRC only make the smaller format batteries, there’s also a difference in power gauges- RRC have LEDs which light up in sequence when you press a button, while Inspired Energy have an LCD display on the end which always stays on.

I did say communicate then- these batteries have a system called SMBus, which is a standard system which communicates charge info, battery health, temperature etc to either the charger or the equipment it’s plugged into.  This can allow accurate info on how long the battery will last given the load it’s under, not just a voltage.  This means they require extra contacts for data info (so pins 2 and 3 on a hirose connector will be used).  Check your cables first as some may be made connecting pins 1&2 and 3&4, which may damage components on the other end is they’re given 16 or so volts.


Short Expectations

This is a list aimed at both producers of short films and technical crew on my expectations while doing a short.

1) I’m doing you a favour, be nice:
It’s not going to look good on my CV or showreel (I don’t have a showreel- see the post production point), get me any guarantee of extra work or “exposure”.  If you come across like you’re doing me a favour over the phone or in an ad (I see this a lot on mandy.com), I’m not likely to say yes to the project.  Don’t try to sell it to me either, just ask nicely- I’ll take a look at the script and see what’s required to do a good job.  I don’t really want to be donating my time to spending a weekend with a load of egomaniacs that I wouldn’t want to work with again.  I’d like to spend it with nice people who listen to each other and can make a good film together- it’s a team sport!

Even if this project does really well and you go on to something else, you may get a line producer in with their own contacts and bring someone else in.  You’ll have probably forgotten about me by the time the short’s gone through post anyway :'(

2) “With own equipment”
This is a sentence I see quite a bit in ads as a massive red flag as it usually means “With own *free* equipment”.  Professional gear really isn’t cheap, you’re looking at least £6-7k for a basic doco kit, and for a drama kit, a lot more- £50k and up. Yes, you can shoot some nice stuff on a DSLR, but professional sound gear hasn’t got any cheaper. Do you expect the camera and lighting dept to own all their gear and give it to you for free?  I also still charge for gear on shorts for 2 reasons:  maintenance costs money- things break over time, new tools become available and I need to keep everything in working condition, which takes up my time or I need to give someone money to fix things.  My second reason is I want there to be a level playing field, if someone’s new to the business, or doesn’t want to buy kit they can get a kit out from a rental house and use it at a similar cost to me.  I’ll have all my stuff set up how I like it and have spares, extra gizmos etc, though.  If I’m using someone else’s equipment, I’ll need to spend prep time setting it up.  And no, I’m not going to use a zoom recorder as it’ll sound really noisy.

The kit I’ll be bringing will also need to be put under production insurance- while it’s on set it’s the production’s responsibility, so if there are any losses or damages production will have to claim for them (or provide a replacement).  Although things like lavelier microphones are small- they can get snagged while on cast (especially if they try taking them off themselves) and at £200-400 each, aren’t cheap to replace.

3) Sound Team
If you’re making any kind of scripted work with dialogue, I’d need a 2 person sound team at least.   I can’t boom a shot and mix multiple microphones at the same time,  I need at least one extra hand and maybe an extra brain.    Yes, you may have done films before with one person doing everything, or a boom going straight to camera but compromises have to be made and a usable mix isn’t possible this way.  The mixer also isn’t going to be able to react to changes in levels- you need to ‘set and forget’ or just use radio mics, which usually aren’t the best solution.  I’m also not willing to swing a drama boom (over 10 foot) with a bag on- it’ll result in osteopath’s bills

I want to get the best sound I can for your film and this requires a team to do it.   I need to have someone I can trust to get the microphones in the right places.  This is a highly skilled job, you need to be aware of how different microphones work in relation to their environments,  the angles of frame from different lenses and how lighting is going to affect where you can or can’t be.  It requires knowing the intricacies of different costumes and how to work in close proximity to actors in getting radio mics fitted.  It’s not just “holding a mic on a stick”- would you ask a runner to pull focus?

4) Pre-production
So many shorts seem to suffer from the problem of suddenly realising they need a sound mixer.  It really helps if we’re across the pre production process.  Take us to recces!  I know it’s extra time and we’re not always available, but it can make the difference of a scene being usable or not.  Will you require generator(s), where will they be positioned?  Are you next to something which is noisy and out of shot?  How will it be shot and lit?  What are the costumes like?  If we can work things out with the relevant departments beforehand it can make a huge difference to what you get as a final piece, again- it’s teamwork.  If I’m brought on at the last minute I can try my best to solve problems, but it’s less likely to happen

5) Expectations vs budget
I can’t do everything with just basic kit, scenes with multiple speaking characters may require 2 booms and as many radios as there are characters (especially in exteriors).  Also radio mics are *really* expensive, at least £2k per channel.  We’ll also need to provide a mixer and recorder with that many tracks and might be more than I own.  I can’t give you this stuff for free.   Is anyone singing? Playback might be required.  It could be a case of paring down your expectations to meet the budget you’ve got or re-allocating it- do you really need to spend extra on hiring those super shiny lenses etc?

6) Time/scheduling
This can really make the difference between a good or bad shoot.  If things get rushed, people make mistakes or don’t get the time needed to fix something then your film will suffer for it.  Also, please don’t take people’s time for granted- let them get some rest!  I tend to charge my standard overtime rate on anything over 12hrs, even if I’m donating my time for free.  This isn’t because I’m greedy, it’s a penalty so that my time and the rest of the crew’s isn’t taken for granted and we can actually get some sleep, if we’re tired mistakes and accidents can happen- again, it’s just a film.  Also really think hard about whether night work is necessary or not, you’ll be really messing with crew’s sleep patterns and effectively taking another day away from them to re-adjust

7) Post Production
Make sure you budget for this, whatever.  If you’re on a tight budget, don’t expect to do any ADR (automated dialogue replacement), you’ll need to hire a studio- it’ll take ages and you won’t get the same performance as in the moment.  If I’m on set and ask for wild lines (run without sync with camera), it’s important that I get them- here a few minutes can save a lot of money and stress later down the line.  It’s still really important to get a quality post production team- the production tracks are only one ingredient to the soundtrack- here the soundtrack will take shape.  This is also why I don’t have a showreel- I’m only getting one ingredient to the soundtrack, it’s up to the post team  to cook it into something lovely.   I’ll try and give them options too, with isolated tracks and will record the off lines if I’ve got the resources.  However, an inexperienced (or even just having the picture editor) post team can make a mess of things which can really affect the quality of your film

8) Money
I really do understand that shorts don’t have high budgets, are often self funded and don’t have much chance of recuperating that expenditure. Depending on the film I’m willing to waive my fee as long as I can get the tools in to do the job properly.  This will include getting assistants in who will, in turn be doing me a massive favour and I like to make sure they get something out of it too.

I’ll also need to make sure I’m not losing money on the job- if it requires a reasonable amount of gear I may need to hire a van to get it to location. However I get there it’ll need to be paid for in full, this includes picking up additional rental gear.

Also, I can get called up to do fully paid work at any moment- and I’m afraid I may have to do another job in order to earn some money- I am running a business here and alas, my landlord doesn’t accept IMDB credits in lieu of rent.  I will try not to dump you in it and find a suitable replacement, though (which may even involve me paying them some of my fee from the other job, and me owing them a massive favour).

9) Whose Sound?
When I’ve handed the rushes over, the sound doesn’t belong to me- it belongs to the producer and director.  I’m not doing this for me- I’m doing this in order to give you the best quality tracks possible and options in the edit, I can only make suggestions and the director can either go with them or ignore them.  Compromises sometimes have to be made across different departments and it’s sometimes the director’s job to make those decisions.  There may be shots where getting a good recording isn’t possible and I’ll try and flag these up, letting the director know they won’t be able to use the dialogue in that shot in the edit, for example.

10) What’s in it for me?
Ok, doing a short won’t do anything for my CV, showreel or give me “exposure”- what do I get out of it, then?  Just working with some different people (who are hopefully lovely).  It also might give me that chance to try out a new setup, or work with a new assistant so we both get familiar with it, hopefully in a less high pressure environment than on a bigger shoot.  I’ve done loads of shorts in the past and find I’ve had recommendations or offers of work from people from all sort of different departments- as always with a lot of these things it can be a case of “be nice to the runner, as they might be production manager in a few years”.  We also might get a good film at the end, where I can be pleased that we’ve done a good job.  Maybe I’ll get to work with a director who’s the next big thing, and will get me on subsequent jobs but on the other hand I could also win the lottery 😉

11) Food/Drink
While I’m on set you’ll need to feed and water me (and the rest of the crew)- I can’t leave to get anything during the day.  I’ll need a hot meal too, don’t mind what it is as long as it’s hot- I’ll be on my feet and doing stuff all day so will need to eat a reasonable amount.  Although I do like takeaway pizza it’s probably best not to have it every day.  Access to water all day is a must.  Tea and biscuits are always good, too… and proper coffee.  Although I’ll dress appropriately if I get cold/hungry/thirsty I’m not going to be able to concentrate on the job and if your crew ends up like this it doesn’t end well