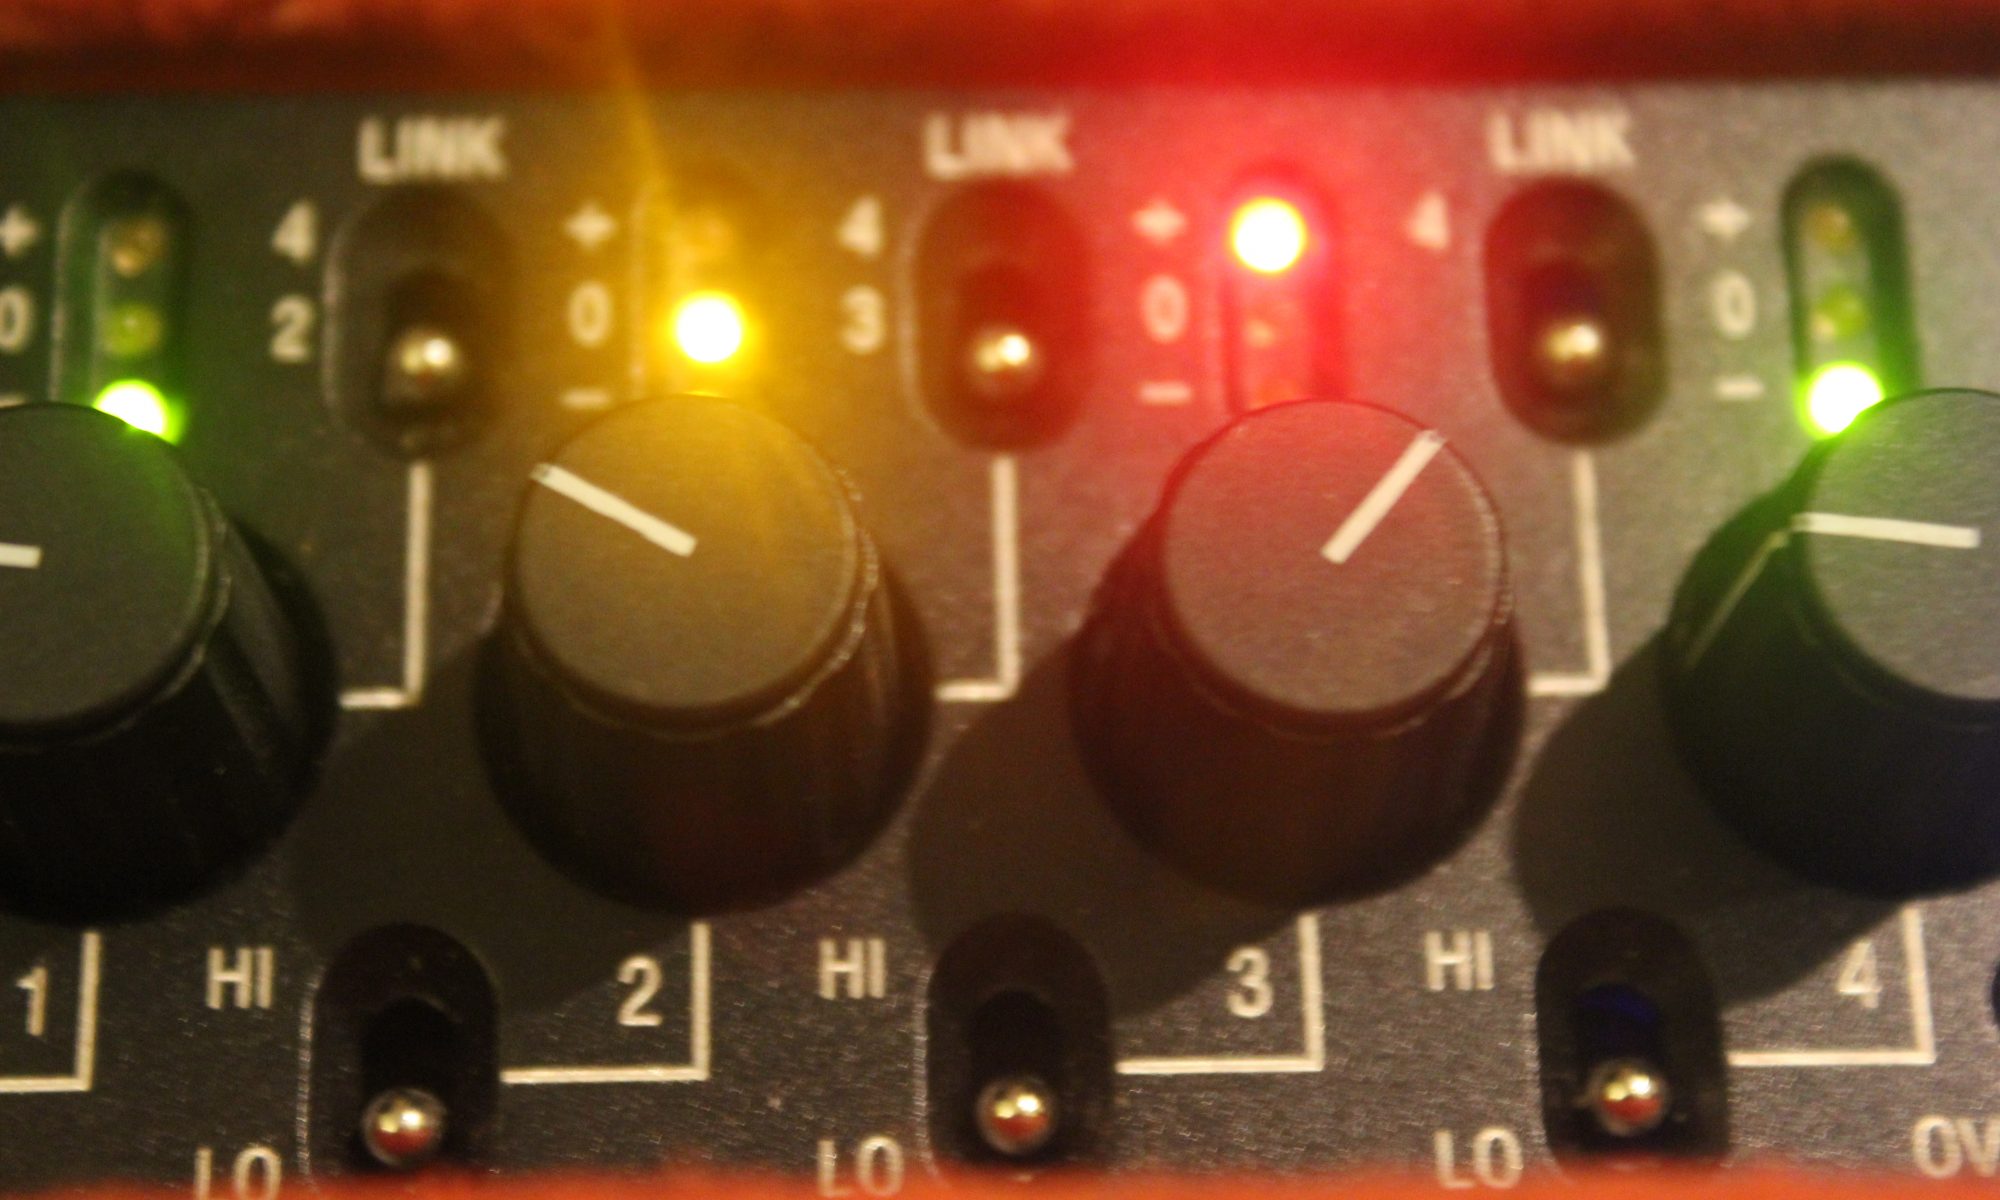
Just to begin, I’m sure most people looking at this post will be familiar with the 19″ rack standard, it’s a very common way of mounting professional audio and computer equipment. ‘Half rack’ is effectively mounting equipment which is half the width of that (or is it?).
Basically half rack isn’t a real standard, it’s what happens when you get equipment where 2 units are designed to fit in one 19″ unit side by side, however it just so happens that you put rack ears on one of them, they seem to be the right size and a few manufacturers have made racks for this equipment.
19 divided by 2 is…
So, how wide is this equipment then? The original 19″ rack width includes the rack ears. Here, the rack ears are the same width, so it’s going to end up being slightly wider than 9.5″- in fact 10.5″ seems to be a standard.
What fits?
As it’s not a proper standard, I thought I’d start compiling a list on here. Please feel free to add stuff if you find it. Also as it’s not a proper standard, they may be some specific combinations which don’t work (especially if there are holes for screws rather than cage nuts)
* items I’ve not personally tried, however the measurements look correct
We’re starting to see more useful products using audio over IP, all of which need switches to connect multiple devices together. This is effectively a patchbay for these devices, however the routing is determined in the devices themselves, while the switch is effectively the patch cables sending the data to and from the right destinations. Here’s an overview of what a switch does and how it works: https://www.oreilly.com/library/view/ethernet-switches/9781449367299/ch01.html
Specifications
I’m mainly going to be using this one using Audiante Dante, which is a proprietary audio over IP system. This will work using most off the shelf switches, however they do recommend using a managed switch, especially if there’s going to be other data on the network. It need to be able to carry gigabit ethernet, supply power over ethernet, have over 5 locking ports and run off 12V DC power. And not make any noise.
Unfortunately I couldn’t find any switches on the market that fulfilled all those specs, so I’ll have to adapt one
Starting points
To begin with, I need a switch. One that ticked most of the boxes was the Cisco SG250-08HP. The Cisco SG250 series seem to be one of the more frequently recommended switches used for Dante networks. This is the smallest one in the series which can supply PoE. However, it comes with a (rather hefty) 52V PSU. It also doesn’t come with ethercon connectors, they seem to only be on some more specialised switches for the AV industry (all of which seem to have mains supplies)
Power
In order to get the switch to run off 12V, it needs the voltage to be increased with a DC-DC Converter to something approaching the 54V specified on the input of the switch. I say approaching, because I had a 48V DC-DC converter which I’d previously been using to power another PoE switch. It also already had the Kycon KPPX-4P connector on and had the same wiring (which is fortunate as that took some finding…).
I’m not sure exactly what the power draw of the switch is, however it can supply up to 45W of PoE. The mains power supply which comes with the switch is just short of 60W (54V at 1.1A).
The DC-DC converter I’ve used is only 40W at 48V- the switch seems to run fine on it though, however there isn’t enough power to run the full capacity of PoE devices. There is a bigger 60W model, however it is bigger and may be difficult fitting it into the case.
Casing
My intended use for this is to mount it on a Soundcart MiniCart. This has 10.5″ ‘half rack’ mounting points, which seems to be a ‘half-standard’, as there’s another 9.5″ half rack spacing. This seems to work with most boxes which are designed to be mounted side by side in a rack by putting both rack rears on the same box, although they’re not really designed for this.
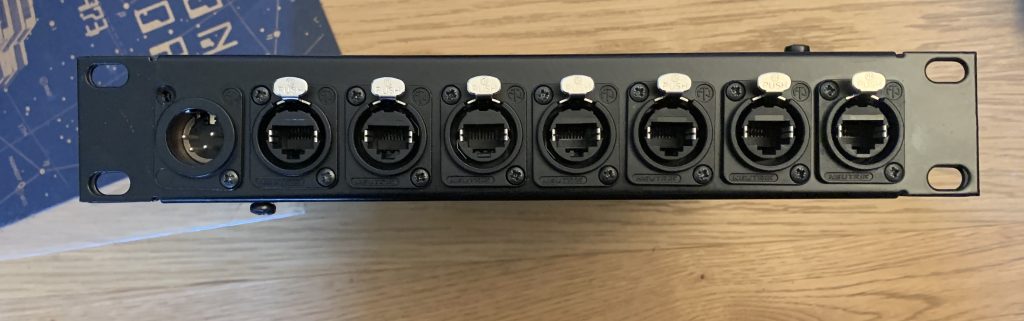
I’ve used some off the shelf parts from a metal fabrication company, however there were a few issues getting things to fit- all 8 ethercon ports won’t fit on the panel and still get in the enclosure- and the 4 pin power connector just fits, with some filing down of the sides! The case itself is steel, so has a fair bit of weight to it.
Connectors and Cables
I opted for the ‘feedthrough’ ethercon connector as otherwise there was a lot of soldering involved. I also realised that regular moulded RJ45 cables wouldn’t fit in the chassis, so had to swap them out for low profile flat ones. This put the build of this back a week. These are probably less hardwearing, however won’t be moving about in the chassis.
I did consider some of the more weatherproof connectors, and even bought some flip down panels– however they were fouling each other when packed together that densely. Given there are holes in the chassis for airflow (which the switch and PSU will need), it seemed a bit much fully weatherproofing the connectors, which would have added further cost
Layout
It ended up all being a bit tighter than expected- I originally imagined the switch ports behind the ethercon connectors. This way, however does allow you to look through the side vents to see LEDs
It all fits together like this
I want one!
I’ve had a few expressions of interest in people buying these- there might need to be a bit of refinement of the metalwork, including a little more space and an extra output for the 8th port. This is currently a prototype but let me know if you’re interested in one- it’ll need a few refinements, but I could potentially get a run of these put together. Back of an envelope costs are around £300+vat for the whole thing
I’m looking into running out a single cable to connect a box to an audio over IP network. For example, a transmitter or receiver to cover a separate area. There are a number of different AOIP standards, which include Audinate Dante, Ravenna and AVB- this is mainly a demonstration of physical connections, but different hardware may be required for different networking standards. This method can be scaled up to devices with more analogue/digital inputs and outputs as long as they can be powered.
Ingredients
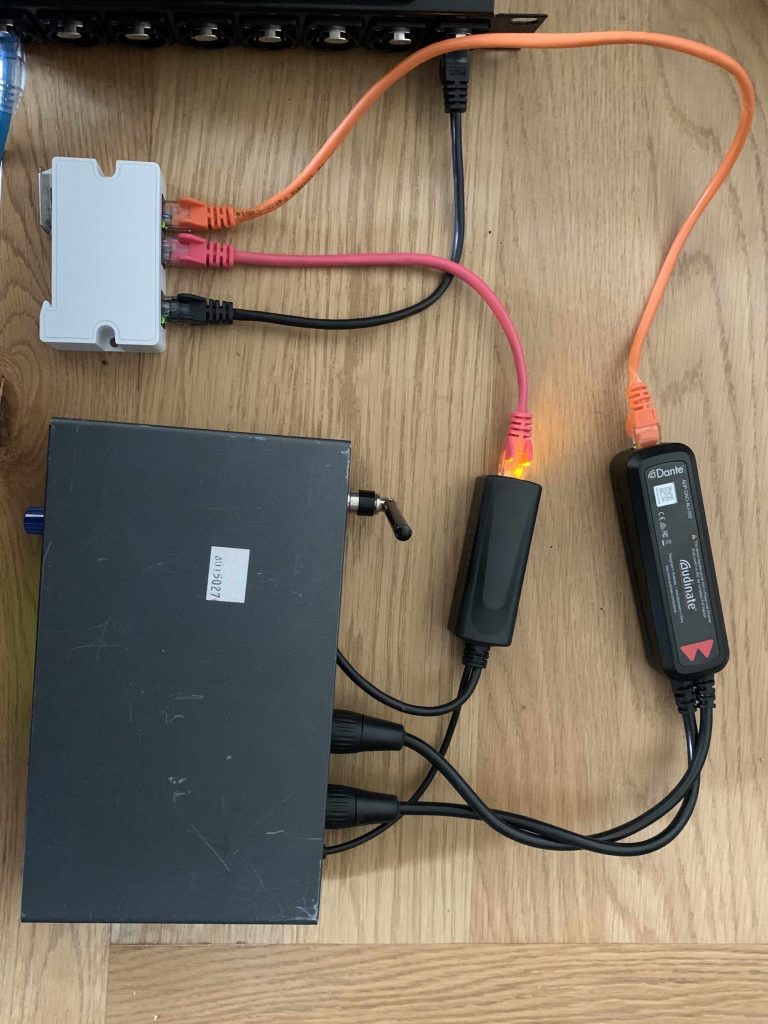
You need the following: Target device with a DC power input (in this case a Sennheiser SR300 G2 transmitter) Network switch with power over Ethernet (PoE) (Cisco SG250-08HP) PoE or DC powered AoIP to analogue endpoint (Dante AVIO) Passive PoE switch (Linovision mini passive switch) 12V PoE Splitter (I used this) CAT5e cables (or better)
Setup
Here we have the main PoE switch connected to the passive PoE switch, which powers that, which in turn powers both the Dante AVIO and Ethernet splitter. The Dante AVIO runs to 2 XLR outs which plug into the Sennheiser transmitter and the PoE Splitter feeds 12V to the transmitter. It powers up as soon as the main switch has booted up. The PoE Splitter also has an RJ45 connector on. If this was a G3 or later Sennheiser transmitter, this could connect to the data port and the transmitter’s settings could be accessed over the network.
Things to bear in mind
Everything in the network needs a certain amount of power and the PoE switch can only supply a certain amount (usually at 48V). Check the specs for power consumption of devices. Ohm’s law is useful for calculating current at different voltages
Look at the required voltage and current for the device you want to power. Voltage has to be within the specified range, while the supplied current can be more than specified (devices only draw as much current as they require). Check that you can find a PoE splitter that fits these specifications.
There are different PoE standards, the current ones are 802.11af or 802.11at which supply different amounts of power per port. Some things which just say ‘PoE’ without a standard may not play nicely or even damage equipment.
There will be some loss of power through the cable. The reason the voltage is reasonably high (48V) is to reduce the current and associated loss due to heating the cable- the longer and thinner the cable, the greater the loss.
The passive switch used here is only 10/100Mbps, this is fine as the Dante interface is also this speed, but if more channels need to be passed though a 10/100/1000 switch may be required
Your DC powered device may have a different connector to the splitter- it’s possible to chop off the moulded connector and solder on a different one
What’s the passive switch for?
In this case the PoE Splitter converts all the power on the port, so it doesn’t pass through to the RJ45 connector, so 2 network ports are required. This also shows how this could work with a box with a separate network port for control. Bigger passive PoE switches are available, so multiple interfaces could be run from one long cable. All this stuff can go in the back of a rack case with a more robust ethercon connector dealing with the connection with the main switch on a long cable.