Analogue vs Digital wireless

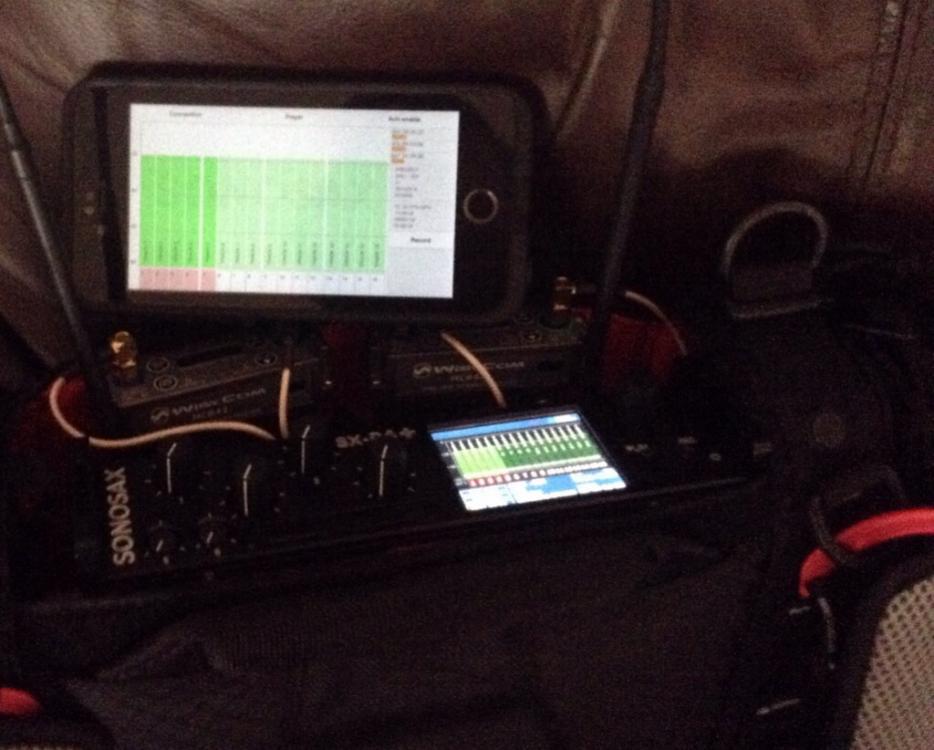
Throughout most of my career I’ve used analogue wireless systems.  However, for a few individual jobs I’ve run digital wireless.  I’ve recently been running a digital system for a specific job over 3 weeks, with both positive and negative experiences.  I’m not going to get into the details of particular brands, but have had similar experiences running digital systems made by different manufacturers.

Range and Reception Quality

It’s quite difficult to actually compare the range of different radio mic systems in real life.  Different situations and environments can produce wildly different results.  In some situations I’d get fantastic range with the digital system including through buildings.  In others, sometimes where someone just turns away or bends down, obscuring line of sight from the transmitter when they are reasonably close, I’d lose RF and therefore audio completely.

With an analogue system, I wouldn’t expect this to happen- worst case scenario would be a rise in noise floor.  Which, in a documentary setting makes the difference of something being potentially still being useable or not getting it.

On the other hand, a colleague was using an RF antenna distribution system with a bandpass filter and seemed to experience these issues far less.  I’ve also heard other colleagues having much better experiences with digital systems using directional LPDA and YAGI antennas.

Backup Recording

Which leads us to this potential saviour, built into some digital systems.  In some cases it’s brilliant and can save scenes from dropouts or allow shooting in situations without crew nearby.  However it is not 100% reliable.  I had a couple of instances I caught where battery telemetry caused the transmitters to drop out of record.  Other colleagues have had corrupted cards.  Just the fact that you cannot monitor them when they’re away from you means you can never be totally certain they’re recording.

There’s also additional work in backing up the cards.  Backing up 4-5 8GB cards, the daily card from my recorder and running the conversion program took 45mins to an hour of precious downtime.

Intermodulation

There is a real advantage of digital systems in that they are not very susceptible to intermoduation from other RF sources.  This is where harmonics from other RF sources can be received on a mathematically related frequency.  Effectively you are receiving multiple RF sources at once.  The fact that digital systems either receive their signal or not really works to their advantage here.  They’ll just get the strongest source or not get it at all.

This results in the ability to pack RF channels much closer together without having frequency coordination issues.  This allows much more flexibility in setting up larger systems, without incurring higher licensing costs or being able to work in already congested areas.

Audio Quality

All the digital systems I’ve used sound very good, with transmission quality surpassing that of top end analogue systems.  I do believe there is a difference in the microphone amplifiers in various different transmitters and output stages of receivers, though- which can make some analogue systems competitive on this front.

The issue, however is in the fact that ‘it works or it doesn’t’.  Digital systems are full quality or nothing, whereas if in suboptimal conditions analogue systems will lose transmission quality. While not ideal, it’s better than a complete dropout and can be a sign that you need to move your antennas closer.

Interoperability and Security

Analogue systems don’t use proprietary modulation schemes and different codecs to send audio.  This allows them to be picked up using other analogue equipment as long as the frequencies match.  Some companies even make receivers which can emulate expander settings to work with different manufacturers’ analogue transmitters.  This can allow much more flexible multi-recordist setups and the ability to often ‘tune in’ to individual microphones at live events where a separate PA is being run.

In the case of digital systems, compatible transmitters and receivers made by the same manufacturer are necessary for the system to work.

The flipside to this is that others can eavesdrop on interviews with important people or talking about sensitive subjects.  Most digital systems have options to encrypt signals.  Even those with equipment from the same manufacturer would not be able to listen in without the matching encryption key.

Power

Digital wireless seems to be much more power hungry.  Both transmitters and receivers need much more power, even compared to analogue systems running DSP.  Some transmitters require rechargeable li-ion packs in order to last a reasonable length of time.  Digital transmitters requiring dual AA batteries lasted about the same as a single AA analogue transmitter.

My analogue receivers pull around 1.5W each, while the digital ones I was using pulled a figure closer to 4W.  This really mounts up and required larger batteries- and meant a heavier bag.

Conclusion

There are currently some areas where digital wireless is superior and can do things that analogue wireless cannot.  However, I still think that analogue definitely still has strong advantages in what I use on a day to day basis.  The fact that you get gradation in quality rather than an “on/off” effect, the flexibility of being able to use them with other systems and much lower power consumption still make them very competitive.

I can, however see certain jobs where digital wireless is more useful.  Those where high channel counts need to fit in a limited bandwidth or if recording transmitters are a requirement.  Analogue cannot compete here, but neither of those circumstances are something I come across on a day to day basis.

The disadvantages of digital also start to become less relevant on a drama set.  In some cases, they may start to outweigh the advantages of analogue.  Size, power consumption and larger antennas are less of an issue.  Frequency co-ordination in studio complexes where multiple productions are happening would also be much more straightforward.

I also had no issues at all with the digital camera link system- works on a single frequency, AES digital in and out so the only quality loss is through the codec (negligible) and would even send timecode without additional boxes.  The disadvantage is that it doesn’t also work as two personal transmitters

Wisycom IR interface installation on windows 10

I’ve had a few people ask me about installing wisycom infra red interfaces, such as the UPKmini in order to do firmware updates.

Most are mac users- easiest way is to set up bootcamp and download an image of windows 10 from microsoft.  It’s up to you to get it licensed, but it’ll only shout at you a bit.  Loads of things on the internet will tell you how to do  this.

Next you need to install Wisycom Manager from the (fantastically named) wisycom.com (look under support/downloads/wireless microphones).

Run that- and there’s a picture of the UPK interfaces

If you press ‘help’ there are installation insrtuctions for earlier versions of windows.  Run the 32 or 64 bit driver depending on your OS, may as well install all the parts.

Now it gets a bit tricky: you need to ‘Disable Driver Signature Enforcement’.
Open the start menu and search for ‘Change Advanced Startup Options’

Hit the ‘Restart now’ button and put the kettle on.  It takes A Long Time

When it’s restarted, go to Troubleshoot/Advanced Options/Startup Settings.
and Restart again (this time it’s faster).

Now (and only now) you can ‘Disable Driver Signature Enforcement’.  It’s option 7.  Press it and windows will boot up again.

Now you’re back into windows, you can plug in your UPK thingy.  It’ll install it for a while, but you need to point the right drivers at it.

This can be a bit confusing compared to the windows 8 instructions- look for Device Manager and open it.

Now look under Ports (COM & LPT)

It’ll be the USB Serial Device (may be on a different COM port)
Now, right click and ‘Update Driver Software…’
Then ‘Browse my computer for driver software’

It’ll be wherever you installed it, but is likely to be in Program Files\Wisycom\Wisycom USB Drivers.  Include the subfolders.


And…. finally it should install the driver:

Fire up the update utility in Wisycom manager, and remember to hit the ‘Connect’ button to talk to the UPK.  Lights should come on!


Audio interfaces as location mixers

This is a bit of a ‘thought experiment’ as I haven’t actually got any of the kit to try out and found whether it actually works in a production environment or not.  I’m also not sure if this is currently a workable solution for me and will state the drawbacks, but this could all be useful to some people- at least as a bit of an experiment

Currently there aren’t really any digital mixers suitable for location work and I’ve been looking at potential solutions to this.   I’m aware that the Yamaha 01V96 is used quite a bit (in the US especially), but it’s big, power hungry and AC powered only.

A possible solution now is that a number of computer audio interfaces will work as standalone mixers (with a suitable control surface).  They have a considerable amount of DSP power available with the ability to run EQ and multiple submixes.  Another advantage is that audio can be sent to a computer, for playback of previously recorded tracks or even processing (auditioning noise reduction, for example).

Having done some research, here are some possible combinations of equipment:

Metric Halo ULN-8 / LIO-8

Metric Halo ULN-8

Effectively these are the same box, except the LIO-8 is a cut down version of the ULN-8, with no microphone preamplifiers or additional DSP plugin licenses.  They’ve been around for a while and use top quality components.  Metric Halo do continually support their products and are the only company I’m aware of who offer hardware upgrades to their audio interfaces.  At the moment there’s been mounting rumours of an upgrade to the DSP and interface with a 3D card (which would not involve buying a whole new unit), which would add a class compliant USB-C computer interface, improved DSP power and an additional card slot.

This is the only computer audio interface I’m aware of with a locking DC connector (4 pin XLR)!  There’s also a second barrel plug, which could be used for redundant power.  It has another unique property in that it’s the only DC powered interface with sample rate converters on the AES3 inputs.  This means I could run my radio mic receivers directly into it using their digital outs.  It’s got 8 analogue audio I/O and 8 digital AES3 I/O

Now for the drawbacks: it’s a big box- a deep 19″ rack unit 432 x 330 x 44 mm but it weights 2.6kg which isn’t too bad.  It currently only has a firewire interface and OSX drivers so requires a good bit of fiddling to get current computers to work with it.  They really need to update this and talk of the 3D card being ‘coming soon’ has been going on for about 2 years now.

Also, with the current architecture, the midi input will accept controllers using the mackie control protocol but needs to have a computer running in order to be able to control the mixer

MOTU AVB Series

MOTU 8A

These are effectively a load of different interfaces with different I/O which can be combined using the AVB protocol.  For a while there was just the Ultralite AVB which could be DC powered, but at the end of last year a couple more, the 624 and 8A were released. Furthermore a whole bunch of digital boxes were announced last month with AES3, ADAT and MADI interfaces.  All of these are in a compact ‘half rack’ format

I’m particularly interested in the 8D, however only half the inputs are AES3, the other 2 are SP/DIF and may require adaptors and/or sample rate conversion

The DC inputs aren’t locking, but will take 12-18V, only draw 10W on the current half rack interfaces and they don’t care about polarity either

The main drawback is controller integration- they won’t accept midi control, only OSC over a network.  Their suggested method is using a tablet computer using a web interface. It should be possible to hook up a tablet to a midi controller and use an application such as TouchOSC or Lemur to control the interface as a mixer.  Another future possibility is programming a BomeBox, although that doesn’t have OSC compatibility yet

RME UCX / Babyface Pro


RME Fireface UCX

These RME interfaces will all work with their totalmix FX mixer out of the box, and accept Mackie control midi commands.  A few features such as some of the talkback functionality won’t work without a computer, however.

The drawback, however is with some of the digital interfaces used.  They all us ADAT optical format, which isn’t common in broadcast equipment, so a converter box is required.  RME do one, the ADI-4DD, however it doesn’t have any sample rate converters, so 2 AJA ADA4 boxes would be required to provide use with mutiple digital sources which cannot be connected to word clock.  Again, power is with a barrel plug (and it’s not too fussy about voltage or polarity), although the babyface can also be powered over the USB bus, so could be a redundant power connection.

Waves / Digigrid LV1


Waves LV1

This is a system designed to work as a powerful digital mixer with a dedicated computer running all the mix software and also plugins at low latency.  It’s not cheap, but is built for purpose.  Working it on DC power may be a challenge (and I expect it may be greedy), however and would require a bit of hardware hacking- looking at the motherboards on some of the host computers (the smallest Impact model, for example will run from 12V but would involve fitting a 12V PSU and invalidating the warranty).  Interface wise, only the MADI ones will run from 12V, so a MADI converter with the I/O you require would be required.  DirectOut make the Exbox.AES which converts 16 channels of AES3 to and from MADI but without sample rate converters (but is has redundant locking DC inputs!)

Keith McMillan K-Mix

Keith McMillen K-Mix

This is actually a real hardware digital mixer- 8 analogue in and 10 out (including the headphone out, which can be freely assigned).  I’ve bought one of these and it’s a really compact and useful machine.  However, it doesn’t quite cut it for me I/O wise- I could do with some digital ins and outs.  It’s powered over USB, but can accept 2 USB connections, so redundant power can be supplied.  The touch control surface is surprisingly useable, there are ‘tracks’ along the faders and indents at 0dB.  The only disadvantage with the touch control is you can have ‘jumps’ if you take your finger off and it’s not in exactly the same place as where the fader is.  The K-Mix works with the Keith McMillan MIDI expander so can use 5 pin DIN cables

Icon Platform M

Icon Platform M

This is just a control surface- but a small DC powered one.  I owned its predecessor, the iControls Pro which wasn’t bad, although from picture it looks like they may have improved the build quality since.  The motorised faders are 100mm but did require a press downwards before moving them, so weren’t super smooth.  In fact I quite like the idea of having smoother, non-motorised faders on a control surface).  Icon have also recently showed off an expander, the Platform Z which adds blocks of 8 faders to the ‘M’.  This is designed to work with a computer so only sends class compliant MIDI over USB.  Various boxes are available which will work as MIDI hosts, however

Asparion D400

Asparion D400F and D400T

This is another control surface, again with motorised faders, a modular system except the build here looks more rugged than the Icon at first glance and has more buttons (but less knobs).  Also USB out only so may need a host device if not being used with a computer

Professional Field Recorder comparison

There’s been radio mic comparison table up on this site for years now, and I had the bright idea of doing one for recorders, partly as a lot of people don’t really know what’s out there (and some assume it’s just Sound Devices).  I’ve only included those with features suitable for professional use in the field – timecode, metadata input, DC power, reasonably sturdy build and those that are current products. I have missed off the Sound Devices 702T and 744T as they have relatively low track counts compared to most of the other machines.

Also, there isn’t any info on ergonomics or sound quality as they’re both subjective.  The only machine it’s not possible to mix on (but you can route) is the Sound Devices 970- which is really designed to have a mixer in front of it, in some ways that is a bit of a different beast and is the only one which can accept a MADI feed.  Please let me know if I’ve made any mistakes or omissions, this is mostly from published specs:

Edit:  Added Aaton Cantar Mini specs.  I’ve also missed off the Sound devices 664 as it’s similar in specification to the 688

2019 Update- added Sound Devices 666 (or ‘Scorpio’, as they insist on calling it) and Zaxcom Nova

  Mic/line inputs Line inputs AES3 inputs AES42 inputs (pairs) Max Inputs to tracks Rec Tracks available (192kHz) Rec Media
Aaton Cantar X3 8 4 8 2 24     24 (24) SSD, 2xSD, USB
Aaton Cantar Mini 4 2 4 2 10     16 (16) SSD, 2xSD, USB
AETA 4minx 4 6***** 2 2 8     8 (8 at 96kHz) SD
Nagra VI 4 2 4 0 8      8 (8) HDD, CF, USB
Roland R-88 8 0 2 0 10      10 (4) SD, USB
Sound Devices 633 3 3 2 1 6      10 (6) SD, CF
Sound Devices 688 6 6 4 2 12      16 (6) SD, CF
Sound Devices 788T 8 0 8 4 8      12 (4) SSD, CF, Firewire
Sound Devices 970 0 8 8 0 64      64 (32 at 96kHz) 2xSSD/CF, 2x eSATA
Sound Devices 666
(or Scorpio)
 16  4  32 36 (18)   SSD, 2xSD
Sonosax SX-R4+ 4 2       10* 4 16      16 (16) 2xSD
Tascam HS-P82 8 0 8 0 8      10 (4) 2xCF
Zaxcom Deva 24 12 4 24 8 24      24 (24 at 96kHz) SSD, 2xCF
Zaxcom Maxx 4 2      0/4***       0/1*** 8      8 (4) CF
Zaxcom Nomad 6 4       0/8***       0/1*** 10      10/12*** (10/12 at 96kHz) 2xCF, USB
Zaxcom Nova  4  2  4  10  12 2xCF 
Zoom F4 4/6**** 2 (unbalanced) 0 0 6      8 (8) 2xSD
Zoom F8 8 0 0 0 8      10 (8) 2xSD


  Balanced Outputs Unbalanced Outputs AES3 Outputs Output buses Multichannel Options Control surface Extras
Aaton Cantar X3 8 0 12 40      Dante 32×32 Cantarem 2
Cantaress
Monitor output, waveform display, play/rec, wifi, bluetooth
Aaton Cantar Mini 8 0 4 12       Cantarem 2 Monitor output, waveform display, play/rec, wifi, bluetooth
AETA 4minx 4 6***** 6 4   MIDI Soundfield monitoring
Nagra VI 2 0 2 4   MIDI  
Roland R-88 8 2 2        8 (direct)      USB interface 10×8 MIDI  
Sound Devices 633 4 2 4 6   CL-12 Wingman Remote
Sound Devices 688 8 2 8 8   CL-6, CL-12 Mix Assist, Dugan, Wingman remote, SL6
Sound Devices 788T 6 2 6 6   CL-8, CL-9 Mix Assist, CL-Wifi, GPIO
Sound Devices 970 8 0 8 64       Dante/MADI 64×64   RS422/GPIO/Network remote
Sound Devices 666
(or Scorpio) 
10  10  Dante 32×32  MIDI (MCU)  Android app 
Sonosax SX-R4+          0/2**                  2/6**     2/6**         4/8**      TBC network audio RC8+ wifi web interface
Tascam HS-P82 2                        0 8      10 (direct)   RC-F82  
Zaxcom Deva 24 10 0 12      10 (12 direct)   Mix-16, Oasis Nomad Touch, MixAhead
Zaxcom Maxx 4 2 0/4*** 4     Zaxcom digital tx option, Automix
Zaxcom Nomad 10 2 0/6*** 6   FC8, Oasis, Mix8 Zaxnet, Nomad Touch, Automix
Zaxcom Nova 8  0  6   Oasis  2x receiver slots for QRX212 
Zoom F4 2 2 0 4      USB interface 6×4 FRC-8  
Zoom F8 2 2 0 4      USB interface 8×4 FRC-8 Bluetooth remote app 


  Battery / power connection Dimensions (mm) Weight (kg) Notes      
Aaton Cantar X3 2x eSmart 2054, XLR4 90x320x240 3.55        
Aaton Cantar Mini 2x eSmart 2054, XLR4 90x259x234 2.3        
AETA 4minx Sony DV, HR10 75x260x195 1.9 ***** EXT I/O connector shared       
Nagra VI Nagra, XLR4 74x310x285 3.8 (weight with battery)      
Roland R-88 AA, XLR4 93x260x235 2.67        
Sound Devices 633 AA, DV, HR10 60x240x160 1.1        
Sound Devices 688 AA, HR10, NP1 (in SL6) 53x320x198 2.21        
Sound Devices 788T DV, HR10 45x257x153 1.7        
Sound Devices 970 2x XLR4 84x218x262 3.4        
Sound Devices 666
(or Scorpio) 
DV, 2x TA4 51x320x205 2.63      
Sonosax SX-R4+ eSmart 2054, HR10 50x200x144.5 0.91 *2 shared with aes out, **2nd figure with xlr5 output board      
Tascam HS-P82 NP1, AA, XLR4 100x270x260 3.65        
Zaxcom Deva 24 2x HR10 76.2x267x177.8 2.45       
Zaxcom Maxx AA, HR10 51x191x133 1.13 ***option variants      
Zaxcom Nomad AA, HR10 51x251x178 1.72 (weight with batteries)      
Zaxcom Nova 2x HR10 51x210x152 1.16 / 1.56***** ***** weight with 2x QRX212 modules     
Zoom F4 AA, HR10 54x178x141 1.03 ****line level only on jack, additional input option APH6XLR      
Zoom F8 AA, HR10 54x178x141 0.96      

Sonosax SX-R4+ v2 firmware

I’ve owned a Sonosax SX-R4+ for around 6 months now and I generally stand with what I said in my initial review:  the machine has been a pleasure to use, sounds fantastic and has a lot of recording power in a small box.  I’ve managed to get by with it on its own in a number of situations but with the v2 firmware it really opens up the machine and removes these limitations.

This is based on a v2.0 release candidate version of the firmware (which won’t be publicly released), there’s been a few bugs ironed out of this and v2.1 should be up on the website very soon.

Faders

This is the big one, so I’d better get this out of the way first.  In v1 of the firmware the 4 main knobs on the front are ‘hard set’ to gain control of whatever the 4 XLR inputs are.  Although it was possible to mute at zero and control gain ranges (so it was possible to mix on them), the ISO track levels would also change- so post would have to undo these gain changes.

Now this is no longer the case: the v2 firmware has  “fader modes”.  2 different fader curves are available -60dB to +12dB (with a steeper rolloff at the bottom) and -60dB to +24dB (linear).  Both mute at -60dB.

Faders are assignable to tracks on the mix configuration screen, and single faders can be assigned to multiple tracks for stereo or surround work or even as groups.  This also now allows me to run my radios (Wisycom MCR42) in AES3 as before the gain was fixedto being ganged across both AES3 channels on each XLR.  It’ll also allow me control levels using the AES3 inputs on the accessory port (when I’ve sorted out the cabling)

IMG_0597

If a fader is not assigned to a channel which is assigned to mix, then it comes through as if the fader is at 0dB.  It’s possible to mute by changing the mix assignment (which is possible while recording)

Gain structure

So, how do you set gain and fader level with only one knob?  As default the push buttons on each knob are the input settings and PFL for each XLR input (long press can also be assigned), so whatever’s going into each of these channels can be soloed and gain adjusted with the menu knob (gain is the initial setting on the input screen).  Here’s a video:

Also, due to the high dynamic range of the converters it’s possible to set gain very conservatively and set up the mix tracks to be up to +20dB higher than the ISOs.  With another 24dB available at the fader it’s possible to work with 44dB of headroom with unnoticeable loss on the ISO tracks if desired.  With the AES3 inputs you’re limited to what happens on the analogue end of whatever you have plugged in, but can have them come in a 0dB and again boost in the mix.  An issue however with setting ISOs this conservatively is it become difficult to PFL as there’s such a big difference.  Personally I might only use these more extreme settings for scenarios where there may be more extreme dynamic range.

Routing Setings

Routing works so that inputs (and mix tracks) are assignable to any 1 of 16 tracks.  These can then be assigned to 2 mix tracks, or any of the outputs on the machine.  Again, anything can be assigned to anything.  There’s also due to be a new output board released soon with an XLR5 connector, switchable between 2 channels of balanced analogue, 4ch of AES3 or unbalanced analogue out. This gives a total of up to 8 outputs over a combination of unbalanced and AES3.  Something I have noticed is that it’s not possible to send individual channels post-fade to outputs, though- which could be useful for mix-minus.

Although it’s now possible to separately assign the inputs, faders and outputs, it’s reasonably easy to keep a handle on what goes where.  The new colour coding to channels also helps.  The record tracks matrix shows input, track name, arm and colour.  Mix menu and output menus also show track assignments and have recallable presets

IMG_0598

User Interface

I found I could navigate this recorder very quickly using the v1 firmware, however more programmable buttons and features have come online in the v2 firmware.  All buttons (7) and 5 touchscreen areas can be programmed to perform different functions with both short and long presses.  Shortcuts for channel muting is also something which isn’t there and I can see that being useful  The Mix setup screen has also been brought up a level in the menu to the main screen.

Sound Reports

The R4+ now generates sound reports straight to the SD card.  Currently all the metadata is there, but the headers aren’t customisable. It’s generated automatically as an HTML file so readable in any web browser (javascript does need to be turned on to read it).  I also looked for a ‘generate sound report’ button and couldn’t find one.  However I just found the report to be generated on the SD card and is updated on the machine continuously.

Here’s an example report:
soundreport

Comparison

At first glance this machine looks like it’s something similar in size and capability of the Sound Devices 633 or Zaxcom Maxx, however there’s quite a lot more crammed into the box.  The interface feels more like a larger recorder such as the Zaxcom Deva and as long as you have access to digital outputs or with an ADC it has the power to be used behind a bigger mixer and be able to deal with complex drama jobs.  I don’t believe there’s anything else that can cram so much mixing and recording power into such a small space.

A feature it doesn’t have compared to the Sound Devices 688 and Zaxcom Nomad however is some kind of automixer, and although the control surface was announced a while ago now, both Sound Devices and Zaxcom have their own control surfaces released.  When I had my hands on the pre-release physical mockup I found it had super smooth faders but was a bit cramped.

The R4+ does, however have a considerable amount of DSP power inside, though- so can potentially see additional features being added

Backup rig

Having both the mixer and recorder in one box has really become a standard these days for doco recording.  It’s quite easy to see why, it’s 2 boxes with the size and weight of one.  However, if something goes wrong with it you can be stuffed.  With my old rig, say if there was a problem with either the recorder or mixer it would be possible to either cable to camera and just use the mixer.  Or plug directly into the recorder and just record iso tracks.  Either way, if something bad happened to either box it’d be possible to get something.  If you’ve got one box handling all your mixing and recording and it goes wrong (and it’s a computer!) you need some kind of failsafe.

Since I bought the SX-R4+ I’ve been carrying this rig in the bottom of my bag.  This is partly because I’m only set up to send to camera over wireless or AES3 digital with the R4+ (currently waiting for the XLR5 option board) so it’s had a bit of use, still:

DSC02048


It’s a Sonosax SX-M32 3 channel mixer, Wisycom MCR42 dual channel radio receiver (with standalone back and AA battery compartment) and a Sony PCM-M10 recorder (with remote on the right).

All of it will work for a good 5-6 hours from AA batteries (the recorder runs for about 24!).  So say, I run out of Li-Ion rechargeables, or they’re held up in customs I can at least get a runner to buy a load of AAs from a shop.  I can run a boom and 2 radio mics and be cabled to camera or record independently (with no timecode).  Also a feature the PCM-M10 has which the SX-R4+ doesn’t is recording as MP3 (!).

The whole bag weight about 2kg and I’d probably find I can do a great deal of more basic jobs with this rig

Even when I do get the additional output options for the SX-R4+, I still think I’m going to carry this around, just in case…

New DPA concealers

Earlier this week I bought some of the newer style DPA concealers- I’ve found the older style to be really useful for hiding body mounted mics, however they’ve made some changes (very possibly improvements).

Quite a few people seem to be a bit confused about them, so I thought I’d show you how they work:

DSC01991

As you can see, instead of one piece, the new concealer’s made of 4,with one piece being slightly smaller than the original concealer.  The back part can be sewn into clothing or used with the clip, as shown here:

DSC01990

There’s also an extra “space bracket” wire which is removable over the top- both of these should keep fabric away from the mic, reducing the chance of rustle against it.  I also think these may be a good way of mounting wind protection without tape, but may require some further experimentation

DSC01989

Here’s a comparison against the old concealer- the new one’s slightly smaller and the plastic’s more pliable. The new ones are a tighter fit and need to be bent a little to get the mics in. As you can see, there’s a 4071 in the old concealer and a 4061 in the new one.  The old ones need specific concealers for both mics and the new ones will work with either:

DSC01988

Here’s the 4071 in the new concealer:DSC01987

DPA’s part number is DMM0021 for a single concealer or DMM0521 for a pack of 5.

Other versions are available for the heavy duty versions of the 406x and 4071 mics and the new d:screet slim.

Sound Network are the UK distributors


Sonosax SX-R4+ first impressions

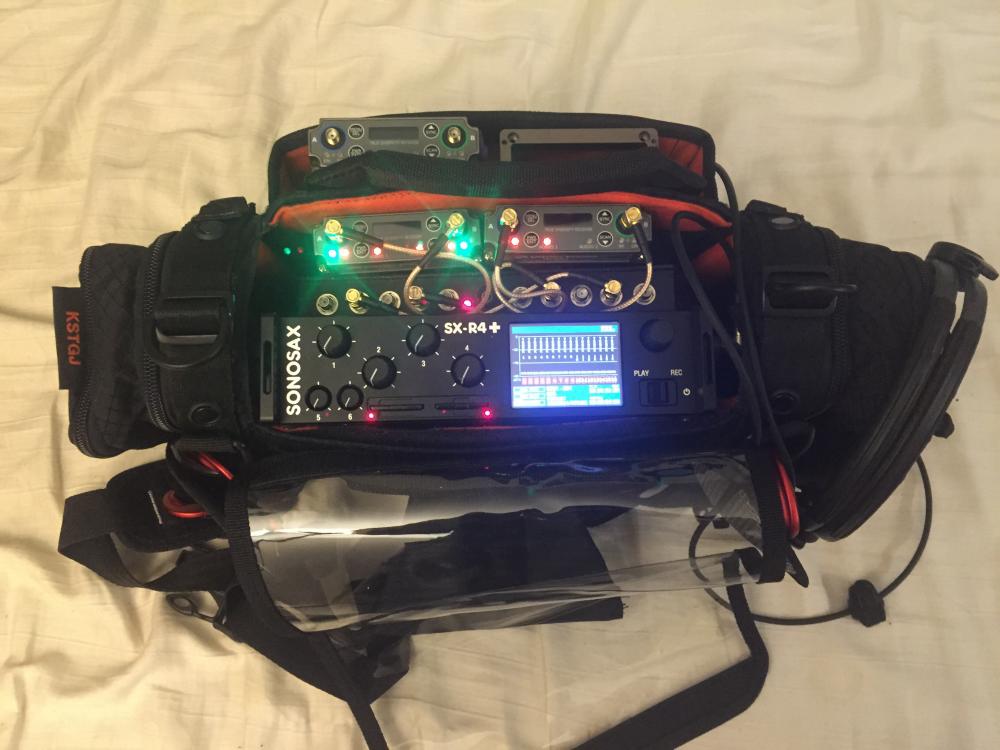
Being an ‘Early Adopter’ is usually a thing I don’t do and warn others away from, especially with products which are heavily software based, however I’ve been a user of the SX-R4 /SX-M32 for some time and have struggled to find another solution which has been able to do quite as much with a similar footprint and weight (despite the numerous workarounds and bodges in my current rig) and have the sound quality I’ve grown accustomed to.  When they offered a discount for pre-orders of the machine I put a deposit down.  Think of this as an ‘initial’ review.  I expect there’s a lot more to come from this machine and the modular system based around it.

The SX-R4+ has been out on 3 separate jobs now, all fairly straightforward corporate /online type things.  It was spared from a trip to Kosovo as it arrived the morning I flew out.

At a first glance the front of the machine and user interface looks pretty bare.  However,  it has a touchscreen interface, I was a bit sceptical about this until I’d used it (especially for a machine this size, it’s only marginally bigger than the SX-R4).  For most menu functions, the screen’s effectively separated into a grid of 9 buttons- all big enough for fingers and there’s a knob to change parameter values.  The menus seem well layered, nothing’s more than 3 layers down.  This allows much faster navigation through menus than on recorders without a touchscreen.   On the main screen there are 3 shortcut sections at the bottom, one to the power menu, one to quickly change scene/slate/take and one to the main menu.  Ideally I’d like a faster way to to the metadata notes screen too, but that’s one click on the web server screen.  Faster hard pan control would also be beneficial.

To add to that, it has a wifi interface which other devices can join or, alternatively it can join a network.  It doesn’t require an app, just a browser window as the machine runs the interface through a web server.  Currently it’s possible to view meters, arm and disarm tracks and add metadata, while almost all parameters on the machine are viewable.  This adds further ease of use to the machine and there’s no reason why a keyboard couldn’t be plugged into your tablet/phone/computer (although there’s no native keyboard port).  Although it’s a small device, it can ‘get big’- there’s no reason why it couldn’t be used effectively for trolley based work with either a mixer in front or with the upcoming control surface.

Webserver screen

Next, what does it sound like?  Lovely. Through the headphone amp, there’s definitely an extra level of cleanness compared to the original R4 and Sound Devices 6 series, this may be just an improvement to the headphone amp, though.  However, it does have an extended dynamic range, due to some kind of dual ADC witchery to give something like 135dB(A) dynamic range- effectively your recordings should be clean without adding any gain to your mics whatsoever (although productions may not understand/like this).  I’m not sure my ears can manage that- it’s from nothing to practically being behind a jet engine and possibly more than any microphone can manage.   There’s some sort of patent wrangling in the US going on with zaxcom’s neverclip which seems to be similar technology meaning the R4+ won’t be sold in the US at this time.

Input-wise it can also take 10 channels of AES3 digital inputs (4 of which can be dual AES42 digial microphone inputs if going though the XLR connectors), 4 microphone inputs and 2 balanced line level.  Using the AES3 inputs make a real difference to the noise floor on the outputs on my Wisycom MCR42 receivers.  All the digital inputs use asynchronous sample rate converters, so clocking is not required.  When switching between analogue and digital on the XLRs, you can hear the mechanical click of a switch inside the machine (in your ears, rather than headphones).  It’s quite satisfying, and I can’t imagine you doing that whilst rolling.  The mechanical record/playback switch is also satisfying, but I think the original R4’s is slightly larger and better.

Outputs are a bit of a sticking point with this machine, as it comes your only outputs (except headphones) are a 2 channel unbalanced output and a 2 channel AES3 output.  This actually worked out fine for a job feeding 2 amiras, with one on wireless but it will require an extra box to run balanced analogue, either an unbalanced-balanced converter or DAC.  There is an empty slot on the left ‘analogue’ side for either a 5pin 2 channel balanced output or RJ45 digital audio connector to run 16 channels I/O over dante, ravenna or AVB- this would really open up the machine to expansion and allow it to be used as a computer audio interface but would still require another box for camera feeds.  Both of these options are currently in development and expected by the end of the year.  Any inputs can be routed to any track or output.  There’s a matrix with each of the 16 tracks and inputs are assignable, while outputs have a 2 track matrix with each pair of channels assignable to either output channel.

The R4+ is a 16 channel recorder, which records to 2x SD cards located on the front at up to 192kHz.  I didn’t receive a cover for these as they’re currently being re-designed.  Sonosax weren’t happy with the initial batch so a new one should be on the way.  Personally I like the front access to the cards- it avoids ferreting around the sides/back with some pliers trying to pull out a CF card . Also the SD cards are considerably cheaper than CF.  A new development is that the R4+ formats the SD cards as UDF- which is the ‘dvd writing format’.  This means file headers are written at the start and the data is added sequentially- if there’s any interruption to recording, say a loss of power then the files stay intact and won’t be lost as a header hasn’t been written.

The power management on the R4+ takes another step up from many other recorders available.  It uses ‘2054’ shape Inspired Energy/RRC/audioroot batteries internally with a runtime of over 8 hours with the machine as-is, and running a RF distributor and 2 wisycom receivers just under 5 hours on one 48W/hr battery.  You can tell this from the smbus interface with the battery- detailed current draw, how many charge cycles the battery has done and accurate runtime are all viewable.  Battery warning alarms can be set at whatever time you like.  It also has a 12V regulated output, and 7W can be drawn from this- this is switchable so peripherals can be turned off through the menu.  There’s also an hot-swappable external DC input which will also receive smbus data over pins 3 and 4 (check your wiring in case DC is going through those pins!).

Finally, the 4 main controller knobs.  First, the good news- these are connected to the DSP and control the ADC input levels of the inputs to each of the 4 corresponding XLRs. Also, the fact they’re offset from each other makes it easier to identify channels without looking. They’re very smooth and totally free of ‘zipper’ noise; sensitivity, gain ranges and whether the knobs mute at zero can all be selected through menu options.  They also have a button which is activated when they are pushed in (this can also be programmed to do number of functions- including something else on a ‘long’ press, although PFL seems to be the most useful).  The issue that they’re currently ‘locked’ to input gain on each XLR, is however an issue at the moment- this means it’s only possible to record post-fader iso tracks, and that each AES3 pair is automatically ganged to one fader, so in AES3 output mode my receivers are effecitively single channel.  This is one of a number of issues which are due to be fixed in the next firmware update, however.  The faders for inputs 5 and 6 correspond only to the analogue line inputs and are pre-adc potentiometers, so if used as faders the iso tracks will be ‘post fade’ (and this can’t be changed in software).

The final missing feature is dedicated comms sends.  I think it’s something Sonosax want to keep for their bigger mixers, however this machine does have plenty of tracks and it certainly has the DSP power to route a mic input to a number of destinations (possibly through programming some of the buttons).  It could also be possible using an external analogue mic switch or through a third party dante/ravenna/AVB compatible box.

In conclusion,  it’s small, this is a very powerful machine, which sounds fantastic and has an excellent user interface.  It should also get very expandable later in the year when the additional mic preamp box, control surface and option cards become available.  There’s also buckets of DSP horsepower in there yet to be used, so it’s still early days on software capability.  However there are a few missing pieces at the moment, which should hopefully be sorted very soon.

For further information, see sonosax.ch and the IPS have a detailed interview with Pierre Blanc from Sonosax about the machine here

Wisycom MCR42 v3.x firmware

I’m doing this post as I’ve realised quite a few people with wisycom haven’t updated their firmware and there’s a quite a few nice features they’ve added since v3 on the MCR42.  The new UPK mini programmer is also available, which is considerably cheaper than the older UPK300, which allows much faster changing of frequencies, locking, unlocking and hiding of frequencies and allows you to update firmware.  NB: if using windows 8, the installation process is a bit convoluted- there’s a help file in the wisycom manager 0.8 program.  And you need to press the connect button for it to see the UPK.

First up, if you’re used to using the MCR42, it initially appears that you’ve got an extra menu layer to navigate, the ‘Edit RX1’ and ‘Edit RX2’ are no longer at the base of the menu tree.  However, you can see and access the settings  through the new ‘quick access’ screens.  The only thing I’ve found I regularly use which isn’t in the quick access menus is the power on/off for individual transmitters.

These are accessed by pressing the ‘sync’ and ‘scan’ buttons which allow you to scroll through these new screens.  Hit ‘sync’ and you get to the RX1 frequency screen:

Pressing select allows you to alter any of the frequency settings, scrolling between channel, and group.  There’s an option to display by the channel name (in fast channel select in the advanced menu), but the frequencies aren’t displayed   There’s another similar screen for RX2.  Next is the RF screen:

This shows your RF strength from each receiver, with a bar for each antenna.  Hitting Menu/Select brings up an RF settings menu, where you can alter squelch settings.  Squelch is the threshold at which the receiver will cut out any incoming RF, this is to ensure when a transmitter goes out of range, you don’t get a burst of static coming through.  There’s a new ‘Auto Squelch’ feature, which runs a scan and sets squelch threshold based on the RF in your environment at the frequencies your receiver is set to.

To run a more general RF scan, hold the ‘scan’ button when in the main screen and choose a receiver and group to scan.  Use the ‘Center’ group (00 as default) of frequencies to run a broadband scan and the regular block of freqs you’d use for more detail over a smaller area. There’s also an ‘intergap’ group, which I think is the frequencies at the start and end of groups. It pulls up a graph in order of ‘best’ to ‘worst’ freqs, if you want to see it in frequency order, press sync and scan at the same time.  If you’re using a user frequency block, I’d advise hiding all the slots you’re not using, so it doesn’t scan your lowest frequency on the RX loads of times.

Finally there’s the Audio screen- this is easiest to access by pressing ‘scan’ once from the main screen (you can also scroll through the other quick menus first with ‘sync’):

This shows your expander settings, audio output level (I generally keep them on +12dBu, this is the level that the DAC outputs the signal, anything else is attenuated) and has big modulometers for each receiver.  Although the increments aren’t marked, I’d guess they’re all 6dB (as the bottom is -42dB and top is 0dB and there’s 7 markers).  It’s so much easier checking levels now.

Finally, the preset feature- it’s in the main menu, second item down (under infrared).  There’s 3 presets (you can rename them using the infrared programmer and software), if you hit ‘save’ and select a preset- it’ll save the current settings and return them when you restore that preset again.  This receiver has presets for camera hop frequencies and talent mics 7 and 8, for example and I can now change between the two easily.  It’s also possible to put different expander settings on different presets.  Expander settings can be tied to channel numbers in the MCR4x manager program:
wisy_prog2

Here I’ve set channels 22-34 to have the sennheiser evolution expander, and programmed group 12 to have the Channel 38 preset frequencies for this system.  There are loads of channels per group, so you can do this.  This does, however work across groups- so try and keep certain channels for certain transmitters only.  You can hide the frequencies before the first one you’re using (and you can select multiple blocks using shift/ctrl+click for locking and hiding, whcih saves time).  Presets can also be used in the wisycom transmitters, specifying input levels, frequencies and compander settings.  There are also updated ENC and ENR 1.2 companders, introduced in v3.3 firmware.  These have a 1.2:1 compressor on the output for use with DSLRs and other noisier consumer inputs- no difference to the TX.

25 pin modular system

This is a bit of an ongoing project, but started having thoughts about it after working with an Audio Ltd 2040 system while assisting a production sound mixer on a drama job.  We were having serious range issues throughout the job, the cause of which was possibly something attached to the camera.  The only way we could get round this was to move the receivers closer in ‘remote boxes’.

These were an RK3 rack in a box with a battery and antenna inputs and outputs, and we rolled out either individual XLR cables or a multicore to connect to the main trolley.  As the receivers themselves are very expensive, it’s not really practical having duplicates doing the same thing, so it was a case they could quickly be pulled out of the RK6 and slotted straight into the remote boxes.

However it’s a case that it’s not possible to do this with other receivers, such as the Wisycom MCR42, which I use.  There is, however quite a common standard for camera receivers.  Pretty much all slot in receivers have an option for a universal ‘Panasonic’ standard 25 pin connector on the base, which will output 2 channels of balanced audio.

So, I’ve now got 25 pin bases for all my receivers.  There are a number of options for antenna, audio and power distribution, which have 25 pin options.  I already owned the Audio Ltd EN2  distribution rack (which still isn’t up on their website, it’s about £550 +VAT) but got an additional 25pin base.  I was scatching my head and looking at getting something made up so the receivers slotted in, but realised the camera mount brackets had holes in the same place as the mounting points on the audio CX2 receivers.  Audio do a base for the receivers with a bar with mounting points on. So just screwed on the brackets and  now have slots.  A disadvantage with the 25 pin section on the audio ltd distributor is that it adds a bit too much weight, there’s a steel plate along the back and I’m not sure it really needs to be there.  When I get some time, I may drill out sections from that

The second mounting solution I have is a Lectrosonics Octopack.  Here it’s a case that the screw holes are in different places to those on the wisycom receivers, however Richard Meredith’s Audio Dept made a run of very purple mounting flanges, so the receivers sit in the slots properly and can also be screwed in so won’t come loose:

It’s not just wisycom which will work, almost any ‘slot in’ camera receiver should have a 25pin option (except Sony, who don’t like to play with others).  Other examples are Lectrosonics SRb, Audio Ltd CX2.  There’s also another distribution system, the PSC Six Pack.  There’s another mod to the wisycom camera plates (see the picture further up on the Audio Ltd distributor) where grooves have been drilled in the camera bracket so the cables can fit.

You can also ‘mix and match’ different brands of receiver, however they don’t always orient the connector the same way round. Here’s a Sennheiser EK3041 (it’s actually on, but the display’s nowhere near as bright as the wisycom):

They also work on their own without antennas, here’s a quick and light cable for the back with power and audio connections: