Network Switches for location

You can’t have your cake and eat it

Location requirements

I’ve had a number of people ask me about network switches over the last week or so. More mixers seem to be looking at Dante on set in various configurations, however most of the switch manufacturers don’t exactly have us in mind when designing products, so we’ve got to make compromises.

Things we need/want:
No disruption using AoIP protocols, like Dante, AES67 etc
Silent (usually fanless)
12V DC powered
Fast boot up
PoE distribution

I’m not aware of any switch which necessarily ticks all the boxes, but there’s quite a few which will tick some.

Managed and Unmanaged Switches

As far as best practice goes in putting together a Dante network, a lot of the choices made can only be done using managed switches, especially if anything which isn’t Dante is on that network.

One of the key functions of managed switches is Quality of Service. This prioritises certain traffic (with the most important being the clock). It’s recommended by Audinate to implement this if there are any slower 100Mbps devices (like the small ones which use an Ultimo chipset) on the network.

Another is IGMP Snooping- this only comes into play if multicast sends are being used, as it limits the number of destinations the data is sent to and reduced the overhead on the switch.

If there are only a few gigabit devices (not small ultimo devices!), without much traffic then an unmanaged switch should be fine. The main thing to look out for is if it has ‘Energy Efficient Ethernet’- this can cause a Dante network to fall over, so you don’t want this feature and if it’s on a managed switch make sure it can be turned off.

Audinate and Shure both publish lists of switches which are not recommended.

A drawback of managed switches can also be boot time. The more switches seem to do, the more complicated the operating system. Some can take a few minutes to boot up, which really isn’t useful if you’ve just had a power outage.

Power over Ethernet (PoE)

Power over Ethernet isn’t quite as straightforward as you might think. There are multiple standards, which use different pins and some have handshake methods with the other end before turning it on. You need to check the standards required of the boxes you’re plugging in, they won’t work with every switch and different switches have different capacities

The basic 3 standards are:

PoE – this can be very vague, from a power source being plugged into some of the wires on a CAT5 cable. The base standard is 802.3af, which uses 48V to carry up to 15.4W of power on one network cable

PoE+ or 802.3at. This allows up to 30W and runs at 52V

PoE++ or 802.3bt This is the big one, either 60W or 90W. Also needs a juicy power source

Cisco also do a proprietary UPOE+ method which appeared before 802.3bt was standardised.

It all needs a high voltage and in some cases can carry quite a lot of power. This means that if equipment is running off 12V; it needs to be stepped up somewhere with a DC-DC converter.

PoE doesn’t have to be implemented at the switch, however. It can also be added with a PoE injector. This is useful if there’s only one or a couple of devices which need it.
I’ve sourced some cheap 10W injectors which will step up from 12V: https://rtsound.com/collections/power-over-ethernet/products/48v-10w-poe-injector-with-voltage-step-up-from-10-24v

Planet make some industrial 802.3bt injectors which will step up from 12V

Some switches can be powered by PoE and some can then pass that on. They’ll never be able to pass on all of the power; don’t take either as given. “PoE PD” (PoE Powered Device) is often a term used.

Some Commonly used Switches

Cisco SG350-10

This is the ‘industry standard’ managed Dante switch. Audinate commonly use them and multiple manufacturers make guides to setting them up.

They’ll do everything you need management-wise.

They can output PoE+ and proprietary 60W UPOE+ and it’s possible to power a second switch with the first and pass through PoE+

They have SFP optical ports, which can be used for very long cable runs.

However- they need 54V. I’ve made a solution for this with a step up converter. This can also be adapted to other switches and the voltage tweaked fairly easily:
https://rtsound.com/collections/power-over-ethernet/products/dc-power-supply-for-cisco-sg350-and-sg250-poe-switches

It takes around 90 seconds to boot up, which doesn’t seem to be able to be got around. If there are 2 switches being powered by each other, that’s almost 3 minutes to get the remote switch up. And it’s been discontinued- it’s replacement, the CBS350 apparently takes even longer!

Netgear GS105Ev2

This is a bit of an unusual choice, as Netgear GS – E switches appear in the Shure Disqualified list. It is, however quite a commonly used switch as it’s small and can be powered by 12V.

Personally I’d be a bit wary of using this without knowing exactly why it’s on a disqualified list. It’s only the v2 version where Energy Efficient ethernet can be turned off (I believe it is off as a factory setting).

I have seen recommendations to turn off IGMP Snooping too as it apparently doesn’t work properly with Dante. This may also be the reason for its disqualification.

Trendnet TI-PG62B

This is an industrial unmanaged switch, which has the holy grail of PoE+ and the ability to run from a 12V supply.

It has 4 PoE+ ports and 2 SFP ports.

Planet also make an 8+2 port 12V industrial switch.

Other Choices

Having had a look around, Cisco do make managed industrial switches. They’re really not cheap and some are still limited to 100Mbps and require a separate DC PSU to step up.

Another expensive remote option could be Cisco’s Catalyst Micro Switch series, which are small, managed layer 2 switches.

Luminex make switches especially for live sound and video with neutrik ethercon connectors and come pre-configured, however they only have AC powering options.

Netgear make their M4250 series switches specifically for Audio and Video and can come pre-configured for Dante. Again, AC power only…



No Gain, No Pain: Sonosax R4+ and AD8+ Gain Structure

Traditionally, when setting up input gain the engineer sets it so that a ‘healthy’ voltage is coming into the system. A certain level of headroom is maintained in order to allow for unexpected peaks.  24bit analogue to digital converters have allowed us more flexibility in leaving headroom before system noise could become a problem.

Here’s a more traditional input diagram from the previous generation SX-R4 recorder:

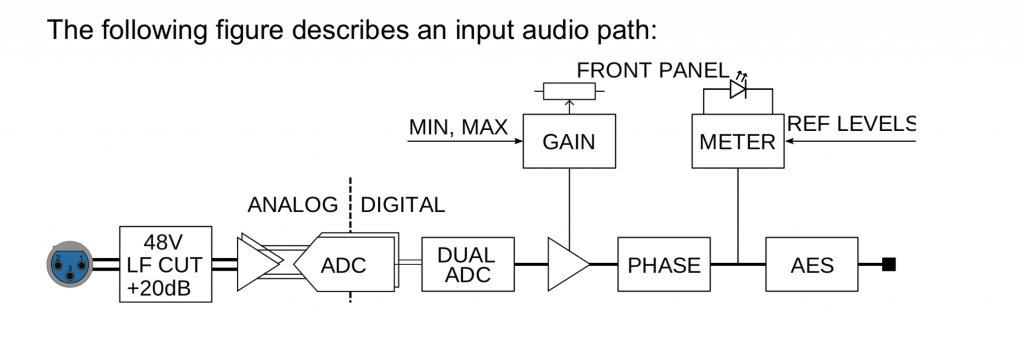
I’ve been using the latest generation of Sonosax preamplifiers for a while now. I’ve known that they can handle a huge dynamic range since using them but I’ve only just found this in the AD8+ manual:

The thing which is initially quite alarming is that the only gain before the analogue to digital converters (ADC) is a switchable +20dB.  Most professional equipment will have low cut filters, gain and analogue limiters before the ADC stage. If something overloads the ADC, it becomes digital garbage.

In this case, the paired ADCs can take a considerable amount of level- +21dBu (which is 24.6V) and +1dBu (2.46V) with the +20dB option enabled.  To put this into context, most amplifiers are designed to take +18dBu max at input.   So the only “real” gain setting is the +20dB option.  In the unlikely event that an even higher voltage is coming in, there are analogue pots on the line inputs of the SX-R4+ (the small 5 and 6 knobs on the front).

This means more information is coming into the ‘digital world’ earlier in the chain and there’s no limiter- everything is captured as it comes in. The gain on any of the knobs, rather than controlling an amplifier is effectively a multiply function.  Sometimes you’ll need to add gain just to hear a signal, however it now doesn’t really matter where it is added as long as the signal isn’t turned back into an analogue one,  it will have the same result in post production as it will from the machine directly.  Even if it’s sent over AES3, it’s the same 1s and 0s. Whether your post production facility want to work this way is another matter.

So, it should be possible to use an AD8+ as an analogue front end and get the same results without putting any gain on the inputs and adding ‘digital gain’ in another mixer or computer

Wisycom IR interface installation on windows 10

I’ve had a few people ask me about installing wisycom infra red interfaces, such as the UPKmini in order to do firmware updates.

Most are mac users- easiest way is to set up bootcamp and download an image of windows 10 from microsoft.  It’s up to you to get it licensed, but it’ll only shout at you a bit.  Loads of things on the internet will tell you how to do  this.

Next you need to install Wisycom Manager from the (fantastically named) wisycom.com (look under support/downloads/wireless microphones).

Run that- and there’s a picture of the UPK interfaces

If you press ‘help’ there are installation insrtuctions for earlier versions of windows.  Run the 32 or 64 bit driver depending on your OS, may as well install all the parts.

Now it gets a bit tricky: you need to ‘Disable Driver Signature Enforcement’.
Open the start menu and search for ‘Change Advanced Startup Options’

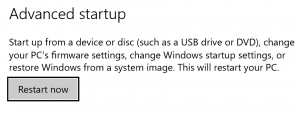
Hit the ‘Restart now’ button and put the kettle on.  It takes A Long Time

When it’s restarted, go to Troubleshoot/Advanced Options/Startup Settings.
and Restart again (this time it’s faster).

Now (and only now) you can ‘Disable Driver Signature Enforcement’.  It’s option 7.  Press it and windows will boot up again.

Now you’re back into windows, you can plug in your UPK thingy.  It’ll install it for a while, but you need to point the right drivers at it.

This can be a bit confusing compared to the windows 8 instructions- look for Device Manager and open it.

Now look under Ports (COM & LPT)

It’ll be the USB Serial Device (may be on a different COM port)
Now, right click and ‘Update Driver Software…’
Then ‘Browse my computer for driver software’

It’ll be wherever you installed it, but is likely to be in Program Files\Wisycom\Wisycom USB Drivers.  Include the subfolders.


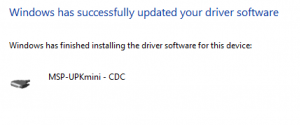
And…. finally it should install the driver:

Fire up the update utility in Wisycom manager, and remember to hit the ‘Connect’ button to talk to the UPK.  Lights should come on!


Macbook Pro USB-C powering from battery

After getting one of the new macbooks, which only had USB-C ports, I initially thought there was a real advantage running the power through this.  The cable’s replaceable and can plug into any USB-C source, potentially making the computer a lot more mobile.

I’m often in situations where I’m away from power sources all day, so being able to use the computer here is very useful.  When working off a cart I use a 12V LiFePO4 battery, so it would be really useful to be able to charge the laptop battery from this.

USB-C Power Delivery

The USB-C power delivery format is actually rather clever.  If the device on the other end is happy, it can up the voltage from 5V in steps up to 20V.  This allows more power to flow along the (usually pretty thin) cable without it getting hot and even melting, as it would by just increasing the current.

However, it seems to be that a number of manufacturers are getting this a bit wrong, and potentially putting out unsafe devices which could blow up your computer or other things attached.   One of the engineers from google has been testing USB-C cables and peripherals to see if they’re up to spec, and a lot of them aren’t.

USB-C Car adapters

It’s pretty easy to do standard USB power from a 12V battery- car USB adaptors are a cheap and easy answer, you just need to attach an XLR4 connector (or whatever you’re using for power distribution), so thought it’d be the case for USB-C.

After doing a bit of research, I only really came up with one adapter which seemed to be able to deliver a reasonable amount of power (45W).  However, that’s still not as much as the laptop can use going full tilt.  This is the Targus APD39EU.  DC input spec is 11-16V so some NP1 type setups may deliver a bit more than 16V.  I expect it’s fine but they may not pay for a replacement if you blow it up.  It’s also quite a lot more expensive than most of the other USB adapters at around £60 (although I managed to snag a reduced one with damaged packaging).

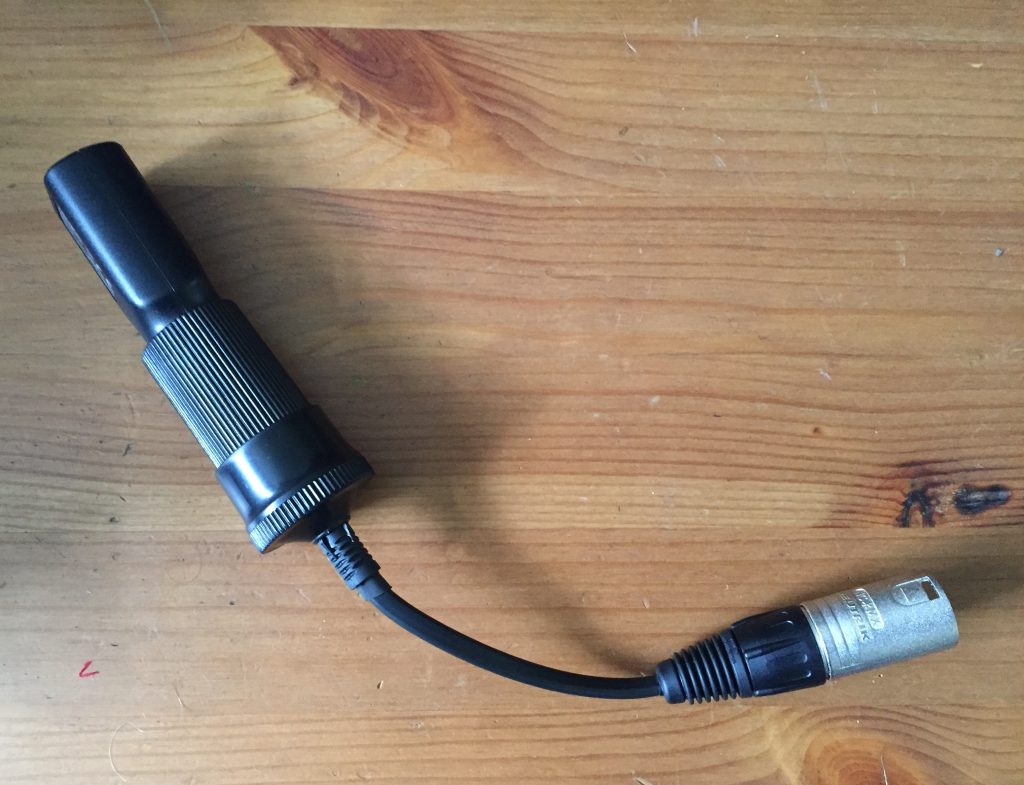
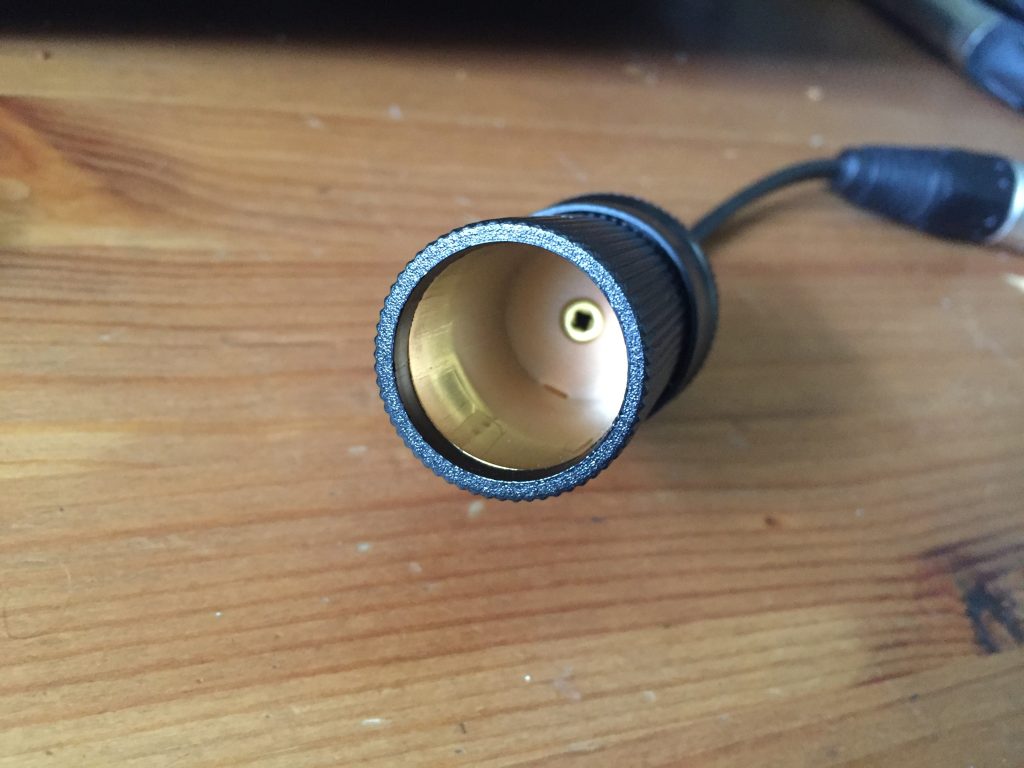
Due to the fact it’s quite an expensive adapter, and a fair bit longer than some other USB adapters, instead of directly attaching an XLR4 I made up a lead from XLR4 to automotive 12V socket.

12 Adapter and cable12V automotive socket on cable

So far the laptop charges off it and nothing has exploded yet…

Timecode and Sync Workflow Flowchart


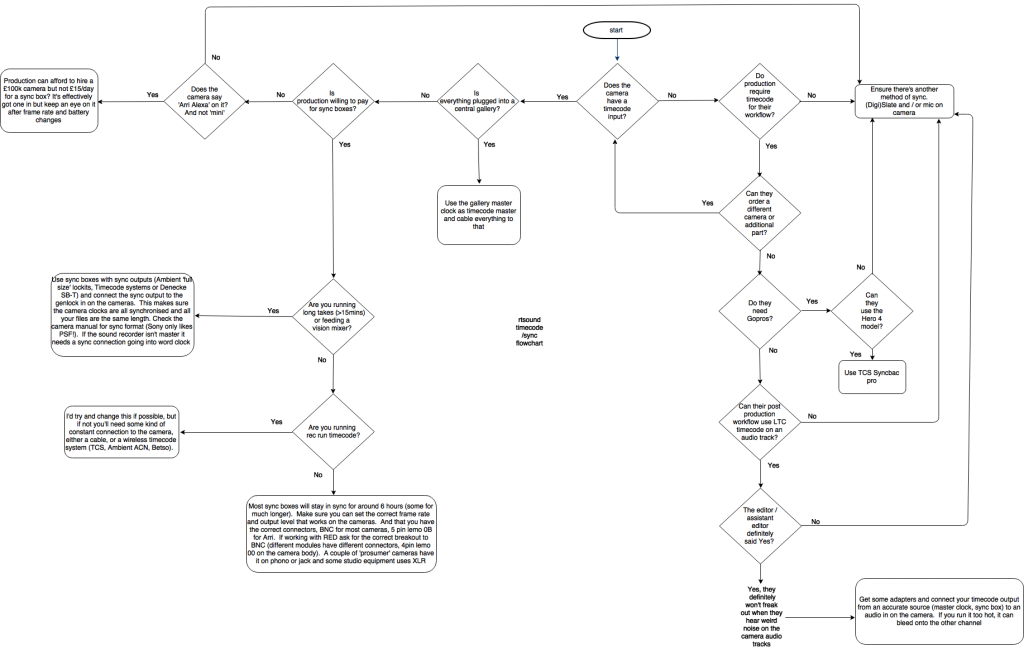
Here’s a flowchart of what I do when asked about timecode workflows and keeping things in sync.  It should be useful to other departments too, when specifying kit.

Note that it is not always possible to run a timecode based workflow.  This is especially the case with consumer equipment.  In this case, the best solution is to use a synched digislate.  Here there is a visual record of the timecode in the image which can be entered manually in the edit.

Other solutions are a good old clap in front of the camera(s).  Editing software also has built in algorithms for matching audio waveforms.  They’re not always reliable and won’t work if the audio on camera has no relation to the master audio recorded

Click on the image below and hopefully you’ll be able to read it (it may require some zooming/scrolling on lower resolution screens or mobile devices):


Professional Field Recorder comparison

There’s been radio mic comparison table up on this site for years now, and I had the bright idea of doing one for recorders, partly as a lot of people don’t really know what’s out there (and some assume it’s just Sound Devices).  I’ve only included those with features suitable for professional use in the field – timecode, metadata input, DC power, reasonably sturdy build and those that are current products. I have missed off the Sound Devices 702T and 744T as they have relatively low track counts compared to most of the other machines.

Also, there isn’t any info on ergonomics or sound quality as they’re both subjective.  The only machine it’s not possible to mix on (but you can route) is the Sound Devices 970- which is really designed to have a mixer in front of it, in some ways that is a bit of a different beast and is the only one which can accept a MADI feed.  Please let me know if I’ve made any mistakes or omissions, this is mostly from published specs:

Edit:  Added Aaton Cantar Mini specs.  I’ve also missed off the Sound devices 664 as it’s similar in specification to the 688

2019 Update- added Sound Devices 666 (or ‘Scorpio’, as they insist on calling it) and Zaxcom Nova

  Mic/line inputs Line inputs AES3 inputs AES42 inputs (pairs) Max Inputs to tracks Rec Tracks available (192kHz) Rec Media
Aaton Cantar X3 8 4 8 2 24     24 (24) SSD, 2xSD, USB
Aaton Cantar Mini 4 2 4 2 10     16 (16) SSD, 2xSD, USB
AETA 4minx 4 6***** 2 2 8     8 (8 at 96kHz) SD
Nagra VI 4 2 4 0 8      8 (8) HDD, CF, USB
Roland R-88 8 0 2 0 10      10 (4) SD, USB
Sound Devices 633 3 3 2 1 6      10 (6) SD, CF
Sound Devices 688 6 6 4 2 12      16 (6) SD, CF
Sound Devices 788T 8 0 8 4 8      12 (4) SSD, CF, Firewire
Sound Devices 970 0 8 8 0 64      64 (32 at 96kHz) 2xSSD/CF, 2x eSATA
Sound Devices 666
(or Scorpio)
 16  4  32 36 (18)   SSD, 2xSD
Sonosax SX-R4+ 4 2       10* 4 16      16 (16) 2xSD
Tascam HS-P82 8 0 8 0 8      10 (4) 2xCF
Zaxcom Deva 24 12 4 24 8 24      24 (24 at 96kHz) SSD, 2xCF
Zaxcom Maxx 4 2      0/4***       0/1*** 8      8 (4) CF
Zaxcom Nomad 6 4       0/8***       0/1*** 10      10/12*** (10/12 at 96kHz) 2xCF, USB
Zaxcom Nova  4  2  4  10  12 2xCF 
Zoom F4 4/6**** 2 (unbalanced) 0 0 6      8 (8) 2xSD
Zoom F8 8 0 0 0 8      10 (8) 2xSD


  Balanced Outputs Unbalanced Outputs AES3 Outputs Output buses Multichannel Options Control surface Extras
Aaton Cantar X3 8 0 12 40      Dante 32×32 Cantarem 2
Cantaress
Monitor output, waveform display, play/rec, wifi, bluetooth
Aaton Cantar Mini 8 0 4 12       Cantarem 2 Monitor output, waveform display, play/rec, wifi, bluetooth
AETA 4minx 4 6***** 6 4   MIDI Soundfield monitoring
Nagra VI 2 0 2 4   MIDI  
Roland R-88 8 2 2        8 (direct)      USB interface 10×8 MIDI  
Sound Devices 633 4 2 4 6   CL-12 Wingman Remote
Sound Devices 688 8 2 8 8   CL-6, CL-12 Mix Assist, Dugan, Wingman remote, SL6
Sound Devices 788T 6 2 6 6   CL-8, CL-9 Mix Assist, CL-Wifi, GPIO
Sound Devices 970 8 0 8 64       Dante/MADI 64×64   RS422/GPIO/Network remote
Sound Devices 666
(or Scorpio) 
10  10  Dante 32×32  MIDI (MCU)  Android app 
Sonosax SX-R4+          0/2**                  2/6**     2/6**         4/8**      TBC network audio RC8+ wifi web interface
Tascam HS-P82 2                        0 8      10 (direct)   RC-F82  
Zaxcom Deva 24 10 0 12      10 (12 direct)   Mix-16, Oasis Nomad Touch, MixAhead
Zaxcom Maxx 4 2 0/4*** 4     Zaxcom digital tx option, Automix
Zaxcom Nomad 10 2 0/6*** 6   FC8, Oasis, Mix8 Zaxnet, Nomad Touch, Automix
Zaxcom Nova 8  0  6   Oasis  2x receiver slots for QRX212 
Zoom F4 2 2 0 4      USB interface 6×4 FRC-8  
Zoom F8 2 2 0 4      USB interface 8×4 FRC-8 Bluetooth remote app 


  Battery / power connection Dimensions (mm) Weight (kg) Notes      
Aaton Cantar X3 2x eSmart 2054, XLR4 90x320x240 3.55        
Aaton Cantar Mini 2x eSmart 2054, XLR4 90x259x234 2.3        
AETA 4minx Sony DV, HR10 75x260x195 1.9 ***** EXT I/O connector shared       
Nagra VI Nagra, XLR4 74x310x285 3.8 (weight with battery)      
Roland R-88 AA, XLR4 93x260x235 2.67        
Sound Devices 633 AA, DV, HR10 60x240x160 1.1        
Sound Devices 688 AA, HR10, NP1 (in SL6) 53x320x198 2.21        
Sound Devices 788T DV, HR10 45x257x153 1.7        
Sound Devices 970 2x XLR4 84x218x262 3.4        
Sound Devices 666
(or Scorpio) 
DV, 2x TA4 51x320x205 2.63      
Sonosax SX-R4+ eSmart 2054, HR10 50x200x144.5 0.91 *2 shared with aes out, **2nd figure with xlr5 output board      
Tascam HS-P82 NP1, AA, XLR4 100x270x260 3.65        
Zaxcom Deva 24 2x HR10 76.2x267x177.8 2.45       
Zaxcom Maxx AA, HR10 51x191x133 1.13 ***option variants      
Zaxcom Nomad AA, HR10 51x251x178 1.72 (weight with batteries)      
Zaxcom Nova 2x HR10 51x210x152 1.16 / 1.56***** ***** weight with 2x QRX212 modules     
Zoom F4 AA, HR10 54x178x141 1.03 ****line level only on jack, additional input option APH6XLR      
Zoom F8 AA, HR10 54x178x141 0.96      

Kaoss Pad KP3 DC powering

Just as a note as it doesn’t seem to be anywhere else on the internet (and was quite tricky to find out): the power connector for the Korg Kaoss Pad 3 is JEITA RC-5320A JSBP4 standard:

Outer diameter is 5.5mm
Inner diameter is 3.3mm
Centre diameter pin is 1mm

Plug I used was a Lumberg 1636 04

It’s also nowhere as greedy as the PSU is specified, it’ll boot up with as little as 9V 100mA

This may also be applicable to other Kaoss Pads and other Korg products.

And using alien power supplies may invalidate your warranty etc etc

Wisycom MCR42 v3.x firmware

I’m doing this post as I’ve realised quite a few people with wisycom haven’t updated their firmware and there’s a quite a few nice features they’ve added since v3 on the MCR42.  The new UPK mini programmer is also available, which is considerably cheaper than the older UPK300, which allows much faster changing of frequencies, locking, unlocking and hiding of frequencies and allows you to update firmware.  NB: if using windows 8, the installation process is a bit convoluted- there’s a help file in the wisycom manager 0.8 program.  And you need to press the connect button for it to see the UPK.

First up, if you’re used to using the MCR42, it initially appears that you’ve got an extra menu layer to navigate, the ‘Edit RX1’ and ‘Edit RX2’ are no longer at the base of the menu tree.  However, you can see and access the settings  through the new ‘quick access’ screens.  The only thing I’ve found I regularly use which isn’t in the quick access menus is the power on/off for individual transmitters.

These are accessed by pressing the ‘sync’ and ‘scan’ buttons which allow you to scroll through these new screens.  Hit ‘sync’ and you get to the RX1 frequency screen:

Pressing select allows you to alter any of the frequency settings, scrolling between channel, and group.  There’s an option to display by the channel name (in fast channel select in the advanced menu), but the frequencies aren’t displayed   There’s another similar screen for RX2.  Next is the RF screen:

This shows your RF strength from each receiver, with a bar for each antenna.  Hitting Menu/Select brings up an RF settings menu, where you can alter squelch settings.  Squelch is the threshold at which the receiver will cut out any incoming RF, this is to ensure when a transmitter goes out of range, you don’t get a burst of static coming through.  There’s a new ‘Auto Squelch’ feature, which runs a scan and sets squelch threshold based on the RF in your environment at the frequencies your receiver is set to.

To run a more general RF scan, hold the ‘scan’ button when in the main screen and choose a receiver and group to scan.  Use the ‘Center’ group (00 as default) of frequencies to run a broadband scan and the regular block of freqs you’d use for more detail over a smaller area. There’s also an ‘intergap’ group, which I think is the frequencies at the start and end of groups. It pulls up a graph in order of ‘best’ to ‘worst’ freqs, if you want to see it in frequency order, press sync and scan at the same time.  If you’re using a user frequency block, I’d advise hiding all the slots you’re not using, so it doesn’t scan your lowest frequency on the RX loads of times.

Finally there’s the Audio screen- this is easiest to access by pressing ‘scan’ once from the main screen (you can also scroll through the other quick menus first with ‘sync’):

This shows your expander settings, audio output level (I generally keep them on +12dBu, this is the level that the DAC outputs the signal, anything else is attenuated) and has big modulometers for each receiver.  Although the increments aren’t marked, I’d guess they’re all 6dB (as the bottom is -42dB and top is 0dB and there’s 7 markers).  It’s so much easier checking levels now.

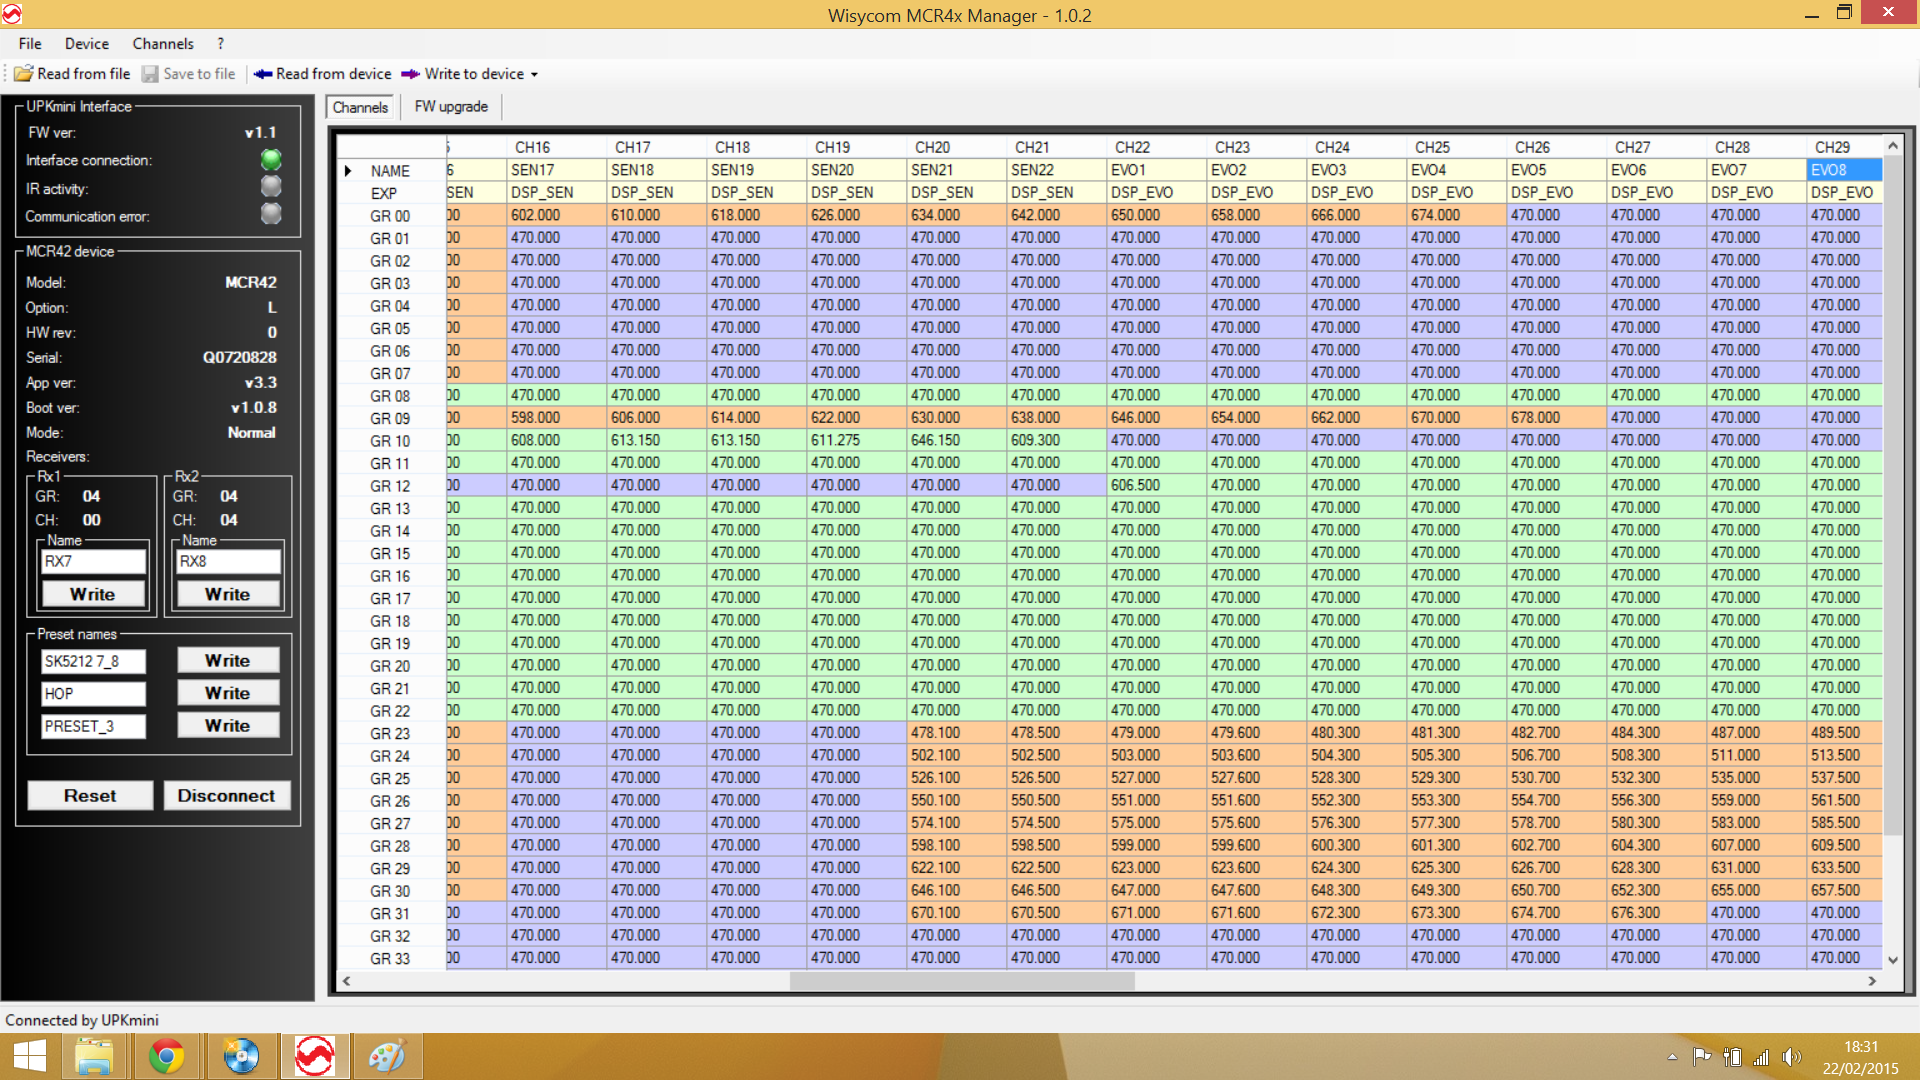
Finally, the preset feature- it’s in the main menu, second item down (under infrared).  There’s 3 presets (you can rename them using the infrared programmer and software), if you hit ‘save’ and select a preset- it’ll save the current settings and return them when you restore that preset again.  This receiver has presets for camera hop frequencies and talent mics 7 and 8, for example and I can now change between the two easily.  It’s also possible to put different expander settings on different presets.  Expander settings can be tied to channel numbers in the MCR4x manager program:
wisy_prog2

Here I’ve set channels 22-34 to have the sennheiser evolution expander, and programmed group 12 to have the Channel 38 preset frequencies for this system.  There are loads of channels per group, so you can do this.  This does, however work across groups- so try and keep certain channels for certain transmitters only.  You can hide the frequencies before the first one you’re using (and you can select multiple blocks using shift/ctrl+click for locking and hiding, whcih saves time).  Presets can also be used in the wisycom transmitters, specifying input levels, frequencies and compander settings.  There are also updated ENC and ENR 1.2 companders, introduced in v3.3 firmware.  These have a 1.2:1 compressor on the output for use with DSLRs and other noisier consumer inputs- no difference to the TX.

What gear should I get?

Loads of people (mainly if they’re new), ask this question, and the answers are unfortunately more questions:

What do you want to do?
How often are you going to use it?
How will it work with other gear?

It’s quite easy to get sucked into the idea of buying things (ooh, nice shiny lovely things) but a lot of the time, unless you’re using whatever it is on a frequent basis, you’re probably going to lose money on it.

Have a look at a local rental company (for example, in London there’s Richmond Film Services, The Audio Dept and Better Sound to name a few) and see how much it costs to hire whatever you need.  Also it often costs only slightly more to hire professional level gear (Audio Ltd, Sound Devices etc), over consumer gear (zoom, sennheiser evolution) while the professional level gear will be more robust, sound better and be able to interface with other professional gear more easily.

Also look at the features in gear that work for you personally and get the gear that works best for the way you find you work more often.  There’s a few things that can catch you out around returns/routing on certain mixers which you sometimes expect to be there and sometimes aren’t (like where the return signal can be routed, is there a ‘bus in’?)

Also, always factor in the cost of cables when you buy something, you often need quite a few new ones with obscure connectors on


Timecode / Logging networks (ACN and TCB)

Something which seems to have been gradually appearing is how all the data about what we’re shooting is now able to be logged and centralised much more easily. You can now run a computer network on set where script supervisor, camera and sound’s notes can be compiled together and matched to all the individual files.

Two different systems have started to emerge (very recently), Ambient’s Clockit Network (ACN) and Timecode Buddy (TCB) and related products. There’s also the Cameron-Pace metastrobe system, but I haven’t seen any documentation on it (and imagine it’s very expensive to hire).
ACN has been in development for some time and started appearing on Ambient’s newest series of lockit boxes (ACL204). They’ve had this video up since it began:
http://player.vimeo.com/video/42540614

Ambient have also teamed up with a company called Easyscott to deal with their logging and metadata distribution. It seems to be a powerful system, although it requires having a server on set which someone’s got to look after (they suggest the 2nd AC). Logging currently works on iOS devices but they’re planning compatibility with other tablets in future. The server’s also able to deal process a video feed, so playback can be done over the network, rather than the camera, which may save some time on set.

Something else Ambient have been talking about with ACN is actually being able to read/write metadata directly off machines via RS232/RS422. They had a demo of this working with a 3D camera rig at last year’s IBC (http://youtu.be/YNNUnBpo_NI?t=4m17s), where metadata was updated on a tablet but I’m yet to see it implemented in any audio recorders. I’d expect the manufacturers who have implemented ambient TC units in their products to be those working with this, however not all have an RS232/RS422 port on them (Sound Devices 7 series do, though). Ambient have also just announced new slate/TC display which works on ACN.

Timecode Buddy are the new kids on the block as far as timecode systems are concerned, their system works in a similar way to ACN (where timecode data is transmitted over wifi), but they also have a UHF range transmitter for transmitting TC between units.

They’ve teamed up with MovieSlate, who make a slate and logging app, which has developed into quite a powerful logging tool which will talk to TCB and receive timecode. I use it for sound reports, but with all the multicam plugins etc multiple iOS devices can share info across the network and receive matched timecode. Buying the app does add up though- it’s £17.50 for the app (on each device), but then another £35 each for the timecode, multicam and sound dept add-ons (making £122.50 per device). I don’t think there are any plans on moving movieslate to any other platforms and TCB have said they can only get the devices to display accurate timecode on devices where they know the hardware delays etc, so if making something for android they’d have to know every model of phone/tablet that would be compatible.

Denecke have also got onboard and are developing a slate which will receive TCB network information: http://www.youtube.com/watch?v=tl8jf_8gIOg

Finally, Movieslate are also working on adding a video feed from a Teredek Cube to the logging screen- so a live picture (or pictures) can be seen from the iOS device.  TCB are also working with Adobe in order to add timecode to their prelude live logger.
http://vimeopro.com/ipstv/ipstv-at-ibc-2013/video/74495522

Both systems look very capable, ACN/EasyScott looks like it’ll be able to do a bit more in future- but involves a more complex setup, while TCB/MovieSlate seems to be a bit more portable, as you don’t need to move a server around with you (and find power for it).

Time will tell whether one will be VHS and the other Betamax…
Zaxcom’s zaxnet system already sends audio and timecode around set, maybe metadata will be added to this?