I’m doing this post as I’ve realised quite a few people with wisycom haven’t updated their firmware and there’s a quite a few nice features they’ve added since v3 on the MCR42. The new UPK mini programmer is also available, which is considerably cheaper than the older UPK300, which allows much faster changing of frequencies, locking, unlocking and hiding of frequencies and allows you to update firmware. NB: if using windows 8, the installation process is a bit convoluted- there’s a help file in the wisycom manager 0.8 program. And you need to press the connect button for it to see the UPK.
First up, if you’re used to using the MCR42, it initially appears that you’ve got an extra menu layer to navigate, the ‘Edit RX1’ and ‘Edit RX2’ are no longer at the base of the menu tree. However, you can see and access the settings through the new ‘quick access’ screens. The only thing I’ve found I regularly use which isn’t in the quick access menus is the power on/off for individual transmitters.
These are accessed by pressing the ‘sync’ and ‘scan’ buttons which allow you to scroll through these new screens. Hit ‘sync’ and you get to the RX1 frequency screen:
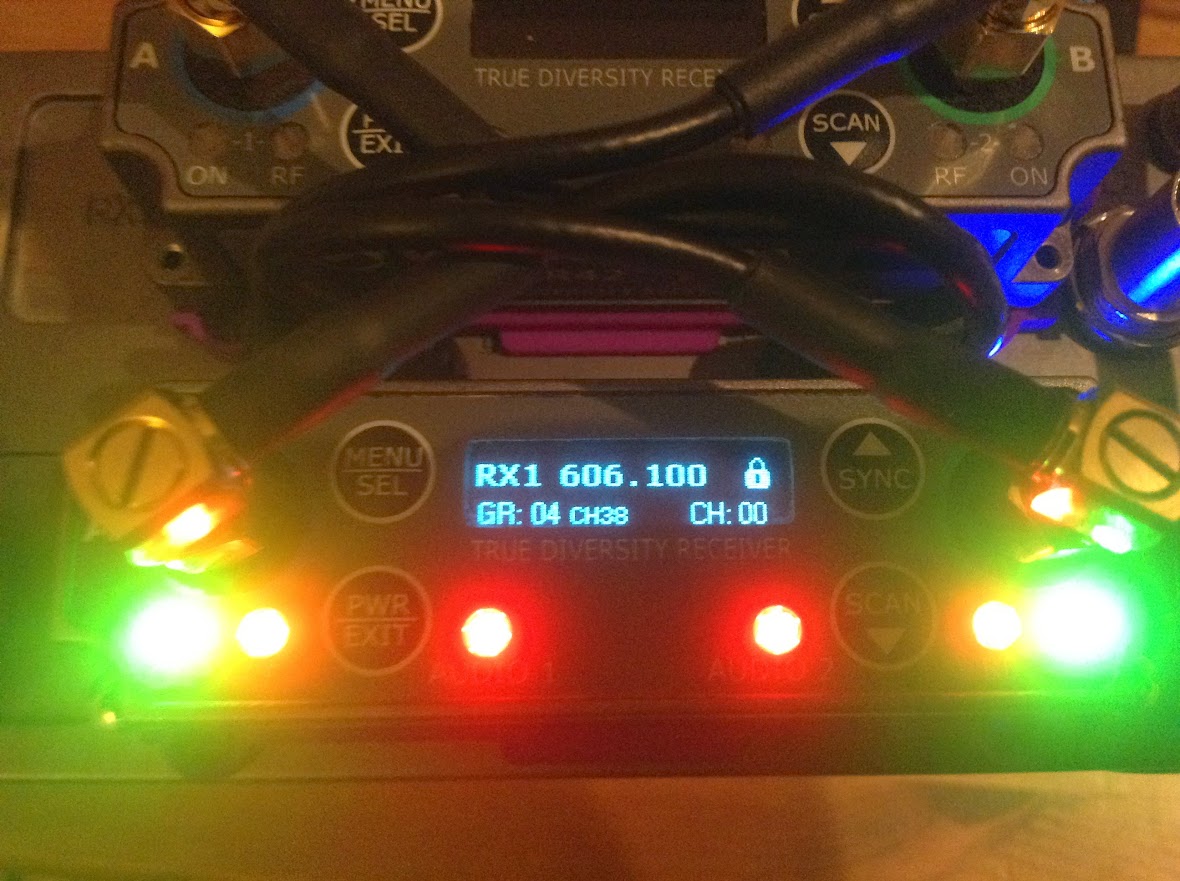
Pressing select allows you to alter any of the frequency settings, scrolling between channel, and group. There’s an option to display by the channel name (in fast channel select in the advanced menu), but the frequencies aren’t displayed There’s another similar screen for RX2. Next is the RF screen:
This shows your RF strength from each receiver, with a bar for each antenna. Hitting Menu/Select brings up an RF settings menu, where you can alter squelch settings. Squelch is the threshold at which the receiver will cut out any incoming RF, this is to ensure when a transmitter goes out of range, you don’t get a burst of static coming through. There’s a new ‘Auto Squelch’ feature, which runs a scan and sets squelch threshold based on the RF in your environment at the frequencies your receiver is set to.
To run a more general RF scan, hold the ‘scan’ button when in the main screen and choose a receiver and group to scan. Use the ‘Center’ group (00 as default) of frequencies to run a broadband scan and the regular block of freqs you’d use for more detail over a smaller area. There’s also an ‘intergap’ group, which I think is the frequencies at the start and end of groups. It pulls up a graph in order of ‘best’ to ‘worst’ freqs, if you want to see it in frequency order, press sync and scan at the same time. If you’re using a user frequency block, I’d advise hiding all the slots you’re not using, so it doesn’t scan your lowest frequency on the RX loads of times.
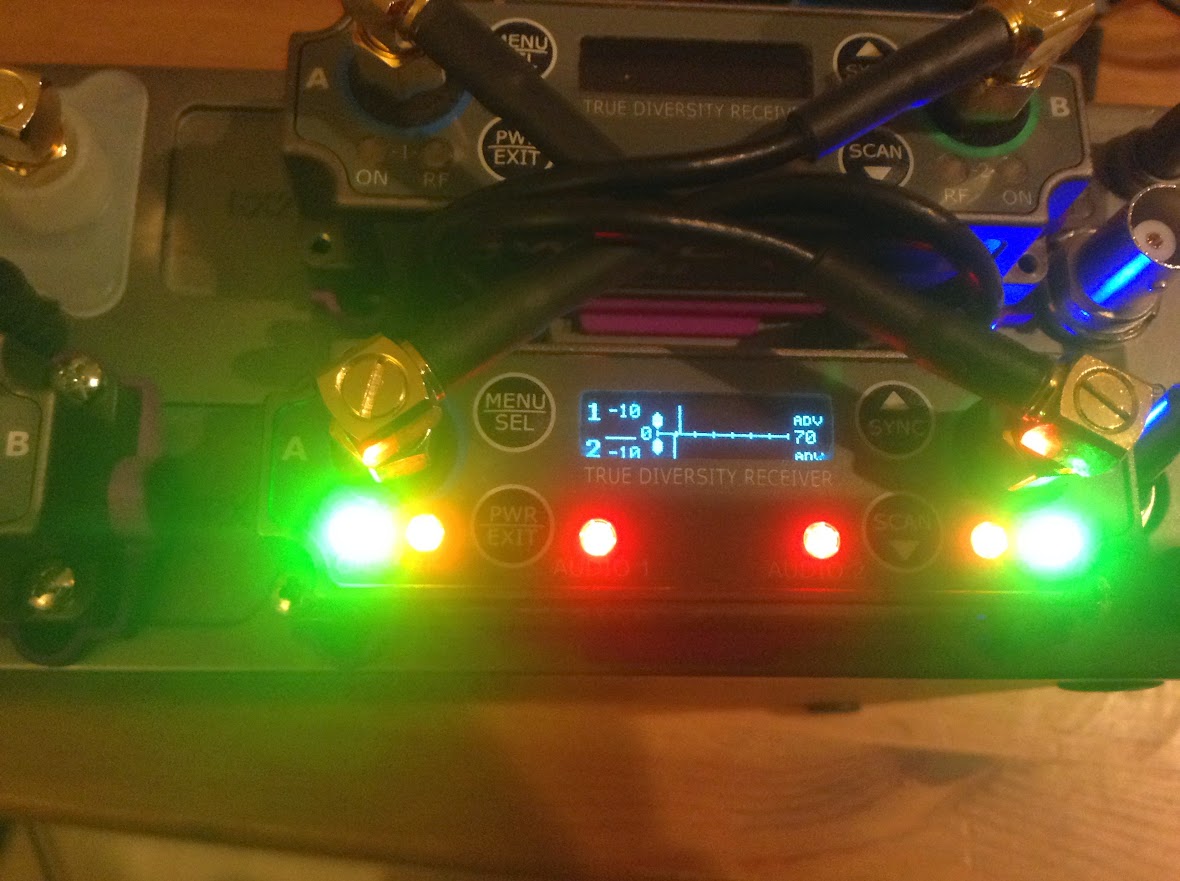
Finally there’s the Audio screen- this is easiest to access by pressing ‘scan’ once from the main screen (you can also scroll through the other quick menus first with ‘sync’):
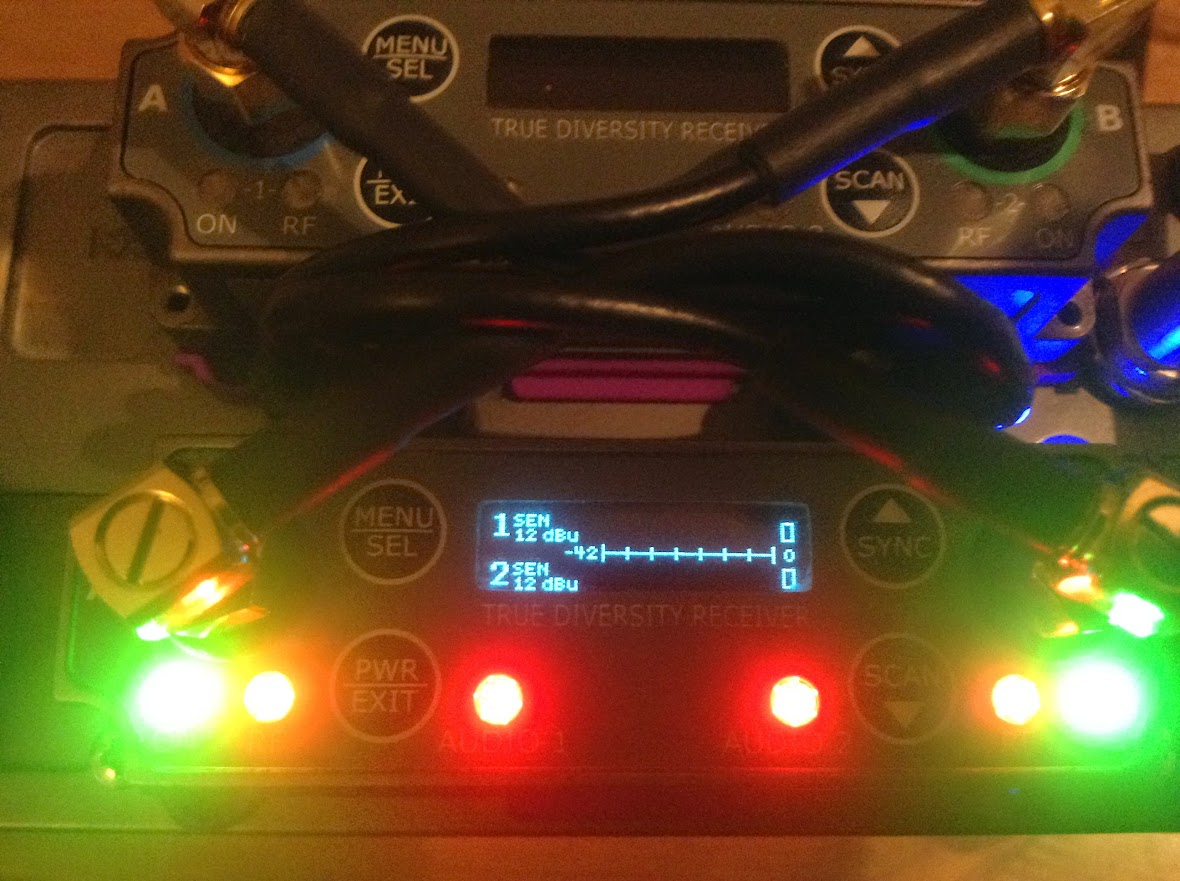
This shows your expander settings, audio output level (I generally keep them on +12dBu, this is the level that the DAC outputs the signal, anything else is attenuated) and has big modulometers for each receiver. Although the increments aren’t marked, I’d guess they’re all 6dB (as the bottom is -42dB and top is 0dB and there’s 7 markers). It’s so much easier checking levels now.
Finally, the preset feature- it’s in the main menu, second item down (under infrared). There’s 3 presets (you can rename them using the infrared programmer and software), if you hit ‘save’ and select a preset- it’ll save the current settings and return them when you restore that preset again. This receiver has presets for camera hop frequencies and talent mics 7 and 8, for example and I can now change between the two easily. It’s also possible to put different expander settings on different presets. Expander settings can be tied to channel numbers in the MCR4x manager program:
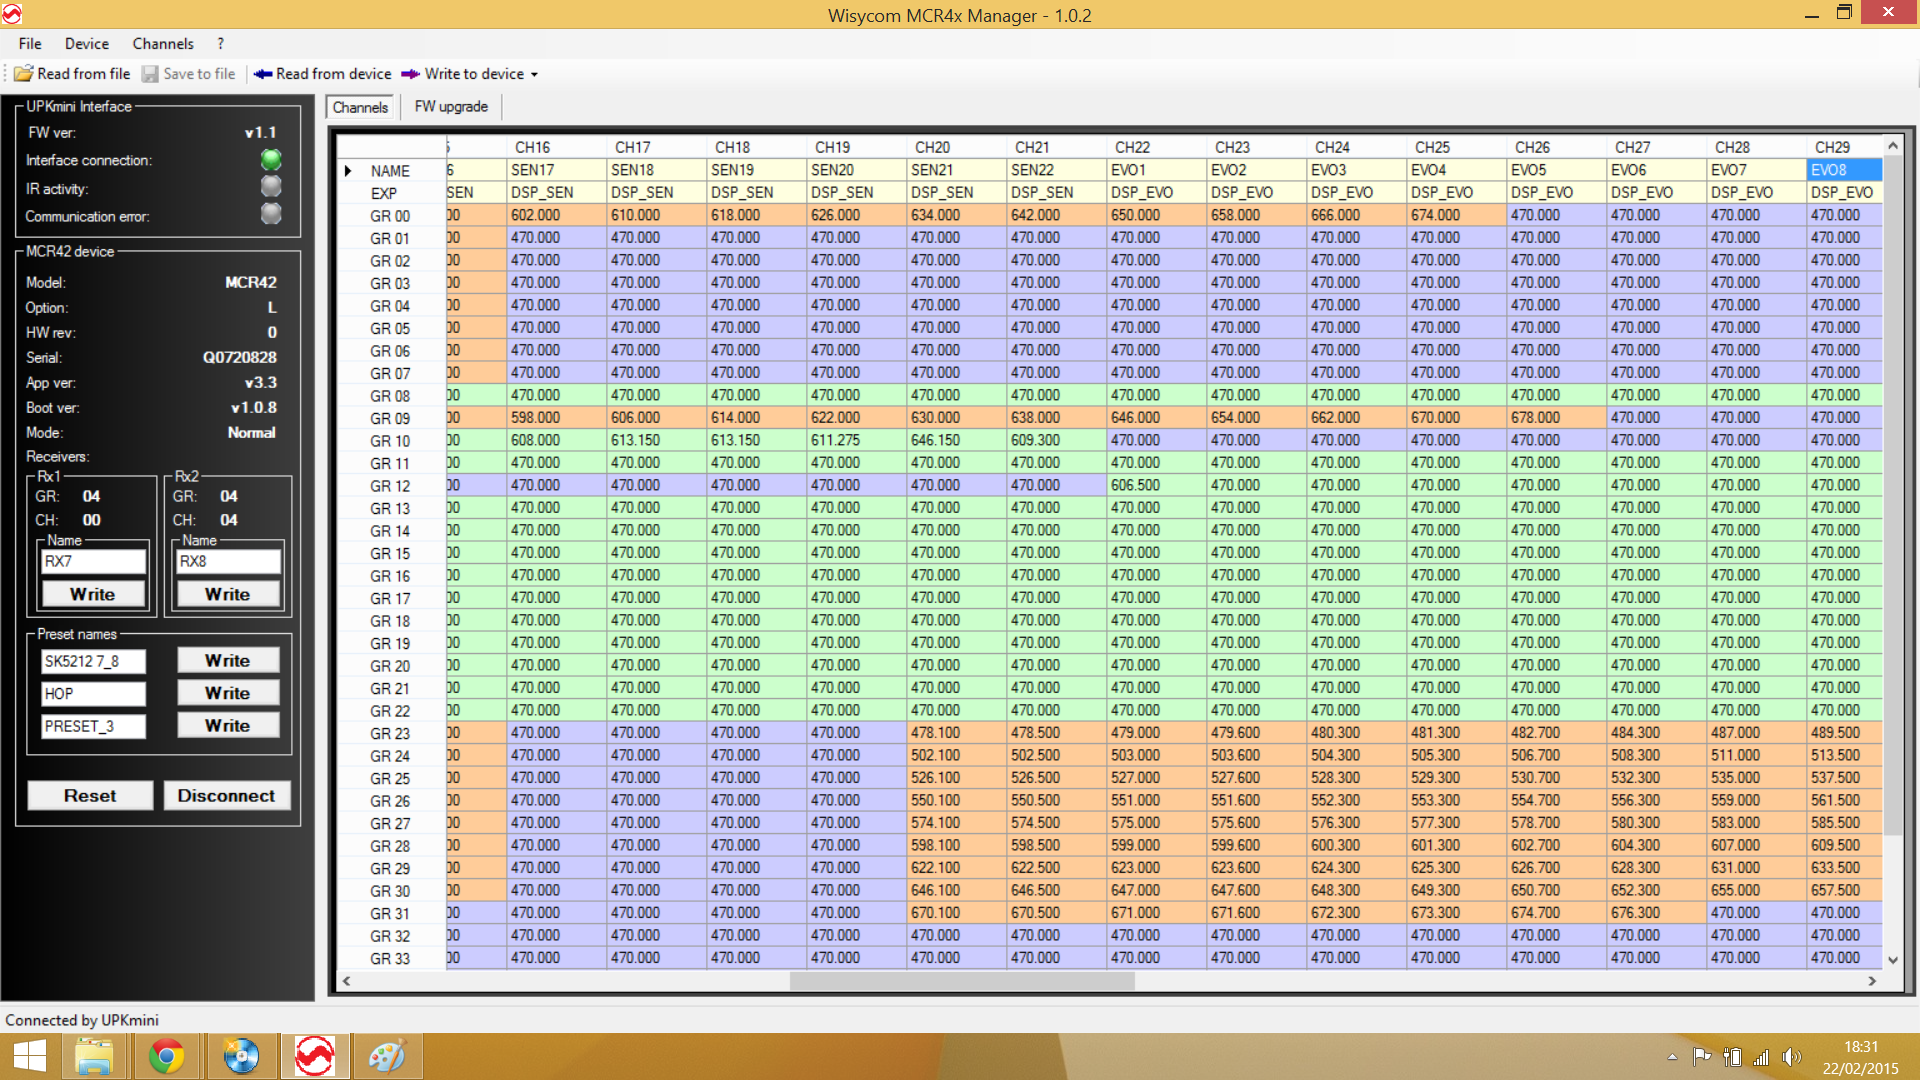
Here I’ve set channels 22-34 to have the sennheiser evolution expander, and programmed group 12 to have the Channel 38 preset frequencies for this system. There are loads of channels per group, so you can do this. This does, however work across groups- so try and keep certain channels for certain transmitters only. You can hide the frequencies before the first one you’re using (and you can select multiple blocks using shift/ctrl+click for locking and hiding, whcih saves time). Presets can also be used in the wisycom transmitters, specifying input levels, frequencies and compander settings. There are also updated ENC and ENR 1.2 companders, introduced in v3.3 firmware. These have a 1.2:1 compressor on the output for use with DSLRs and other noisier consumer inputs- no difference to the TX.